Difference between revisions of "X-Cart:UPS Developer Kit"
(Created page with '== What UPS OnLine® Tools module does == The module <u>UPS OnLine® Tools</u> enables UPS real-time shipping rate calculation at your store. == Roles in UPS OnLine® Tools mod…') |
|||
| Line 8: | Line 8: | ||
* You can enable/disable <u>UPS OnLine® Tools</u> module, perform <u>UPS OnLine® Tools </u>registration and configure the module settings | * You can enable/disable <u>UPS OnLine® Tools</u> module, perform <u>UPS OnLine® Tools </u>registration and configure the module settings | ||
| + | |||
| + | ==Enabling and Configuring 'UPS Online® Tools'== | ||
To begin using the module: | To begin using the module: | ||
| Line 27: | Line 29: | ||
: [[Image:ups0.gif|546px]] | : [[Image:ups0.gif|546px]] | ||
| − | |||
* Click the '''Register''' button. UPS Online® Tools Licensing & Registration Wizard will be launched to guide you through the registration process. | * Click the '''Register''' button. UPS Online® Tools Licensing & Registration Wizard will be launched to guide you through the registration process. | ||
: [[Image:ups2.gif|546px]] | : [[Image:ups2.gif|546px]] | ||
| − | |||
* Complete the registration: | * Complete the registration: | ||
| Line 41: | Line 41: | ||
: [[Image:ups3.gif|546px]] | : [[Image:ups3.gif|546px]] | ||
| − | |||
: If you agree to be bound by the terms and conditions of this Agreement, select '<u>Yes, I Do Agree</u>' and click on '''Next'''. If you do not agree to accept the terms and conditions of the Agreement, select '<u>No, I Do Not Agree</u>' and click on '''Next '''(In this case you will exit the registration process). | : If you agree to be bound by the terms and conditions of this Agreement, select '<u>Yes, I Do Agree</u>' and click on '''Next'''. If you do not agree to accept the terms and conditions of the Agreement, select '<u>No, I Do Not Agree</u>' and click on '''Next '''(In this case you will exit the registration process). | ||
| Line 48: | Line 47: | ||
: [[Image:ups4.gif|546px]] | : [[Image:ups4.gif|546px]] | ||
| − | |||
: Make sure you have completed all the fields and entered your valid email address before you click the '''Next''' button. | : Make sure you have completed all the fields and entered your valid email address before you click the '''Next''' button. | ||
| Line 55: | Line 53: | ||
: [[Image:ups5.gif|546px]] | : [[Image:ups5.gif|546px]] | ||
| − | |||
: Click the '''Finish''' button to return to '<u>UPS Online® Tools - Main page</u>'. | : Click the '''Finish''' button to return to '<u>UPS Online® Tools - Main page</u>'. | ||
| Line 65: | Line 62: | ||
: [[Image:ups1.gif|546px]] | : [[Image:ups1.gif|546px]] | ||
| − | |||
: Click this button. A dialog box titled '<u>UPS Online® Tools Rates & Service Selection</u>' opens. | : Click this button. A dialog box titled '<u>UPS Online® Tools Rates & Service Selection</u>' opens. | ||
: [[Image:ups6.gif|546px]] | : [[Image:ups6.gif|546px]] | ||
| − | |||
* Complete the fields in the '<u>Rates & Service Selection OnLine Tool</u>' and '<u>Address Validation OnLine Tool</u>' subsections of the '<u>UPS Online® Tools Rates & Service Selection</u>' dialog box. | * Complete the fields in the '<u>Rates & Service Selection OnLine Tool</u>' and '<u>Address Validation OnLine Tool</u>' subsections of the '<u>UPS Online® Tools Rates & Service Selection</u>' dialog box. | ||
| Line 76: | Line 71: | ||
{{Note1|Note: The button Test can be used to test the Rates & Service Selection and Address Validation Tools.}} | {{Note1|Note: The button Test can be used to test the Rates & Service Selection and Address Validation Tools.}} | ||
| + | |||
| + | |||
| + | ==Setting up International Shipping== | ||
| + | |||
| + | Some of the international shipping services offered by UPS may depend on other UPS services. If you are planning to use such shipping methods in your store, it is important to resolve these dependencies first. Otherwise X-Cart will not be able to estimate UPS shipping charges in the real-time mode. | ||
| + | |||
| + | To resolve the dependencies, you need to activate the generic UPS services along with the shipping methods that you are planning to use. For example, UPS Express Saver (SM) depends on UPS Saver. Therefore, to get shipping charges for UPS Express Saver (SM) estimated you need to activate both UPS Express Saver (SM) and UPS Saver. | ||
| + | |||
| + | '''To activate UPS shipping services:''' | ||
| + | |||
| + | # Log in to the Admin area. | ||
| + | # Go to the <u>Shipping methods</u> section (<u>Management</u> menu -> <u>Shipping methods</u>). | ||
| + | # In the <u>'Shipping methods'</u> box, click on the UPS link to expand the list of available shipping methods. | ||
| + | # Select the check boxes for the methods you want to activate. | ||
| + | # Click the '''Update''' button. | ||
| + | |||
| + | '''Important!''' | ||
| + | |||
| + | Activate "UPS Saver" shipping method if you are going to offer the following methods for your customers: | ||
| + | |||
| + | * UPS Express Saver (SM) | ||
| + | * UPS Worldwide Saver (SM) | ||
| + | * UPS Worldwide Express Saver (SM) | ||
| + | |||
| + | Otherwise these methods will not be available for customers. | ||
| + | |||
| + | Activate "UPS Standard" shipping method to be able to offer the "UPS Standard to Canada" shipping method to customers. | ||
[[Category:X-Cart user manual]] | [[Category:X-Cart user manual]] | ||
[[Category:X-Cart modules]] | [[Category:X-Cart modules]] | ||
Revision as of 16:48, 30 January 2010
Contents
What UPS OnLine® Tools module does
The module UPS OnLine® Tools enables UPS real-time shipping rate calculation at your store.
Roles in UPS OnLine® Tools module management
If you are an X-Cart GOLD administrator/provider or an X-Cart PRO administrator:
- You can enable/disable UPS OnLine® Tools module, perform UPS OnLine® Tools registration and configure the module settings
Enabling and Configuring 'UPS Online® Tools'
To begin using the module:
1. Make sure your store meets the system requirements for installing and using UPS OnLine® Tools module. The following components are required:
- EXPAT extension for php;
- HTTPS module like Net:SLeay, libCURL, CURL, Open SSL or HTTPS-cli.
2. Enable UPS OnLine® Tools module (Administration menu->Modules).
- When the module is enabled, a link 'UPS OnLine® Tools' appears in the Settings menu of the Admin area of your store.
3. Register your UPS OnLine® Tools with UPS:
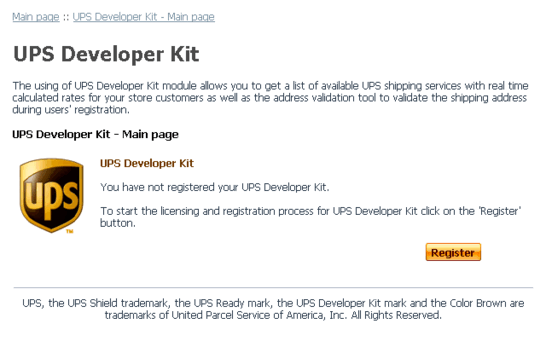
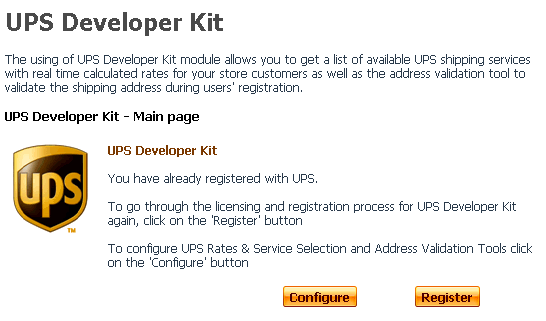
- Go to the 'UPS OnLine® Tools' section of your store (Settings menu->UPS OnLine® Tools). You should see a dialog box titled 'UPS Online® Tools - Main page'.
- Click the Register button. UPS Online® Tools Licensing & Registration Wizard will be launched to guide you through the registration process.
- Complete the registration:
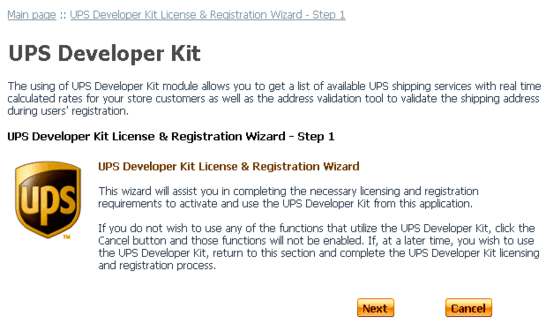
- At Step 1, click the button Next to proceed with the registration.
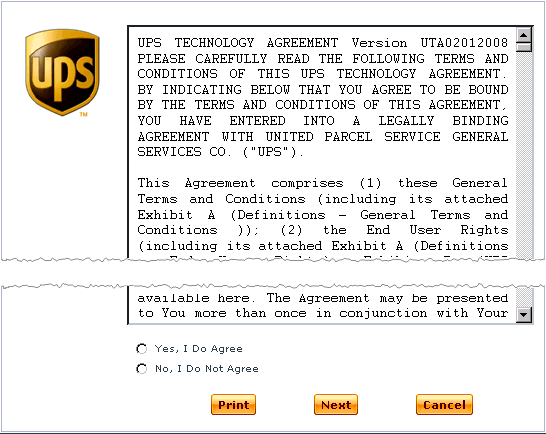
- At Step 2, read the UPS Technology Agreement.
- If you agree to be bound by the terms and conditions of this Agreement, select 'Yes, I Do Agree' and click on Next. If you do not agree to accept the terms and conditions of the Agreement, select 'No, I Do Not Agree' and click on Next (In this case you will exit the registration process).
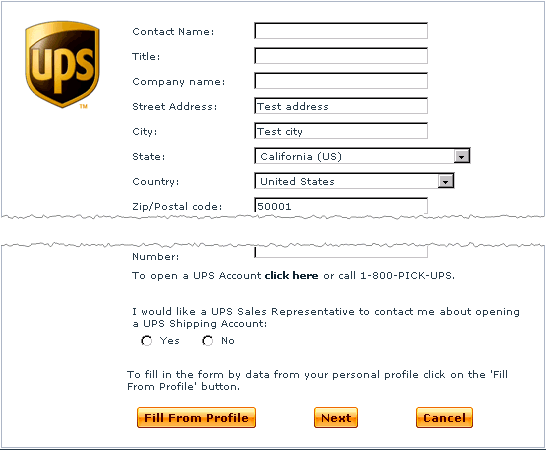
- At Step 3, provide your registration information. The address you provided in General settings->Company options is automatically entered into the registration form. However, you can provide a different address and contact info (manually or using the Fill From Profile button).
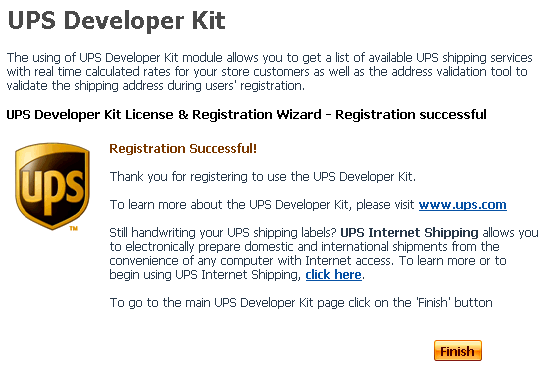
- Make sure you have completed all the fields and entered your valid email address before you click the Next button.
- Step 4 informs you of the successful completion of the registration process:
- Click the Finish button to return to 'UPS Online® Tools - Main page'.
4. Adjust your store to use UPS Online® Tools:
- Ensure that the option 'Real-time shipping calculation' is enabled and the option 'Intershipper calculation services' is disabled in General settings->Shipping options section.
- Again, go to the 'UPS OnLine® Tools' section of your store. After you have registered your UPS Online® Tools with UPS, a Configure button appears in the 'UPS Online® Tools - Main page' dialog box:
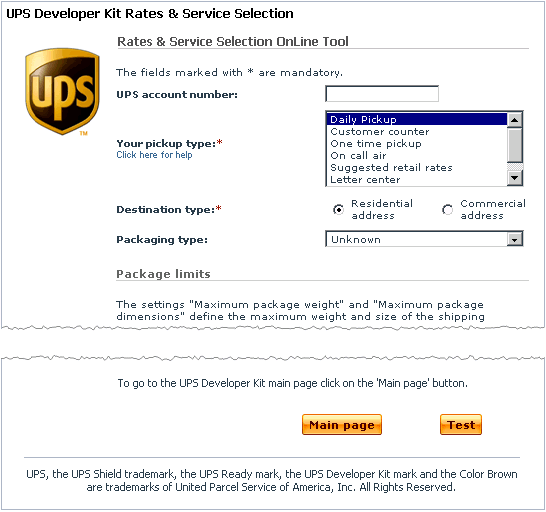
- Click this button. A dialog box titled 'UPS Online® Tools Rates & Service Selection' opens.
- Complete the fields in the 'Rates & Service Selection OnLine Tool' and 'Address Validation OnLine Tool' subsections of the 'UPS Online® Tools Rates & Service Selection' dialog box.
- Click the Update button.
Setting up International Shipping
Some of the international shipping services offered by UPS may depend on other UPS services. If you are planning to use such shipping methods in your store, it is important to resolve these dependencies first. Otherwise X-Cart will not be able to estimate UPS shipping charges in the real-time mode.
To resolve the dependencies, you need to activate the generic UPS services along with the shipping methods that you are planning to use. For example, UPS Express Saver (SM) depends on UPS Saver. Therefore, to get shipping charges for UPS Express Saver (SM) estimated you need to activate both UPS Express Saver (SM) and UPS Saver.
To activate UPS shipping services:
- Log in to the Admin area.
- Go to the Shipping methods section (Management menu -> Shipping methods).
- In the 'Shipping methods' box, click on the UPS link to expand the list of available shipping methods.
- Select the check boxes for the methods you want to activate.
- Click the Update button.
Important!
Activate "UPS Saver" shipping method if you are going to offer the following methods for your customers:
- UPS Express Saver (SM)
- UPS Worldwide Saver (SM)
- UPS Worldwide Express Saver (SM)
Otherwise these methods will not be available for customers.
Activate "UPS Standard" shipping method to be able to offer the "UPS Standard to Canada" shipping method to customers.
