Difference between revisions of "LiteCommerce:Installing/Uninstalling Modules"
m |
|||
| (One intermediate revision by one other user not shown) | |||
| Line 1: | Line 1: | ||
| + | {{LC2_disclaimer}}<br /><br /> | ||
== Installing modules == | == Installing modules == | ||
Before starting installation of a new commercial module, you should upgrade your cart license to the new version which includes this new module. | Before starting installation of a new commercial module, you should upgrade your cart license to the new version which includes this new module. | ||
| − | The new "License Certificate" is in "My Licenses" section of your | + | The new "License Certificate" is in "My Licenses" section of your {{QA}}: |
* Click the "Certificate" link opposite the corresponding license. The "License certificate" window will appear. | * Click the "Certificate" link opposite the corresponding license. The "License certificate" window will appear. | ||
Latest revision as of 12:53, 31 May 2012
|
Installing modules
Before starting installation of a new commercial module, you should upgrade your cart license to the new version which includes this new module.
The new "License Certificate" is in "My Licenses" section of your X-Cart Account:
- Click the "Certificate" link opposite the corresponding license. The "License certificate" window will appear.
- Copy the whole license text and paste into the "License" window under the "License" section in the cart admin area. The license text has two parts (customer information and license key). You should copy the full text of the licence (both parts).
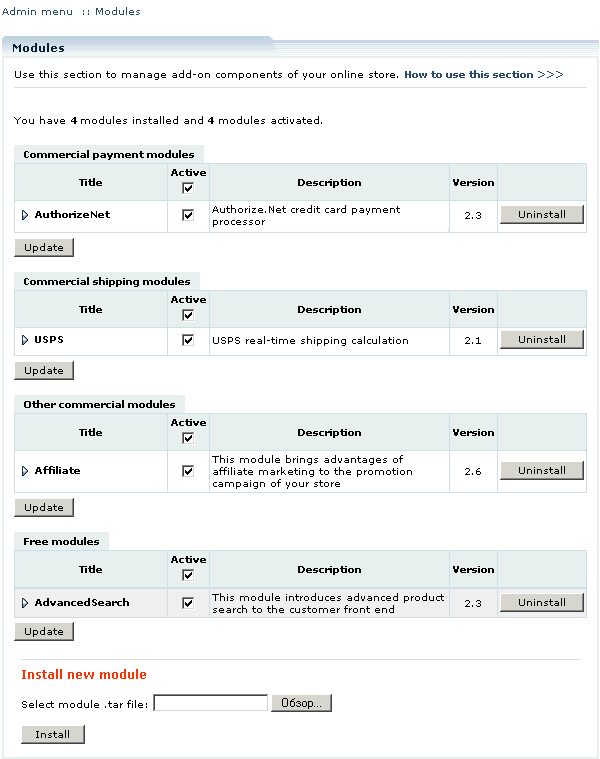
In order to install a module, select the 'Modules' section in the 'Settings' menu of the Administrator Zone. The list of currently installed add-on modules will appear (Figure 7-1) with activated modules coming first, followed by deactivated ones.
To install a module, click on the 'Browse…' button, select the module's '.tar' file and click on the 'Install' button to add the module to your store setup. Module installation screen will come up with the installation progress details (Figure 7-2). During the installation, the add-on module modifies the relevant templates and database tables and creates additional ones as needed.
When the installation is complete, click on the 'Return to admin zone' link to return back to the list of installed add-on modules. The newly installed module will appear in the list and will be activated automatically.
Uninstalling modules
To completely remove a module from your LiteCommerce installation:
- select the 'Modules' section in the 'Settings' menu of the Administrator Zone,
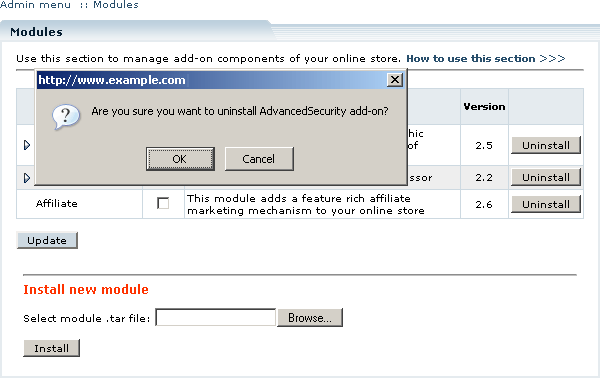
- click on the 'Uninstall' button opposite the module's title,
- in the pop-up window click on the 'Ok' button to confirm the action, or 'Cancel' to cancel it (Figure 7-3).
Deinstallation progress screen will come up (Figure 7-4). Once the operation is complete, the 'Return to admin zone' link will take you back to the 'Modules' section.


