Difference between revisions of "X-Cart:UPS Developer Kit"
(→How to enable UPS Negotiated Rates in my store?) |
m |
||
| (28 intermediate revisions by 2 users not shown) | |||
| Line 7: | Line 7: | ||
== Roles in UPS Developer Kit module management == | == Roles in UPS Developer Kit module management == | ||
| − | If you are an X-Cart GOLD administrator/provider or an X-Cart PRO administrator: | + | If you are an X-Cart GOLD or GOLD PLUS administrator/provider or an X-Cart PLATINUM or PRO administrator: |
* You can enable/disable <u>UPS Developer Kit</u> module, perform <u>UPS Developer Kit </u>registration and configure the module settings | * You can enable/disable <u>UPS Developer Kit</u> module, perform <u>UPS Developer Kit </u>registration and configure the module settings | ||
| Line 20: | Line 20: | ||
* HTTPS module like Net:SLeay, libCURL, CURL, Open SSL or HTTPS-cli. | * HTTPS module like Net:SLeay, libCURL, CURL, Open SSL or HTTPS-cli. | ||
| − | + | You can find out whether these components are installed on your system by looking at the Environment info section of your store's <u>Summary</u> page. In X-Cart versions 4.4.0 and later, this page can be found at <u>Tools menu -> Summary</u>; in X-Cart versions before 4.4.x, this page can be found at <u>Administration menu -> Summary</u>. | |
| − | + | {{Note1|Note: If you select Net:SLeay perl module as your preferred HTTPS module, be sure to specify the full path to Perl interpreter executable in General settings->General options.}} | |
| − | : | + | {{Note1|IMPORTANT: Make sure the HTTPS module selected as the "Preferred HTTPS module" is working. Non-working HTTPS module may cause "Internal Server Error" and prevent your store from operating properly. |
| + | See also: | ||
| + | * [[X-Cart:Setting_Up_HTTPS_modules#How_to_test_HTTPS_modules_in_my_X-Cart_store.3F | How to test HTTPS modules in my X-Cart store?]] | ||
| + | * [[X-Cart:UPS_Developer_Kit#UPS_Developer_Kit_.26_Registration_wizard:_getting_.22Internal_Server_Error.22_at_step_2 | UPS Developer Kit & Registration wizard: getting "Internal Server Error" at step 2]]}} | ||
| + | |||
| + | 2. In your store's Admin area, use the <u>Modules</u> page to enable <u>UPS Developer Kit</u> module. In X-Cart versions 4.4.0 and later, the <u>Modules</u> page can be found at <u>Settings menu -> Modules</u>; in X-Cart versions before 4.4.x, this page can be found at <u>Administration menu -> Modules</u>. | ||
| + | |||
| + | : After the module has been enabled, in the Admin area of your store a link '<u>UPS Developer Kit</u>' will be added to the <u>Shipping and Taxes</u> menu (X-Cart versions 4.4.0 and later) or <u>Settings</u> menu (X-Cart versions before 4.4.x). You will be able to use this link for access to the '<u>UPS Developer Kit</u>' section. | ||
3. Register your UPS Developer Kit with UPS: | 3. Register your UPS Developer Kit with UPS: | ||
| − | * Go to the '<u>UPS Developer Kit</u>' section of your store | + | * Go to the '<u>UPS Developer Kit</u>' section of your store. You should see a dialog box titled '<u>UPS Developer Kit - Main page</u>'. |
: [[Image:ups0.gif|center|border]] | : [[Image:ups0.gif|center|border]] | ||
| Line 65: | Line 72: | ||
4. Adjust your store to use <u>UPS Developer Kit</u>: | 4. Adjust your store to use <u>UPS Developer Kit</u>: | ||
| − | * Ensure that the option '<u>Real-time shipping calculation</u>' is enabled and the option '<u> | + | * Ensure that the option '<u>Real-time shipping calculation</u>' is enabled and the option '<u>InterShipper calculation services</u>' is disabled in <u>General settings->Shipping options</u> section. |
* Again, go to the '<u>UPS Developer Kit</u>' section of your store. After you have registered your <u>UPS Developer Kit</u> with UPS, a '''Configure''' button appears in the '<u>UPS Developer Kit - Main page</u>' dialog box: | * Again, go to the '<u>UPS Developer Kit</u>' section of your store. After you have registered your <u>UPS Developer Kit</u> with UPS, a '''Configure''' button appears in the '<u>UPS Developer Kit - Main page</u>' dialog box: | ||
| Line 90: | Line 97: | ||
# Log in to the Admin area. | # Log in to the Admin area. | ||
| − | # Go to the <u>Shipping methods</u> section (<u>Management</u> menu -> <u>Shipping methods</u>). | + | # Go to the <u>Shipping methods</u> section (In X-Cart versions 4.4.0 and later, this page can be found at <u>Shipping and Taxes</u> menu -> <u>Shipping methods</u>; in X-Cart versions before 4.4.x, this page can be found at <u>Management</u> menu -> <u>Shipping methods</u>). |
# In the <u>'Shipping methods'</u> box, click on the UPS link to expand the list of available shipping methods. | # In the <u>'Shipping methods'</u> box, click on the UPS link to expand the list of available shipping methods. | ||
# Select the check boxes for the methods you want to activate. | # Select the check boxes for the methods you want to activate. | ||
# Click the '''Update''' button. | # Click the '''Update''' button. | ||
| − | '''Important!''' | + | {{Note1|'''Important!''' |
Activate "UPS Saver" shipping method if you are going to offer the following methods for your customers: | Activate "UPS Saver" shipping method if you are going to offer the following methods for your customers: | ||
| Line 105: | Line 112: | ||
Otherwise these methods will not be available for customers. | Otherwise these methods will not be available for customers. | ||
| − | Activate "UPS Standard" shipping method to be able to offer the "UPS Standard to Canada" shipping method to customers. | + | Activate "UPS Standard" shipping method to be able to offer the "UPS Standard to Canada" shipping method to customers.}} |
==Setting up Dimensional Shipping== | ==Setting up Dimensional Shipping== | ||
| Line 117: | Line 124: | ||
Certain shipping modules, such as Australia Post, FedEx, UPS and USPS allow enabling/disabling splitting orders into multiple packages. | Certain shipping modules, such as Australia Post, FedEx, UPS and USPS allow enabling/disabling splitting orders into multiple packages. | ||
| − | To enable this function, select '''Split the shipment into multiple packages if its weight/dimensions exceed the limitations''' on the <u>Shipping methods</u> -> <u>Options</u> page | + | To enable this function, select '''Split the shipment into multiple packages if its weight/dimensions exceed the limitations''' on the <u>Shipping methods</u> -> <u>Options</u> page. |
In the shipping settings, you can also specify: | In the shipping settings, you can also specify: | ||
| Line 141: | Line 148: | ||
'''To enable Dimensional Shipping:''' | '''To enable Dimensional Shipping:''' | ||
| − | + | # X-Cart 4.4.0 and later: Go to the <u>Shipping</u> page (Settings menu -> General settings -> "Сore options" pane at the right -> Shipping).<br />X-Cart 4.3.x: Go to the <u>Shipping options</u> page (Settings menu -> Shipping settings)<br />X-Cart 4.2.x: Go to the <u>Shipping options</u> page (Administration menu -> General settings -> "In this section:" menu -> Shipping options).<br /> | |
| − | + | # On the page that appears, under '''General shipping options''', select the '''Use product dimensions for shipping rates calculation''' check box.<br /> | |
| − | 2. | + | # On the same page, under '''Dimensions of the shipping box for small items (for real-time shipping)''', specify the length, width and height (in inches) for the default shipping box. These dimensions are used by the calculator when no product-specific dimensions are provided.<br /> |
| − | + | # Click the '''Apply changes''' button. | |
| − | |||
| − | |||
| − | |||
{{Note|To enable the shipping calculators, make sure to select the '''ENABLE SHIPPING''' check box at the top of the page before making any other shipping settings.}} | {{Note|To enable the shipping calculators, make sure to select the '''ENABLE SHIPPING''' check box at the top of the page before making any other shipping settings.}} | ||
| Line 197: | Line 201: | ||
===UPS Developer Kit & Registration wizard: getting error "Sorry, license agreement is temporary unavailable. Try again later."=== | ===UPS Developer Kit & Registration wizard: getting error "Sorry, license agreement is temporary unavailable. Try again later."=== | ||
| − | First make sure that your X-Cart copy is registered. To learn how to do this see [[X-Cart:Licensing#Registering_installed_X-Cart|this article]]. | + | First make sure that your X-Cart copy is registered (for 4.3.x and 4.4.x versions only). To learn how to do this see [[X-Cart:Licensing#Registering_installed_X-Cart|this article]]. |
| + | When your X-Cart has been registered, perform the following steps: | ||
# Log in your store back-end. | # Log in your store back-end. | ||
# Go to the "Summary" page, "Environment info" section. | # Go to the "Summary" page, "Environment info" section. | ||
| − | # Check if any HTTPS modules are available. | + | # Check if any HTTPS modules are available and [[X-Cart:Setting_Up_HTTPS_modules#How_to_test_HTTPS_modules_in_my_X-Cart_store.3F | test them]]. |
# Go to the "General Settings" page. | # Go to the "General Settings" page. | ||
| − | # Switch the "Preferred HTTPS module" | + | # Switch the "Preferred HTTPS module" setting value to any HTTPS module that is available and working on your server (according to step 3). |
# Try to register UPS Developer Kit again. | # Try to register UPS Developer Kit again. | ||
# If the error still persists, repeat steps 5-6 until resolved. | # If the error still persists, repeat steps 5-6 until resolved. | ||
{{Note|If there are no HTTPS modules available, please refer to the [[X-Cart:Setting_Up_HTTPS_modules | "X-Cart:Setting Up HTTPS modules"]] article.}} | {{Note|If there are no HTTPS modules available, please refer to the [[X-Cart:Setting_Up_HTTPS_modules | "X-Cart:Setting Up HTTPS modules"]] article.}} | ||
| + | |||
| + | ===UPS Developer Kit & Registration wizard: getting "Internal Server Error" at step 2=== | ||
| + | |||
| + | Please install the patch-improvement provided in [http://bugtracker.qtmsoft.com/view.php?id=40392 this Bugtracker's ticket]. | ||
| + | |||
| + | Alternatively, you can try to switch the "Preferred HTTPS module" setting from libCURL to any other HTTPS module that is available and working on your server. | ||
| + | |||
| + | {{Note1 | NOTE: The first solution (installing the patch-improvement) is still the most preferred and highly recommended one.}} | ||
| + | |||
| + | See also: | ||
| + | * [[X-Cart:Setting_Up_HTTPS_modules#How_to_test_HTTPS_modules_in_my_X-Cart_store.3F | How to test HTTPS modules in my X-Cart store?]] | ||
===UPS not showing up as a shipping option for customers during checkout=== | ===UPS not showing up as a shipping option for customers during checkout=== | ||
| Line 257: | Line 273: | ||
<u>Solution</u>: | <u>Solution</u>: | ||
| − | In case the <u>"Use negotiated rates"</u> option is NOT enabled (<u>Settings</u> menu -> <u>UPS Developer Kit</u> -> <u>Configure</u> button), try to re-register UPS Developer Kit in your X-Cart admin back-end, as described in the [[X-Cart:UPS_Developer_Kit#Enabling_and_Configuring_. | + | In case the <u>"Use negotiated rates"</u> option is NOT enabled (<u>Settings</u> menu -> <u>UPS Developer Kit</u> -> <u>Configure</u> button), try to re-register UPS Developer Kit in your X-Cart admin back-end, as described in the [[X-Cart:UPS_Developer_Kit#Enabling_and_Configuring_.27UPS_Developer_Kit.27 | Enabling and Configuring 'UPS Developer Kit']] section, step 3. If the problem still persists, please contact our tech support for assistance. |
In case the <u>"Use negotiated rates"</u> option is enabled, please follow the steps described in this article: [[X-Cart:UPS_Developer_Kit#How_to_enable_UPS_Negotiated_Rates_in_my_store.3F | How to enable UPS Negotiated Rates in my store?]] | In case the <u>"Use negotiated rates"</u> option is enabled, please follow the steps described in this article: [[X-Cart:UPS_Developer_Kit#How_to_enable_UPS_Negotiated_Rates_in_my_store.3F | How to enable UPS Negotiated Rates in my store?]] | ||
| − | ===Can not get rates for | + | ===Can not get UPS Standard rates for Canadian customers. How do I solve the problem?=== |
You should enable both 'UPS Standard to Canada' and 'UPS Standard' shipping methods in the [[X-Cart:Shipping_Settings#Shipping_Methods | 'Shipping Methods']] section of the Admin area. | You should enable both 'UPS Standard to Canada' and 'UPS Standard' shipping methods in the [[X-Cart:Shipping_Settings#Shipping_Methods | 'Shipping Methods']] section of the Admin area. | ||
| + | |||
| + | See also: | ||
| + | * [[X-Cart:UPS_Developer_Kit#Setting_up_International_Shipping | Setting up International Shipping]] | ||
| + | |||
| + | ===UPS Developer Kit: "The XML document is not well formed (errorcode: 10001)" error=== | ||
| + | |||
| + | UPS Realtime shipping rate calculation service returns the following error: | ||
| + | |||
| + | <pre>The XML document is not well formed (errorcode: 10001)</pre> | ||
| + | |||
| + | <u>Solution</u>: | ||
| + | |||
| + | # First make sure that your X-Cart copy is registered. See [[X-Cart:Licensing#Registering_installed_X-Cart|Registering installed X-Cart]]. When your X-Cart has been registered, proceed with the next step. | ||
| + | # Re-register UPS Developer Kit in your X-Cart admin back-end, as described in the [[X-Cart:UPS_Developer_Kit#Enabling_and_Configuring_.27UPS_Developer_Kit.27 | Enabling and Configuring 'UPS Developer Kit']] section, step 3. | ||
| + | |||
| + | If the problem still persists, please contact our tech support for assistance. | ||
==FAQ== | ==FAQ== | ||
| Line 273: | Line 305: | ||
<u>Solution:</u> | <u>Solution:</u> | ||
| − | 1) Obtain Developer's Key from UPS. | + | 1) [http://www.ups.com/content/us/en/resources/service/hardware/tools.html#How+can+I+get+a+Developer%27s+Key%3F Obtain Developer's Key from UPS]. |
2) Create config.local.UPS_OnLine_Tools.php file in the X-Cart directory, put the following code in the file: | 2) Create config.local.UPS_OnLine_Tools.php file in the X-Cart directory, put the following code in the file: | ||
| Line 283: | Line 315: | ||
3) Modify the following file in your dev X-Cart installation: | 3) Modify the following file in your dev X-Cart installation: | ||
| − | * skin/common_files/modules/UPS_OnLine_Tools/ups.tpl (X-Cart 4.4) | + | * skin/common_files/modules/UPS_OnLine_Tools/ups.tpl (X-Cart 4.4.x & 4.5.0-4.5.2) |
| − | * skin1/modules/UPS_OnLine_Tools/ups.tpl (X-Cart 4.3) | + | * skin1/modules/UPS_OnLine_Tools/ups.tpl (X-Cart 4.3.x and older versions) |
- find the following line of code: | - find the following line of code: | ||
| Line 293: | Line 325: | ||
<pre>{if false and $shop_evaluation and $shop_evaluation ne "WRONG_DOMAIN"}</pre> | <pre>{if false and $shop_evaluation and $shop_evaluation ne "WRONG_DOMAIN"}</pre> | ||
| + | |||
| + | {{Note1 | <b>NOTE</b>: Step 3 is not required for X-Cart 4.5.3 and newer versions.}} | ||
4) [[X-Cart:UPS_OnLine_Tools#Enabling_and_Configuring_.27UPS_Developer_Kit.27 | Enable and configure 'UPS Developer Kit']] via your X-Cart admin back-end. | 4) [[X-Cart:UPS_OnLine_Tools#Enabling_and_Configuring_.27UPS_Developer_Kit.27 | Enable and configure 'UPS Developer Kit']] via your X-Cart admin back-end. | ||
| + | |||
| + | See also: | ||
| + | |||
| + | * [http://www.ups.com/content/us/en/resources/service/hardware/tools.html#What+is+a+Developer%27s+Key%3F What is a Developer's Key?] | ||
| + | * [http://www.ups.com/content/us/en/resources/service/hardware/tools.html#How+can+I+get+a+Developer%27s+Key%3F How can I get a Developer's Key?] | ||
===How to enable UPS Negotiated Rates in my store?=== | ===How to enable UPS Negotiated Rates in my store?=== | ||
| − | When you register UPS Developer Kit in your X-Cart store, you will get default credentials (UserID, Password and AccessKey) from UPS. These default credentials are associated with your Shipper Account Number, but do not allow to use negotiated rates, unfortunately. | + | When you register UPS Developer Kit in your X-Cart store, you will get default credentials (UserID, Password and AccessKey) from UPS. These default credentials are associated with your Shipper Account Number (ShipperNumber), but do not allow to use negotiated rates, unfortunately. |
To enable Negotiated Rates in your X-Cart store, please follow these steps: | To enable Negotiated Rates in your X-Cart store, please follow these steps: | ||
| − | a) Make sure your Shipper Account Number is qualified for Negotiated Rates. Please contact UPS for assistance in getting your Shipper Account Number approved for Negotiated Rates. | + | a) Make sure your Shipper Account Number is qualified for Negotiated Rates. |
| + | |||
| + | Please contact UPS for assistance in getting your Shipper Account Number approved for Negotiated Rates. | ||
| − | Once your Shipper Account Number is qualified for Negotiated Rates, | + | Once your Shipper Account Number is qualified for Negotiated Rates, you will get new credentials: UserID, Password and AccessKey. |
| − | b) | + | To use the new credentials in your X-Cart store, proceed with the next step. |
| + | |||
| + | b) In the "<xcart_dir>/shipping/mod_UPS.php" file, find the lines: | ||
<pre> | <pre> | ||
| Line 314: | Line 357: | ||
</pre> | </pre> | ||
| − | and replace them with | + | and replace them with the following lines: |
<pre> | <pre> | ||
$UPS_username = "UserID"; | $UPS_username = "UserID"; | ||
$UPS_password = "Password"; | $UPS_password = "Password"; | ||
| − | $ | + | $UPS_accesskey = "AccessKey"; |
</pre> | </pre> | ||
| − | + | (Be sure to replace the "UserID", "Password" and "AccessKey" values with the actual UserID, Password and AccessKey credentials you got from UPS after getting your Shipper Account Number qualified for Negotiated Rates). | |
| + | |||
| + | ===How do I set up X-cart to display both UPS and other shipping methods at the same time?=== | ||
| + | |||
| + | Add this code | ||
| + | |||
| + | <pre>define('ALL_CARRIERS',1);</pre> | ||
| + | |||
| + | to this file | ||
| + | |||
| + | <i>include/func/func.shipping.php</i> | ||
| + | |||
| + | just below | ||
| + | |||
| + | <pre>define('SHIPPING_SYSTEM', 1);</pre> | ||
== See also == | == See also == | ||
| − | * [[X-Cart:Setting_Up_Dimensional_Shipping|Setting up Dimensional Shipping]] | + | :* [[X-Cart:Setting_Up_Dimensional_Shipping|Setting up Dimensional Shipping]] |
| + | :* [[X-Cart:Webgility_Integration_Solutions_for_X-Cart|Webgility Integration Solutions for X-Cart]] | ||
[[Category:X-Cart user manual]] | [[Category:X-Cart user manual]] | ||
Latest revision as of 15:20, 5 June 2014
Contents
- 1 What UPS Developer Kit module does
- 2 Roles in UPS Developer Kit module management
- 3 Enabling and Configuring 'UPS Developer Kit'
- 4 Setting up International Shipping
- 5 Setting up Dimensional Shipping
- 6 Troubleshooting
- 6.1 UPS Developer Kit & Registration wizard: getting error "Sorry, license agreement is temporary unavailable. Try again later."
- 6.2 UPS Developer Kit & Registration wizard: getting "Internal Server Error" at step 2
- 6.3 UPS not showing up as a shipping option for customers during checkout
- 6.4 The administartor is logged out when registering at UPS Developer Kit
- 6.5 UPS Developer Kit: "There are no shipping methods available" error
- 6.6 UPS Developer Kit: "Invalid UserId/Password (errorcode: 250002)" error
- 6.7 Can not get UPS Standard rates for Canadian customers. How do I solve the problem?
- 6.8 UPS Developer Kit: "The XML document is not well formed (errorcode: 10001)" error
- 7 FAQ
- 8 See also
What UPS Developer Kit module does
The module UPS Developer Kit enables UPS real-time shipping rate calculation at your store.
Roles in UPS Developer Kit module management
If you are an X-Cart GOLD or GOLD PLUS administrator/provider or an X-Cart PLATINUM or PRO administrator:
- You can enable/disable UPS Developer Kit module, perform UPS Developer Kit registration and configure the module settings
Enabling and Configuring 'UPS Developer Kit'
To begin using the module:
1. Make sure your store meets the system requirements for installing and using UPS Developer Kit module. The following components are required:
- EXPAT extension for php;
- HTTPS module like Net:SLeay, libCURL, CURL, Open SSL or HTTPS-cli.
You can find out whether these components are installed on your system by looking at the Environment info section of your store's Summary page. In X-Cart versions 4.4.0 and later, this page can be found at Tools menu -> Summary; in X-Cart versions before 4.4.x, this page can be found at Administration menu -> Summary.
See also:
2. In your store's Admin area, use the Modules page to enable UPS Developer Kit module. In X-Cart versions 4.4.0 and later, the Modules page can be found at Settings menu -> Modules; in X-Cart versions before 4.4.x, this page can be found at Administration menu -> Modules.
- After the module has been enabled, in the Admin area of your store a link 'UPS Developer Kit' will be added to the Shipping and Taxes menu (X-Cart versions 4.4.0 and later) or Settings menu (X-Cart versions before 4.4.x). You will be able to use this link for access to the 'UPS Developer Kit' section.
3. Register your UPS Developer Kit with UPS:
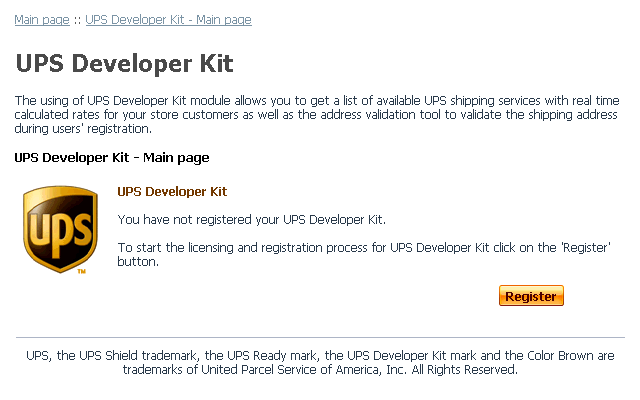
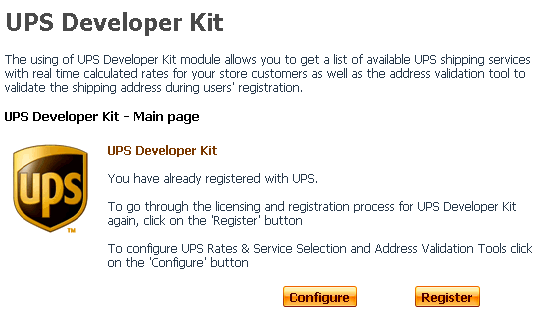
- Go to the 'UPS Developer Kit' section of your store. You should see a dialog box titled 'UPS Developer Kit - Main page'.
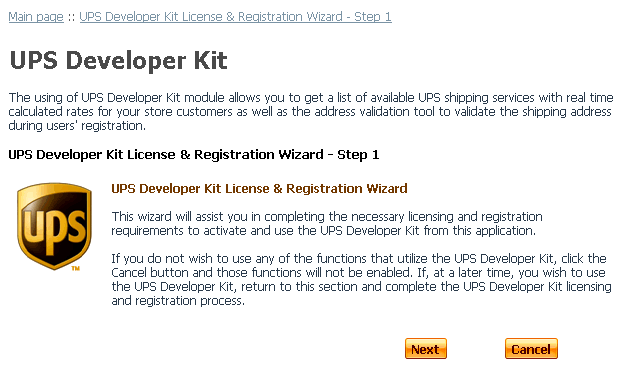
- Click the Register button. UPS Developer Kit Licensing & Registration Wizard will be launched to guide you through the registration process.
- Complete the registration:
- At Step 1, click the button Next to proceed with the registration.
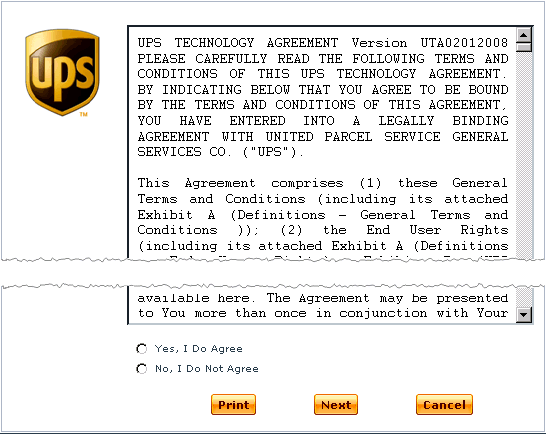
- At Step 2, read the UPS Technology Agreement.
- If you agree to be bound by the terms and conditions of this Agreement, select 'Yes, I Do Agree' and click on Next. If you do not agree to accept the terms and conditions of the Agreement, select 'No, I Do Not Agree' and click on Next (In this case you will exit the registration process).
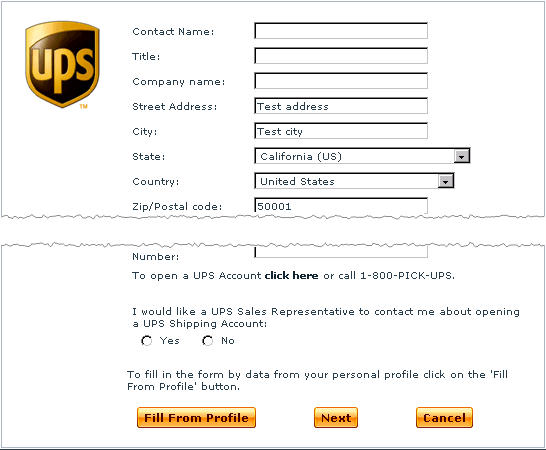
- At Step 3, provide your registration information. The address you provided in General settings->Company options is automatically entered into the registration form. However, you can provide a different address and contact info (manually or using the Fill From Profile button).
- Make sure you have completed all the fields and entered your valid email address before you click the Next button.
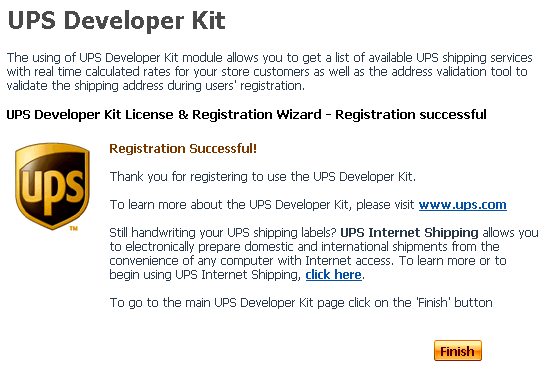
- Step 4 informs you of the successful completion of the registration process:
- Click the Finish button to return to 'UPS Developer Kit - Main page'.
4. Adjust your store to use UPS Developer Kit:
- Ensure that the option 'Real-time shipping calculation' is enabled and the option 'InterShipper calculation services' is disabled in General settings->Shipping options section.
- Again, go to the 'UPS Developer Kit' section of your store. After you have registered your UPS Developer Kit with UPS, a Configure button appears in the 'UPS Developer Kit - Main page' dialog box:
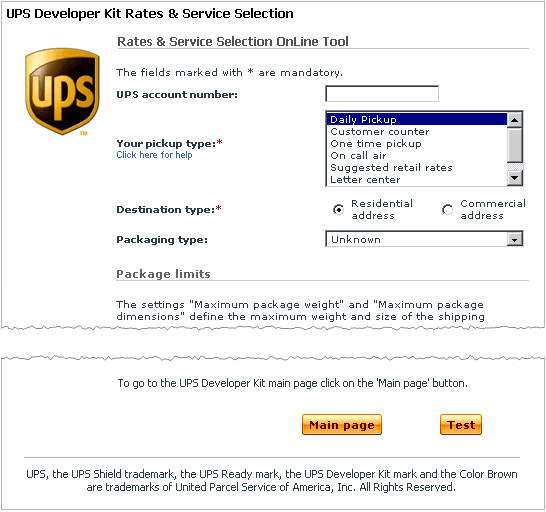
- Click this button. A dialog box titled 'UPS Developer Kit Rates & Service Selection' opens.
- Complete the fields in the 'Rates & Service Selection OnLine Tool' and 'Address Validation OnLine Tool' subsections of the 'UPS Developer Kit Rates & Service Selection' dialog box.
- Click the Update button.
Setting up International Shipping
Some of the international shipping services offered by UPS may depend on other UPS services. If you are planning to use such shipping methods in your store, it is important to resolve these dependencies first. Otherwise X-Cart will not be able to estimate UPS shipping charges in the real-time mode.
To resolve the dependencies, you need to activate the generic UPS services along with the shipping methods that you are planning to use. For example, UPS Express Saver (SM) depends on UPS Saver. Therefore, to get shipping charges for UPS Express Saver (SM) estimated you need to activate both UPS Express Saver (SM) and UPS Saver.
To activate UPS shipping services:
- Log in to the Admin area.
- Go to the Shipping methods section (In X-Cart versions 4.4.0 and later, this page can be found at Shipping and Taxes menu -> Shipping methods; in X-Cart versions before 4.4.x, this page can be found at Management menu -> Shipping methods).
- In the 'Shipping methods' box, click on the UPS link to expand the list of available shipping methods.
- Select the check boxes for the methods you want to activate.
- Click the Update button.
Activate "UPS Saver" shipping method if you are going to offer the following methods for your customers:
- UPS Express Saver (SM)
- UPS Worldwide Saver (SM)
- UPS Worldwide Express Saver (SM)
Otherwise these methods will not be available for customers.
Activate "UPS Standard" shipping method to be able to offer the "UPS Standard to Canada" shipping method to customers.Setting up Dimensional Shipping
X-Cart now provides a packaging algorithm that allows splitting an entire purchase into multiple packages that fit the limitations (maximum package weight and dimensions) imposed by a certain shipping service. This algorithm allows to get real-time shipping rates even when the cart contains a large quantity of products with the total weight and dimensions exceeding the values allowed for a single package.
With the Dimensional Shipping feature, you can specify dimensions for each product you have got at your store (See the Product details page) and use those dimensions for calculating shipping rates using the on-line real-time shipping rate calculation services like UPS, USPS, FedEx, etc.
Module-specific settings
Certain shipping modules, such as Australia Post, FedEx, UPS and USPS allow enabling/disabling splitting orders into multiple packages.
To enable this function, select Split the shipment into multiple packages if its weight/dimensions exceed the limitations on the Shipping methods -> Options page.
In the shipping settings, you can also specify:
Maximum package weight (lbs) - package weight that must not be exceeded when when shipping products to customers.
Maximum package dimensions (inches) - package dimensions that must not be exceeded when when shipping products to customers.
Always use the same package dimensions as specified in the "Maximum package dimensions" fields - applies the dimensions specified in the above option to all packages shipped through this shipping service.
- If the total weight/volume of the products ordered by customer exceeds the limitations defined by these settings, the order is split into several packages.
- The maximum package weight and maximum package dimensions that you set on this page must not exceed the actual limitations imposed by the shipping service.
- If you set the maximum package weight or any of the maximum package dimension values to zero, X-Cart will use the default limitations established by the shipping service.
For other shipping modules, please follow the instructions below.
Enabling Dimensional Shipping
To enable Dimensional Shipping:
- X-Cart 4.4.0 and later: Go to the Shipping page (Settings menu -> General settings -> "Сore options" pane at the right -> Shipping).
X-Cart 4.3.x: Go to the Shipping options page (Settings menu -> Shipping settings)
X-Cart 4.2.x: Go to the Shipping options page (Administration menu -> General settings -> "In this section:" menu -> Shipping options). - On the page that appears, under General shipping options, select the Use product dimensions for shipping rates calculation check box.
- On the same page, under Dimensions of the shipping box for small items (for real-time shipping), specify the length, width and height (in inches) for the default shipping box. These dimensions are used by the calculator when no product-specific dimensions are provided.
- Click the Apply changes button.
Defining product dimensions
To define dimensions of a product:
1. Sign in as provider and select the product to be edited.
2. On the Product management page, select the Use the dimensions of this product for shipping cost calculation check box.
3. In the Shipping box dimensions group, specify the length, width and height of the product, in inches.
4. Select the Ship in a separate box option to set shipping the product in separate boxes, then specify the Quantity per shipping box, i.e. how many pieces of the item can be placed in a single shipping box.
5. Click the Apply changes button.
Checking dimensional shipping settings
To check dimensional shipping settings:
1. Open the directory where your X-Cart is installed in a file manager and then open the file config.local.php in any plain-text editor.
2. In the config.local.php file, uncomment or type the following code:
<?php
define("PACKAGING_DEBUG", "Y");
?>
3. Save the modified config.local.php file in the directory where your X-Cart is installed and test your shipping calculator with the new settings.
This constant adds comments on the performance of the packaging routine at the bottom of the UPS calculator page. View those comments in an HTML source viewer and determine whether your dimensional shipping settings work as expected.
When you are done testing, don't forget to comment out or delete the debug string from the config.local.php file.
Troubleshooting
First make sure that your X-Cart copy is registered (for 4.3.x and 4.4.x versions only). To learn how to do this see this article.
When your X-Cart has been registered, perform the following steps:
- Log in your store back-end.
- Go to the "Summary" page, "Environment info" section.
- Check if any HTTPS modules are available and test them.
- Go to the "General Settings" page.
- Switch the "Preferred HTTPS module" setting value to any HTTPS module that is available and working on your server (according to step 3).
- Try to register UPS Developer Kit again.
- If the error still persists, repeat steps 5-6 until resolved.
UPS Developer Kit & Registration wizard: getting "Internal Server Error" at step 2
Please install the patch-improvement provided in this Bugtracker's ticket.
Alternatively, you can try to switch the "Preferred HTTPS module" setting from libCURL to any other HTTPS module that is available and working on your server.
See also:
UPS not showing up as a shipping option for customers during checkout
1) Try to re-register UPS Developer Kit in your X-Cart admin back-end, as described in the Enabling and Configuring 'UPS Developer Kit' section, step 3.
2) Apply the following SQL patch ( wonder how to apply SQL patches?):
DELETE FROM xcart_shipping_cache;
If the problem still persists, please contact our tech support for assistance.
The administartor is logged out when registering at UPS Developer Kit
When trying to register at "UPS Developer Kit" the administrator is redirected to the /admin/error_message.php?access_denied&id=37 page.
The issue is caused by some strange glitch in MySQL due to which the headers were corrupted..
In order to fix the issue add the following code to init.php file:
db_query("set names latin1");
UPS Developer Kit: "There are no shipping methods available" error
Affected version: X-Cart v.4.1.9
Using UPS online shipping, no matter what settings are used in the admin area, the following error message keeps appearing:
"There are no shipping methods available" (http://www.yoursite.com/error_message.php?error_no_shipping) as soon as anyone tries to checkout.
You can then click view cart and see the shipping method selected.
Solution: upgrade your X-Cart up to the 4.1.12 version.
UPS Developer Kit: "Invalid UserId/Password (errorcode: 250002)" error
Affected version: X-Cart v.4.3.2 and older.
When using UPS Developer Kit, the following error message appears at checkout:
"Error:(250002) Invalid UserId/Password"
Solution:
In case the "Use negotiated rates" option is NOT enabled (Settings menu -> UPS Developer Kit -> Configure button), try to re-register UPS Developer Kit in your X-Cart admin back-end, as described in the Enabling and Configuring 'UPS Developer Kit' section, step 3. If the problem still persists, please contact our tech support for assistance.
In case the "Use negotiated rates" option is enabled, please follow the steps described in this article: How to enable UPS Negotiated Rates in my store?
Can not get UPS Standard rates for Canadian customers. How do I solve the problem?
You should enable both 'UPS Standard to Canada' and 'UPS Standard' shipping methods in the 'Shipping Methods' section of the Admin area.
See also:
UPS Developer Kit: "The XML document is not well formed (errorcode: 10001)" error
UPS Realtime shipping rate calculation service returns the following error:
The XML document is not well formed (errorcode: 10001)
Solution:
- First make sure that your X-Cart copy is registered. See Registering installed X-Cart. When your X-Cart has been registered, proceed with the next step.
- Re-register UPS Developer Kit in your X-Cart admin back-end, as described in the Enabling and Configuring 'UPS Developer Kit' section, step 3.
If the problem still persists, please contact our tech support for assistance.
FAQ
How do I get UPS Developer Kit working on my development server?
My dev server is internal and does not accept external connections. Thus, it is impossible to activate X-Cart license and get UPS Developer Kit working.
Solution:
1) Obtain Developer's Key from UPS.
2) Create config.local.UPS_OnLine_Tools.php file in the X-Cart directory, put the following code in the file:
$devlicense = '{developer_key}';
where {developer_key} should be replaced with your Developer's Key obtained from UPS.
3) Modify the following file in your dev X-Cart installation:
- skin/common_files/modules/UPS_OnLine_Tools/ups.tpl (X-Cart 4.4.x & 4.5.0-4.5.2)
- skin1/modules/UPS_OnLine_Tools/ups.tpl (X-Cart 4.3.x and older versions)
- find the following line of code:
{if $shop_evaluation and $shop_evaluation ne "WRONG_DOMAIN"}
- change it as follows:
{if false and $shop_evaluation and $shop_evaluation ne "WRONG_DOMAIN"}
4) Enable and configure 'UPS Developer Kit' via your X-Cart admin back-end.
See also:
How to enable UPS Negotiated Rates in my store?
When you register UPS Developer Kit in your X-Cart store, you will get default credentials (UserID, Password and AccessKey) from UPS. These default credentials are associated with your Shipper Account Number (ShipperNumber), but do not allow to use negotiated rates, unfortunately.
To enable Negotiated Rates in your X-Cart store, please follow these steps:
a) Make sure your Shipper Account Number is qualified for Negotiated Rates.
Please contact UPS for assistance in getting your Shipper Account Number approved for Negotiated Rates.
Once your Shipper Account Number is qualified for Negotiated Rates, you will get new credentials: UserID, Password and AccessKey.
To use the new credentials in your X-Cart store, proceed with the next step.
b) In the "<xcart_dir>/shipping/mod_UPS.php" file, find the lines:
$UPS_username = text_decrypt(trim($config["UPS_OnLine_Tools"]["UPS_username"]));
$UPS_password = text_decrypt(trim($config["UPS_OnLine_Tools"]["UPS_password"]));
$UPS_accesskey = text_decrypt(trim($config["UPS_OnLine_Tools"]["UPS_accesskey"]));
and replace them with the following lines:
$UPS_username = "UserID";
$UPS_password = "Password";
$UPS_accesskey = "AccessKey";
(Be sure to replace the "UserID", "Password" and "AccessKey" values with the actual UserID, Password and AccessKey credentials you got from UPS after getting your Shipper Account Number qualified for Negotiated Rates).
How do I set up X-cart to display both UPS and other shipping methods at the same time?
Add this code
define('ALL_CARRIERS',1);
to this file
include/func/func.shipping.php
just below
define('SHIPPING_SYSTEM', 1);
