Difference between revisions of "X-Cart:Amazon Feeds"
m (→Getting started with Amazon Feeds) |
m |
||
| Line 4: | Line 4: | ||
The module allows you to upload product information from your X-Cart store to Amazon, including such information as product details, inventory, pricing and images. | The module allows you to upload product information from your X-Cart store to Amazon, including such information as product details, inventory, pricing and images. | ||
| + | |||
| + | ==Getting started with Amazon Feeds== | ||
| + | To start using Amazon Feeds, complete the following steps: | ||
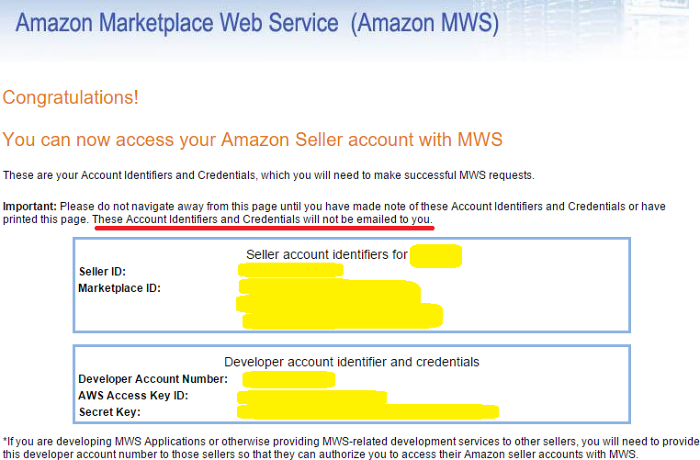
| + | # Set up a [https://services.amazon.com/content/sell-on-amazon.htm Professional Amazon seller account].<br />During registration, when asked about the way you are going to use MWS, select the option "I want to access my own Amazon seller account with MWS".<br />After completing registration, you will be provided with your Account Identifiers and Credentials for access to [https://developer.amazonservices.com/ Amazon Marketplace Web Service] (Amazon MWS). Please make note of your Account Identifiers and Credentials, as they will ''not'' be emailed to you.<br />[[File:xc4_amazonfeeds_mws_credentials.png|border]]<br /> | ||
| + | # Activate the module Amazon Feeds in your X-Cart store. For instructions, see the section [[#Activating the module | Activating the module]] below. | ||
| + | # Visit the module settings page in your X-Cart store's Admin area and adjust the module configuration settings. For more info, see the section [[#Configuring the module | Configuring the module]] further below. | ||
==Activating the module== | ==Activating the module== | ||
| Line 10: | Line 16: | ||
# Locate the module '''Amazon Feeds''' and select the Enable check box opposite its name. | # Locate the module '''Amazon Feeds''' and select the Enable check box opposite its name. | ||
This activates the module. | This activates the module. | ||
| − | |||
| − | |||
| − | |||
| − | |||
| − | |||
==Configuring the module== | ==Configuring the module== | ||
Revision as of 13:40, 28 April 2016
X-Cart 4.7.5or above
Contents
Overview
The module allows you to upload product information from your X-Cart store to Amazon, including such information as product details, inventory, pricing and images.
Getting started with Amazon Feeds
To start using Amazon Feeds, complete the following steps:
- Set up a Professional Amazon seller account.
During registration, when asked about the way you are going to use MWS, select the option "I want to access my own Amazon seller account with MWS".
After completing registration, you will be provided with your Account Identifiers and Credentials for access to Amazon Marketplace Web Service (Amazon MWS). Please make note of your Account Identifiers and Credentials, as they will not be emailed to you.
- Activate the module Amazon Feeds in your X-Cart store. For instructions, see the section Activating the module below.
- Visit the module settings page in your X-Cart store's Admin area and adjust the module configuration settings. For more info, see the section Configuring the module further below.
Activating the module
To enable the module:
- In your X-Cart store's Admin area, go to the Modules section (Settings menu -> Modules).
- Locate the module Amazon Feeds and select the Enable check box opposite its name.
This activates the module.