Difference between revisions of "X-Cart:X-Payments Connector"
m (→Connection instructions) |
m (→Connection instructions) |
||
| Line 27: | Line 27: | ||
# In X-Cart, paste the bundle you have copied into the appropriate field on the X-Payments Connector settings page, then click the '''Deploy''' button:<br />[[File:xc4_xp_connector_module_configure3.png|border]]<br /><br />X-Cart will take a few moments to deploy the configuration bundle. Once the deployment has been completed, a success message will be displayed at the top of the page saying that the configuration has been successfully deployed and the payment methods have been synchronized:<br />[[File:xc4_xp_connector_module_configure4.png|border]]<br /><br /> | # In X-Cart, paste the bundle you have copied into the appropriate field on the X-Payments Connector settings page, then click the '''Deploy''' button:<br />[[File:xc4_xp_connector_module_configure3.png|border]]<br /><br />X-Cart will take a few moments to deploy the configuration bundle. Once the deployment has been completed, a success message will be displayed at the top of the page saying that the configuration has been successfully deployed and the payment methods have been synchronized:<br />[[File:xc4_xp_connector_module_configure4.png|border]]<br /><br /> | ||
# Now have a closer look at the X-Payments Connector settings page:<br />[[File:xc4_xp_connector_module_configure4_1.png|border]]<br /><br />Here you will need configure your store's X-Payments-related settings. | # Now have a closer look at the X-Payments Connector settings page:<br />[[File:xc4_xp_connector_module_configure4_1.png|border]]<br /><br />Here you will need configure your store's X-Payments-related settings. | ||
| − | ## On the '''Payment methods''' tab, you can see the list of payment methods that have been imported from X-Payments - according to what payment configurations have been configured and enabled for your X-Cart store on the X-Payments end. After the deployment of the X-Payments configuration bundle in X-Cart, the imported payment methods are not yet active in your X-Cart store. To use | + | ## On the '''Payment methods''' tab, you can see the list of payment methods that have been imported from X-Payments - according to what payment configurations have been configured and enabled for your X-Cart store on the X-Payments end. After the deployment of the X-Payments configuration bundle in X-Cart, the imported payment methods are not yet active in your X-Cart store. To activate a method, select the checkbox next to its name in the '''Active''' column. For methods that you want to use for tokenized payments with saved credit cards, select the '''Use for recharges''' checkbox. Be sure to click '''Update''' to save your changes:<br />[[File:xc4_xp_connector_module_configure5.png|border]]<br /><br /> |
==Connecting an X-Cart store to X-Payments v1.x (User manual for old X-Cart connector modules)== | ==Connecting an X-Cart store to X-Payments v1.x (User manual for old X-Cart connector modules)== | ||
Revision as of 14:53, 14 September 2016
Contents
Overview
X-Payments Connector is an add-on module for X-Cart that provides an interface to connect X-Cart to X-Payments, a PA-DSS v 3.x verified payment application intended for web stores accepting online credit card payments through background payment gateways. See more about X-Payments at http://www.x-cart.com/extensions/modules/xpayments.html
Connecting an X-Cart store to X-Payments v2.1 or later
Video tutorial
Below is a video tutorial on how to connect X-Payments 2.1 or later with X-Cart 4.6.4 or later. The video features the X-Payments connector modules for X-Cart 4.x Classic released in September 2014.
Connection instructions
- Log in to the Admin back end of your X-Payments installation and make sure you have everything ready on the X-Payments end:
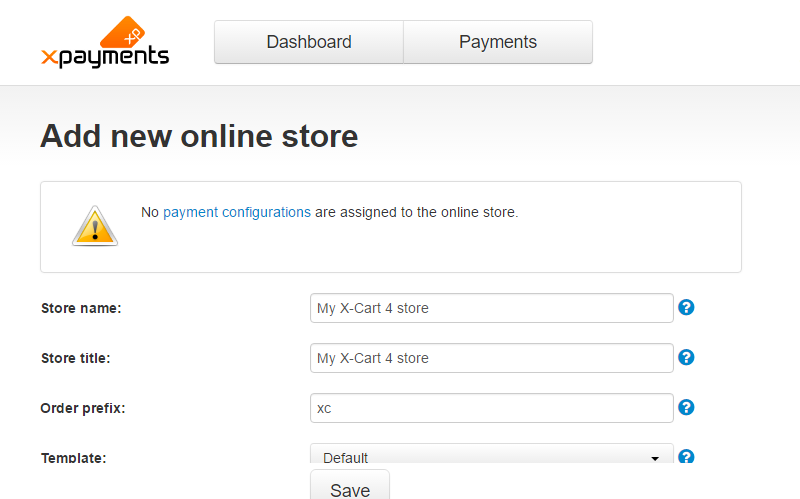
- In the Online Stores section of X-Payments (Settings->Online stores), add and configure an online store that will represent your X-Cart store in X-Payments.
- In the Payment Configurations section of X-Payments (Settings->Payment configurations), add and configure one or more payment configurations for this store. On the screenshot below you can see that we are adding the payment configuration based on the "First Data Payeezy Gateway (ex-Global Gateway e4)" module:
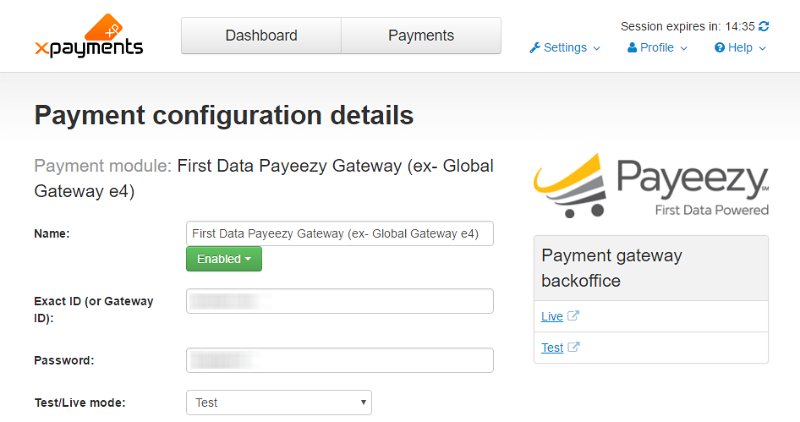
The payment method for accepting payments via X-Payments will be created from this very configuration. Make sure the payment configuration is active ("Enabled").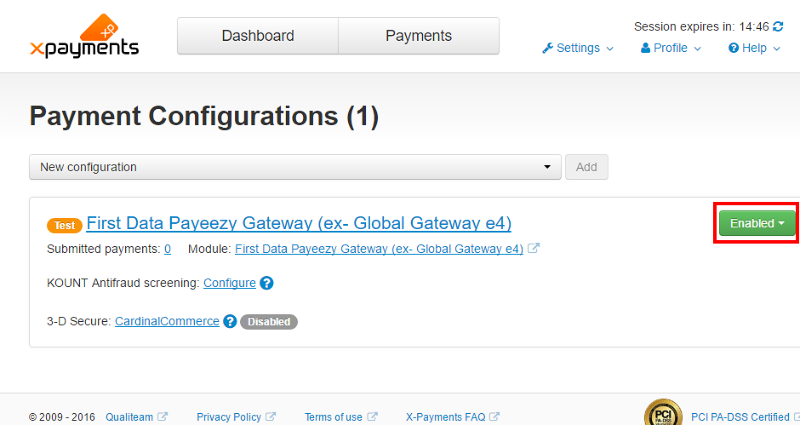
- In the details of the online store you have configured in X-Payments, specify that the store will be using the payment configuration you have created and configured at the previous step.
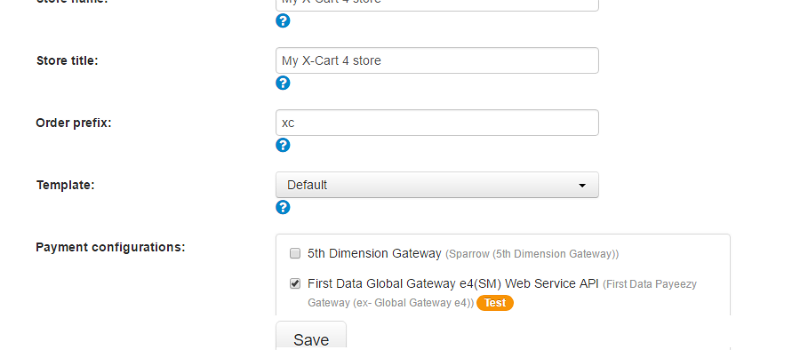
Make sure the store is active ("Enabled").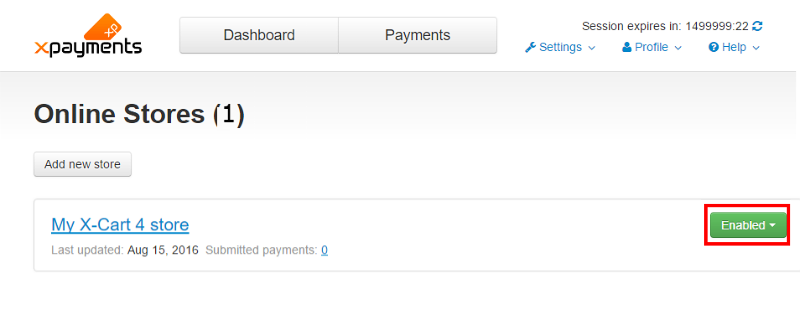
- Click on the name of the store you have configured in X-Payments to access the store's details. Here you will find a section titled "Connection". This section contains the configuration bundle that you will use a bit later to automatically deploy your X-Payments connection details in X-Cart. For now, leave the X-Payments page with the configuration bundle open and go on to the next step.
- In the Online Stores section of X-Payments (Settings->Online stores), add and configure an online store that will represent your X-Cart store in X-Payments.
- In a new browser tab or window, go to the Admin area section of your X-Cart store and, after logging in as administrator, prepare your X-Cart store for the connection:
- Go to the Modules section (Settings->Modules) and find the module X-Payments Connector:
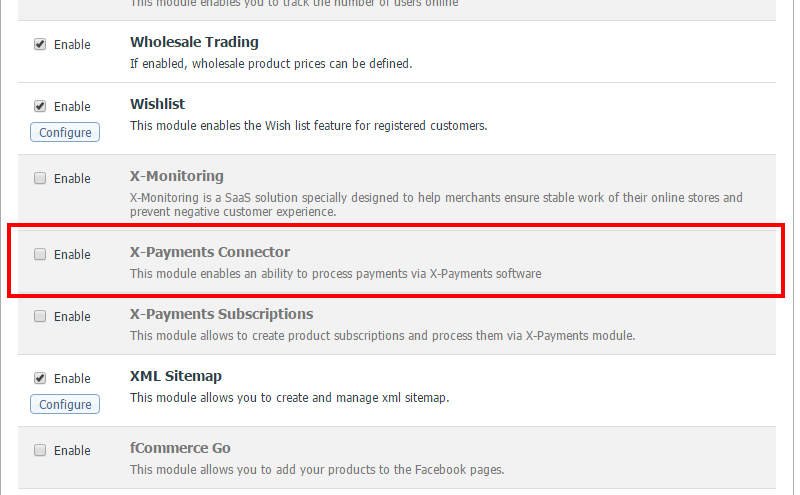
- Activate the module as usual:
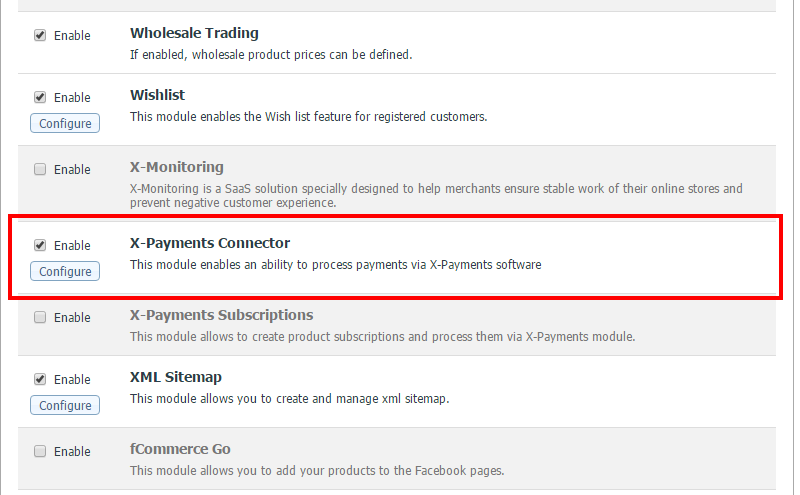
- Click the Configure button next to the module name to access the module settings.
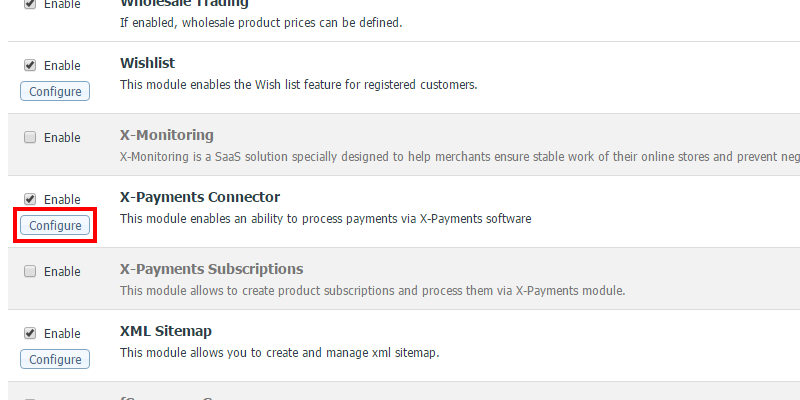 The module settings can also be accessed by selecting Settings->X-Payments Connector.
If you see a page like the following, click Next: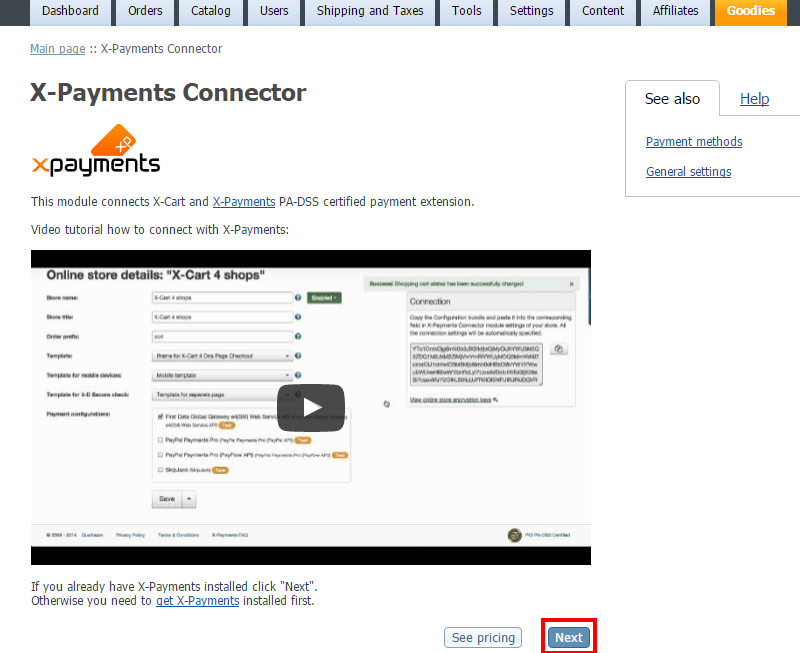
Your aim is to get to a page where you can enter your X-Payments configuration bundle: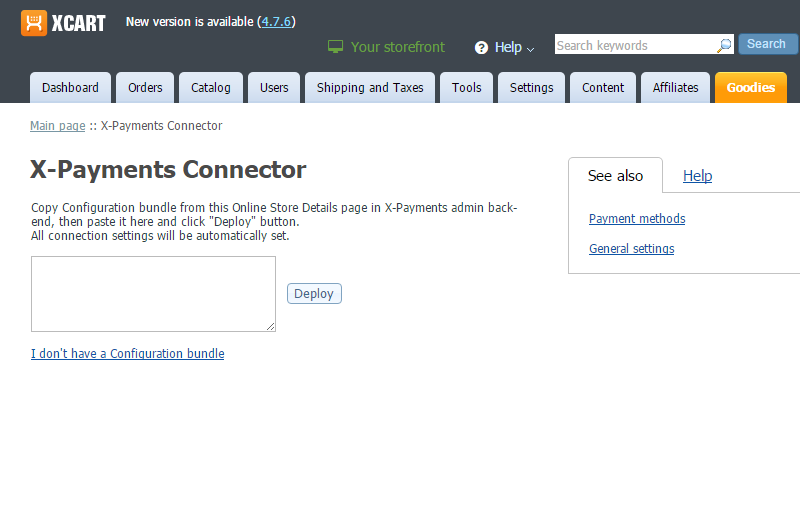
- Go to the Modules section (Settings->Modules) and find the module X-Payments Connector:
- Go back to the browser tab or window where you have the details of your online store in X-Payments and click the button to copy your configuration bundle to clipboard:
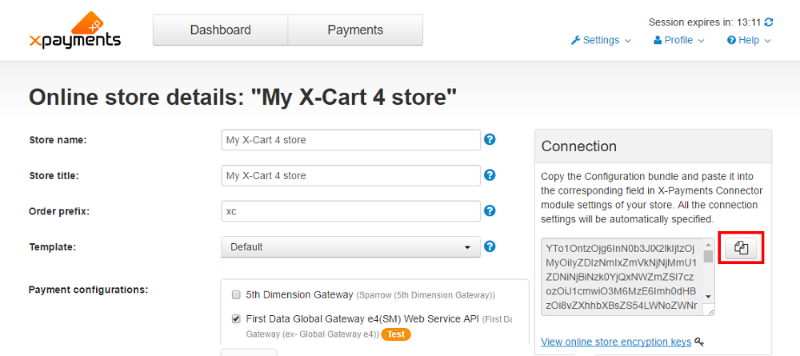
- In X-Cart, paste the bundle you have copied into the appropriate field on the X-Payments Connector settings page, then click the Deploy button:
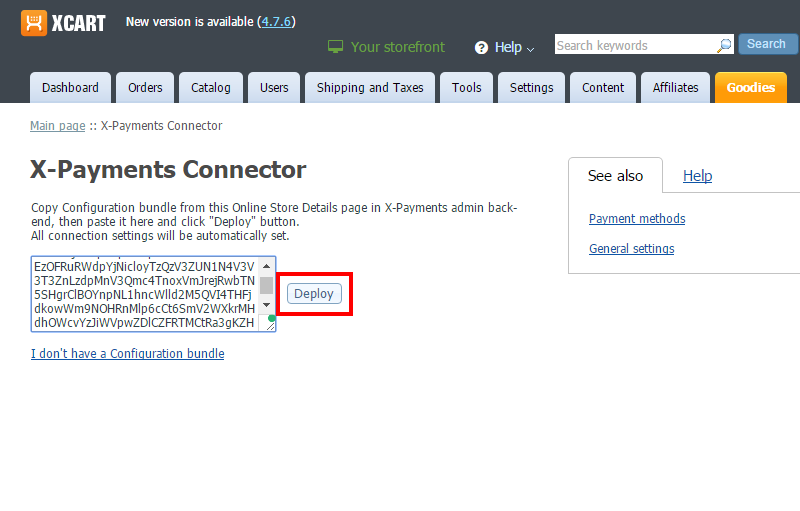
X-Cart will take a few moments to deploy the configuration bundle. Once the deployment has been completed, a success message will be displayed at the top of the page saying that the configuration has been successfully deployed and the payment methods have been synchronized: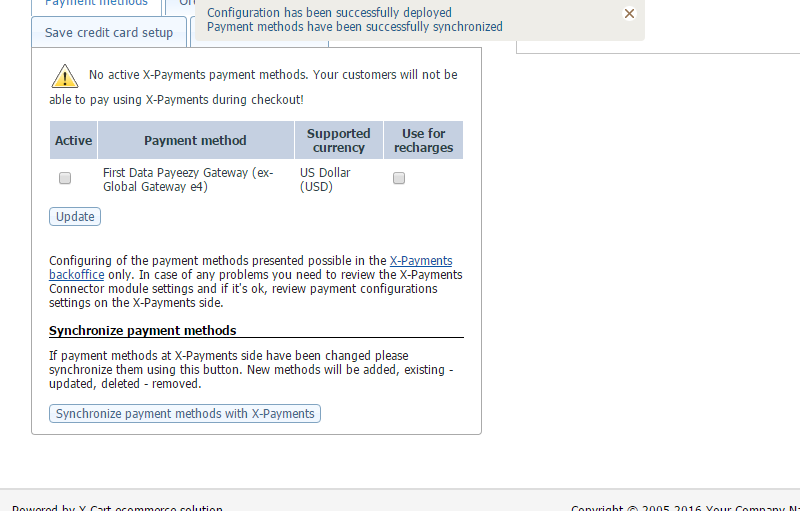
- Now have a closer look at the X-Payments Connector settings page:
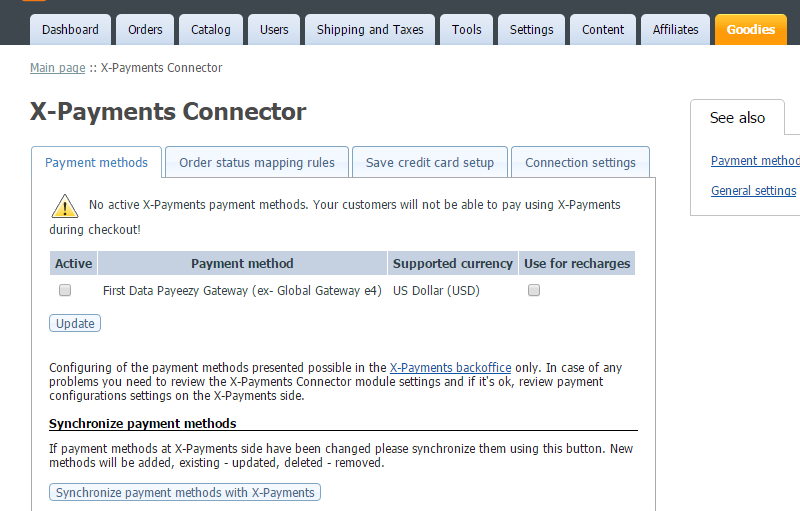
Here you will need configure your store's X-Payments-related settings.- On the Payment methods tab, you can see the list of payment methods that have been imported from X-Payments - according to what payment configurations have been configured and enabled for your X-Cart store on the X-Payments end. After the deployment of the X-Payments configuration bundle in X-Cart, the imported payment methods are not yet active in your X-Cart store. To activate a method, select the checkbox next to its name in the Active column. For methods that you want to use for tokenized payments with saved credit cards, select the Use for recharges checkbox. Be sure to click Update to save your changes:
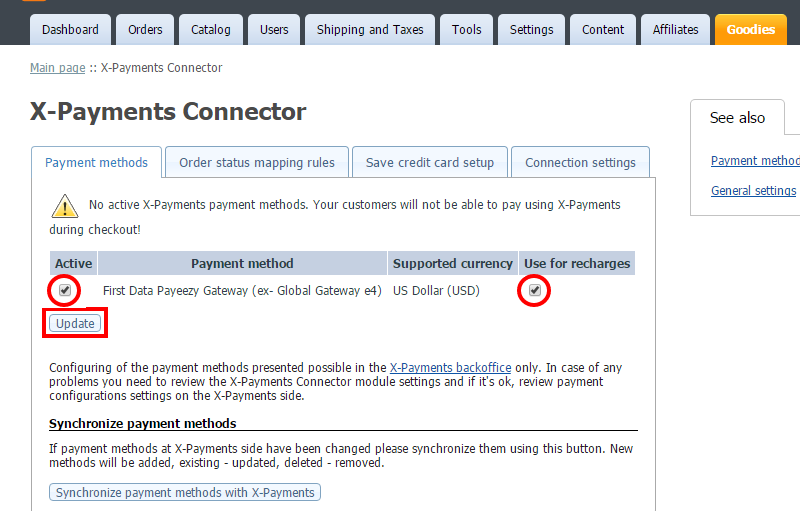
- On the Payment methods tab, you can see the list of payment methods that have been imported from X-Payments - according to what payment configurations have been configured and enabled for your X-Cart store on the X-Payments end. After the deployment of the X-Payments configuration bundle in X-Cart, the imported payment methods are not yet active in your X-Cart store. To activate a method, select the checkbox next to its name in the Active column. For methods that you want to use for tokenized payments with saved credit cards, select the Use for recharges checkbox. Be sure to click Update to save your changes:
Connecting an X-Cart store to X-Payments v1.x (User manual for old X-Cart connector modules)
IMPORTANT NOTE: If you are using a new X-Payments version and an X-Cart version newer than 4.6.3, please read the above section.
Video tutorial
System requirements
To be able to use the X-Payments Connector add-on module, you must have:
- Installed copy of X-Cart v4.3.0 or later;
- Installed copy of X-Payments v 1.0 or later;
- PHP extensions:
- libCurl version >= 7.10;
- OpenSSL extension;
- XML DOM extension, to parse XML data (or DOM extension for PHP 5.x).
Configuring the X-Payments Connector
Before you can start using X-Cart together with X-Payments, you must configure the X-Payments Connector.
To configure the X-Payments Connector:
1. Log in to the X-Cart Admin area.
2. Go to the Modules section (Administration menu -> Modules).
3. If not selected, select the check box for the X-Payments Connector and click Update. This will activate the module.
4. Click on the Configure link for the X-Payments Connector module.
This will open the X-Payments Connector configuration page.
5. Define connection details.
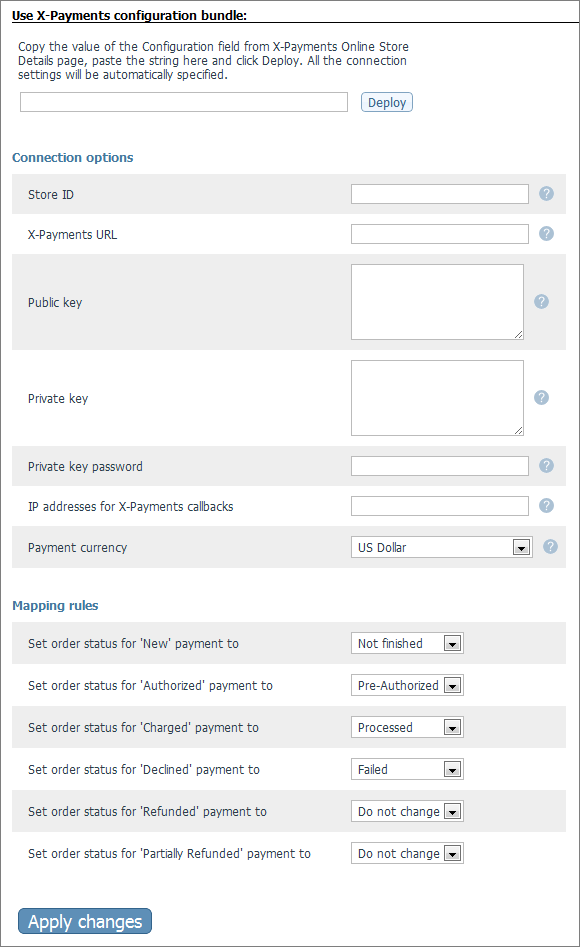
- Copy the value of the Configuration bundle field from the X-Payments' Online Store Details page, paste the string here and click Deploy. All the connection settings will be automatically specified.
The latest versions of X-Payments Connector can automatically get connection settings from the settings of the store. In the older versions, the values are to be specified manually.
- Store ID: Unique value generated in the X-Payments back-end for a particular store. This value allows X-Payments to correctly identify requests coming from this store.
- X-Payment URL: The URL of your X-Payments installation. Make sure the URL is specified correctly, otherwise the module will not be able to connect to X-Payments.
- Encryption key: A key to encrypt requests that the store sends to X-Payments. The key is generated in the X-Payments back-end.
- Decryption key: A key to decrypt responses and callback requests that the store receives from X-Payments. The key is generated in the X-Payments back-end.
- Decryption key password: A password to decrypt the Decryption key. The password is generated in X-Payments back-office.
- IP addresses for X-Payments callbacks: enter IP address of the server where X-Payments is installed. "127.0.0.1" can not be used here. If you are using a hosted X-Payments plan read this FAQ. For better understanding what IP address to put here see X-Payments:How_It_Works#Callback_from_X-Payments_to_the_store
6. Set the mapping rules you require.
The mapping rules are used to synchronize the transaction statuses in X-Payments with the statuses of the respective X-Cart orders. To associate an X-Payments transaction status with an X-Cart order status, choose the order status from the drop-down box in the column on the right.
For example, if you associate the entry "Set order status for 'Charged' payment to" on the right with the value "Processed" from the drop-down box on the left, changing the status of an X-Payment transaction to "Charged" will automatically change the status of the respective order in X-Cart to "Processed".
7. Click the Save button.
Making a test transaction
To test the module settings and connection with X-Payments, click the Test module button. If the module is configured properly, a 'Test transaction successfully completed' message is displayed at the top of the page.
Importing the X-Payments payment methods into X-Cart
To be able to use the payment methods defined in X-Payments you should import information about them from X-Payments.
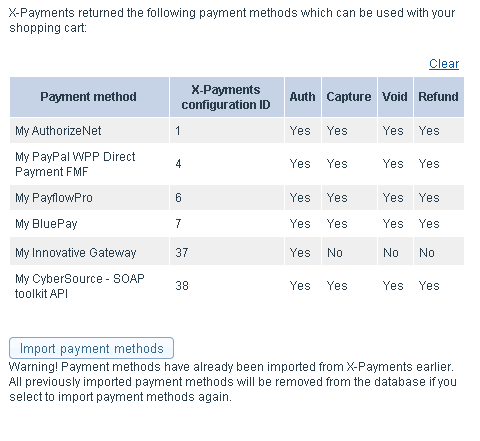
First, click the Request payment methods from X-Payments button, and X-Payments will return a list of payment methods available for this shopping cart.
After you have reviewed the list of available payment methods, click Import payment methods and proceed with the next step - adding and enabling X-Payments payment methods in X-Cart admin area.
Adding and enabling X-Payments payment methods in X-Cart
To be able to use X-Payments payment methods, you need to add and enable them in X-Cart admin area.
- In the Admin area of your X-Cart store, go to the Payment methods page (Settings->Payment methods).
- On the Payment methods page, click the Payment gateways tab to open the section where you select payment gateways:
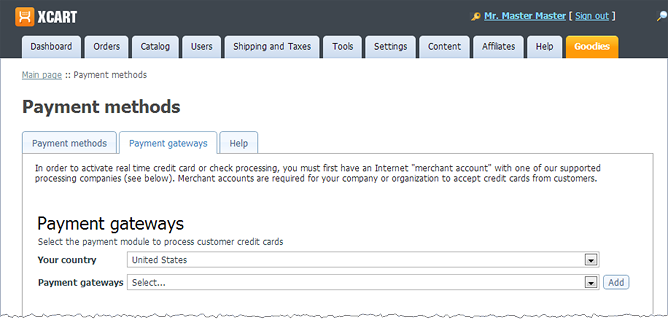
- Use this section to select the payment methods you have configured in X-Payments:
First, choose your country of business from the Your country box to ensure that you see only payment gateways available for you country: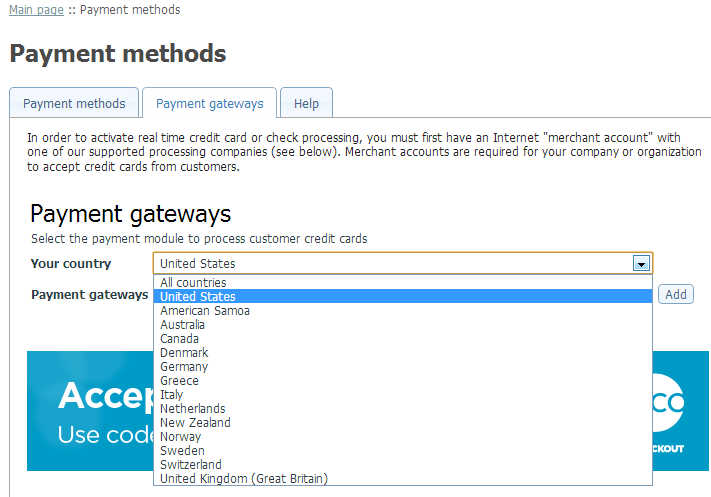
Then, choose the method you have imported from X-Payments from the list in the Payment gateways selector (Methods imported from X-Payments can be found under the X-Payments payment methods section title):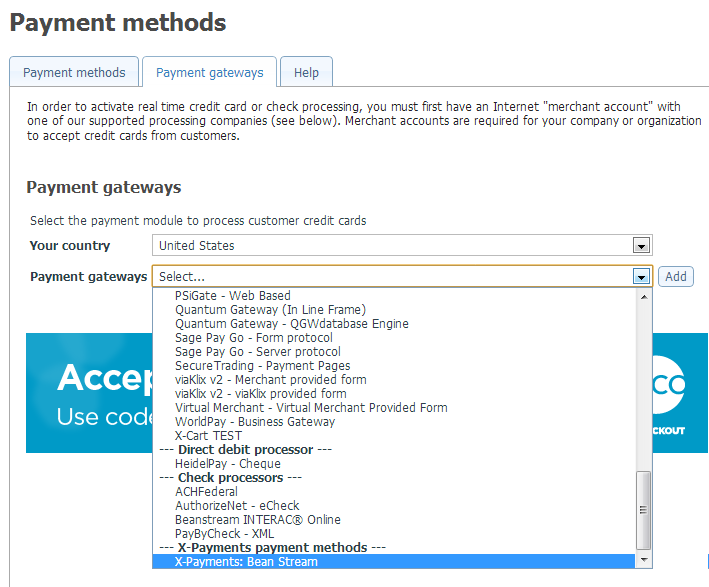
- Click Add. The payment method will be added.
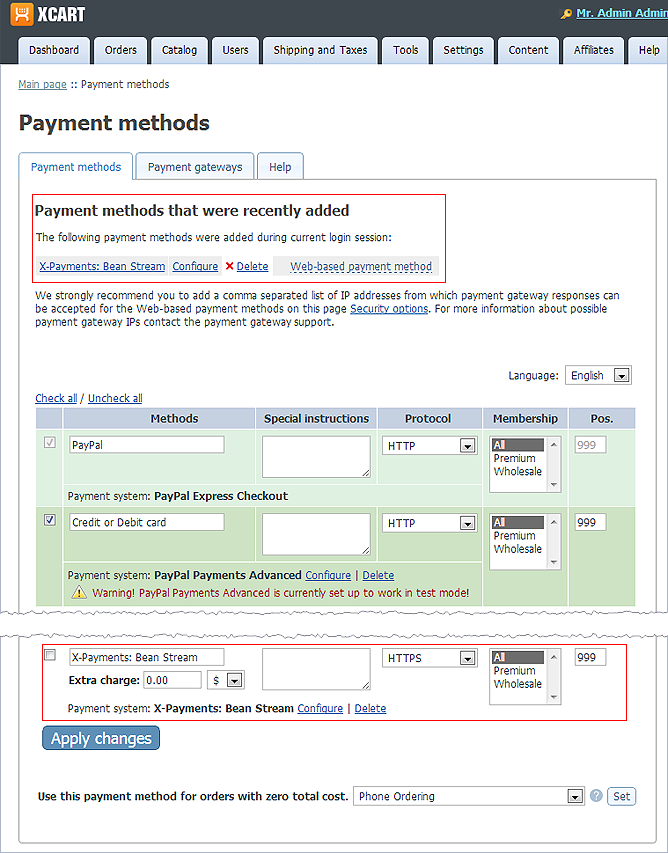
Now, if you click the Payment methods tab, you will be able to see the newly added payment method in the Payment methods section:
You can check its configuration by clicking the Configure link opposite its name.
Note that for X-Payments payment methods it is not possible to change the configuration using X-Cart's user interface. Should you need to change anything, you will have to make the changes in X-Payments and then import and add the method in X-Cart again.
After the payment method has been added, you need to enable it:
- Locate the payment method you have added in the list of payment methods. You may need to scroll down the form because new methods are added to the end of the list.
- Select the check box to the left of the payment method name.
- Click Apply changes. The payment method will be activated.
You can edit or delete the added X-Payments payment method like any other payment methods in X-Cart.
Enabling iFrame support for One-Step-Checkout
An online store based on X-Cart version 4.1.9 (or later) and connected to X-Payments version 1.0.6 (or later) with one of the latest versions of the X-Payments connector can be configured to display the secure X-Payments generated form for entering payment card information directly on the checkout page in X-Cart - as opposed to the mode in which this form is displayed on a separate page. For the buyer everything looks as though they were entering their credit card details within your regular checkout routine. Embedding the form generated by X-Payments into X-Cart's checkout page is made possible by use of iFrame. iFrame integration for X-Cart&X-Payments checkout routines is part of the X-Payments connector functionality, so it is essential that you should use an up-to-date version of the connector to enjoy this feature. Older versions of the connector (released prior to September 2014) do not support the iFrame feature, so if you last updated your X-Payments connector for X-Cart prior to September 2014, or purchased your X-Cart prior to September 2014 and continue to use the built-in X-Payments connector that came with it, you must update your X-Payments connector be able to use the iFrame feature. Newer X-Payments connector versions (released after September 2014) already include support the iFrame feature, but we still recommend updating to the latest connector version available to ensure that your connector has all the latest features and fixes.
Steps to enable displaying the payment card form in iFrame:
- In your X-Cart store's Admin back end, go to the X-Cart Connector settings page and enable the "Use iframe" option (If you are using an older X-Cart versions, this may be called "Use lite interface").
- Make sure the "API version" field on the same page is set to "1.2".
- In your X-Payments Admin back end, go to the Online Store Details page for your store and enable the "lite" template there.
Here's also a video for how to enable the iFrame feature in X-Cart working with X-Payments:
|
