Difference between revisions of "X-Cart:Magnifier"
(→Installing and Uninstalling X-Magnifier) |
(→Enabling and Configuring X-Magnifier) |
||
| Line 169: | Line 169: | ||
===Enabling and Configuring X-Magnifier=== | ===Enabling and Configuring X-Magnifier=== | ||
| + | |||
| + | ==== Enabling X-Magnifier ==== | ||
| + | |||
| + | After X-Magnifier add-on module is installed, you need to log into the Admin area of your store and enable it: | ||
| + | |||
| + | # Go to the '<u>Modules</u>' section of the store's administration back-end (<u>Administration menu->Modules</u>). | ||
| + | # In the list of modules and add-ons, find the name '<u>Magnifier</u>' and select the check box opposite it. | ||
| + | # Click the Update button at the bottom of the list. | ||
| + | |||
| + | ==== Configuring X-Magnifier ==== | ||
| + | |||
| + | After activation, the add-on module needs to be configured: | ||
| + | |||
| + | 1. Go to the section '<u>General settings/Modules options->Magnifier options</u>': | ||
| + | |||
| + | [[Image:_xmagn_options.gif|545px]] | ||
| + | |||
| + | 2. Adjust X-Magnifier options: | ||
| + | |||
| + | 3. Use the option '<u>Image viewer style</u>' to select a skin for your image viewer. You can choose one of the pre-designed skins provided with the module or create a skin of your own (More information is available in the chapter [http://www.x-cart.com/xcart_manual/online/skinning_x_magnifier.htm Skinning X-Magnifier] of this manual) | ||
| + | |||
| + | 4. Select the check box '<u>Display image viewer in a popup window</u>' if you wish the image viewer to be displayed in a popup window. Unselect if you wish the viewer to appear in a standard X-Cart dialog box. When displayed in a standard X-Cart dialog box, the image viewer work area is non-resizable. | ||
| + | |||
| + | 5. Use the options '<u>Image viewer width</u>' and '<u>Image viewer height</u>' to specify the size with which you would like the image viewer to open. When the image viewer is displayed in a popup window, the size defined by these options is used as the initial size of the image viewer frame (the size used before the user resizes the popup window in which the viewer is displayed). When the image viewer is displayed in a standard X-Cart dialog box, the size defined by these options is the only size available. | ||
| + | |||
| + | {{Note1|'''Important''': The minimum size at which the image viewer can be displayed with all its elements fully visible is 420 x 420 pixels. It is not recommended to use widths and heights smaller than these values.}} | ||
| + | |||
| + | {{Note|Images being uploaded for use with X-Magnifier are sliced so that the size of their Level 0 images will fit the size of the image viewer work area corresponding to the image viewer size defined by the current values of the options 'Image viewer width' and 'Image viewer height'. This means that if you change the values of the options 'Image viewer width' and 'Image viewer height' after having uploaded some images for X-Magnifier, the size of the previously created Level 0 images will no longer fit the work area displayed at the default size. This will not prevent normal operation of the module; however, if you wish all Level 0 images to be the same size as the default size of the image viewer work area, you might want to re-slice all your previously uploaded images. See the section [http://www.x-cart.com/xcart_manual/online/managing_x_magnifier_images.htm#reslicingimages Re-slicing images] in the chapter 'Managing X-Magnifier Images' for details.}} | ||
| + | |||
| + | 6. Click the '''Save''' button. | ||
| + | |||
| + | {{Note|Please do not change any values defined in the file <u>modules/Magnifier/config.php</u> except the value of '$magnifier_sets["save_init_image"]' as it can cause a negative effect on the look of X-Magnifier image viewer and the functionality of X-Magnifier in general.}} | ||
===Managing X-Magnifier Images=== | ===Managing X-Magnifier Images=== | ||
Revision as of 14:30, 22 January 2010
Contents
Overview
What X-Magnifier does
X-Magnifier enhances delivery of image content in an X-Cart-based online store and provides enriched media experience to the store website visitors. Designed to facilitate presentation of high-resolution images on the Internet, X-Magnifier add-on module provides a Flash-based viewer that allows your store visitors to examine large images of your product items in detail and, possibly, even to save some time and traffic while doing so. Customers can freely zoom in and out on any area of an image, as well as drag the image around in the viewer work area to examine every detail of the item displayed. No image quality loss occurs during magnification, so your customers are provided the ultimate viewing experience at any magnification level.
X-Magnifier add-on module provides the following key features:
- Support for images of up to 2000 x 2000 px in size without image quality loss
- Smooth zooming and panning
- Unlimited number of zoomable images for any product in the store
- Skinnable image viewer, 2 skins included
- Resizable image viewer popup window
- Support for GIF, JPEG and PNG image formats
- Advanced tool for creating thumbnail icons
- Image repository located on the server file system
- Clear layout of all interface elements
- Ease of back-end administration
X-Magnifier add-on module is a valuable acquisition for any online store, but it is especially recommended for stores selling watches, jewelry items, home decorations, kitchen and tableware, cell phones and digital cameras, apparel and accessories, toys, antiques, artwork and various collectibles.
How X-Magnifier Works
X-Magnifier at a glance
The storefront part of the add-on provides an image viewer based on Macromedia Flash technology. The viewer allows website visitors to zoom and pan high-resolution images quickly and easily, regardless of connection speed. Images that can be displayed in the viewer are uploaded onto the server through X-Cart's administration back-end and are stored on the server file system in a multi-resolution tiled format which allows the user's browser to download only small amounts of data while an image is being panned within the viewer work area or zoomed to display an increasing level of detail.
Levels and tiles
The outstanding performance of X-Magnifier add-on module in displaying large high-resolution images even on a slow Internet connection is explained by the way these images are served to the user's web browser. Instead of providing to the browser an entire full-size large image, X-Magnifier gives the image away gradually in small portions.
After you upload an image into the store for the purpose of showcasing it in X-Magnifier viewer, this image is processed by the module in a certain way, which results in creation of levels and tiles for this image. Levels correspond to the magnification steps that the image will go through when being zoomed in the viewer. Tiles are small pieces of the image that will be loaded into the viewer at each magnification level.
The number of levels that is created for an image is defined dynamically and depends on the image size. The highest level corresponds to the largest scale at which a user will be able to view the image when zooming in.
The process of zooming and panning is as simple as switching between magnification levels and loading the necessary tiles. Whenever a user opts to change an image's zoom scale or to shift the image in the viewer work area, X-Magnifier calculates the magnification level at which the image needs to be displayed and allows the image viewer to load only those image tiles that represent portions of the image area selected by the user.
Flash technology ensures smooth transitions between the different magnification levels, so 'jumps' from one level to another are transparent to the user.
Each image tile loaded onto the user's computer is cached, so when the user chooses to return to an area of the image that he or she has already viewed, the tiles of that area do not have to be loaded from the server again, but are drawn from cache.
Due to that only a few tiles are loaded into the image viewer every time the user zooms or pans the image, load time and the amount of traffic consumed remain much smaller than they would be if the user's browser were loading entire large images.
Supported image formats and image size limitations
Source files for uploading into X-Magnifier can be in GIF, JPEG and PNG formats.
X-Magnifier does not have any limitations as to the file size of images that can be used. The file size of an image can be as large as you wish, as long as the server on which your store is running can handle it.
As to image dimensions, the maximum image size that X-Magnifier can handle without compression is 2000 by 2000 pixels. You can upload images of any size (which may be especially convenient when uploading pictures directly from your digital camera without resizing them in an external program), but all images larger than 4 megapixels will be automatically shrunk by the module to 2000 pixels along the maximum dimension.
Image repository
All the files produced by X-Magnifier as a result of processing an image that has been uploaded into the 'Images for X-Magnifier' section of your store are put into the directory '/xcart/images/Z/ProductID/ImageID', where '/xcart' is the directory of your X-Cart installation, 'ProductID' is a number representing the ProductID of the product for which the image was added and 'ImageID' is a number representing the ID of the image as assigned by X-Magnifier add-on module (For example, '/xcart/images/Z/63/1' would be a folder containing image files for the first zoomable image of a product whose ProductID is defined as 63).
Every '/xcart/images/Z/ProductID/ImageID' directory in your store will contain the following elements:
- a set of JPEG image files containing image tiles for different magnification levels (The filenames of such files are defined in the format n_x_y.jpg, where n stands for the level number, x and y - for the coordinates the tile is supposed to have in the layer matrix);
- level_0.jpg - an image file providing the smallest scale representation of the image that a user will be able to see in the viewer;
- thumbnail.jpg - an icon that will represent the image in the image nav bar of X-Magnifier image viewer if more than one zoomable images are added for the product;
- description.xml - an XML file describing the structure of levels of the image.
When moving your X-Cart-based store to a new location, be sure to move the directory '/xcart/images/Z/' with it retaining the directory structure.
Image format conversion issues
Note that any GIF and PNG images that you upload for use in X-Magnifier as zoomable images are automatically converted to JPEG. Please be aware that format conversion may have an undesirable effect on images that have transparent areas: as JPEG format does not support transparency, image areas that used to be transparent in GIF and PNG will no longer look transparent after the images are processed by X-Magnifier. In GIF files, transparent areas become black, while PNG transparency may turn into shades of gray.
Installing and Uninstalling X-Magnifier
System Requirements
Before trying to install the add-on module, make sure you have the following:
- A web server with support for PHP 4.0.6 or better. Make sure the configuration file php.ini meets the following requirements:
- safe_mode must be disabled.
- file_uploads must be enabled.
- register_long_arrays must be enabled (only for hosts using PHP5; not required for PHP4).
- Access to a MySQL database. Make sure you have the following information:
- your MySQL server name,
- your database name,
- your username and password for access to the database.
- X-Cart 4.1.11 installed on the server.
- GDLib 2.0 or better installed on the server. GDLib must be compiled with libJpeg (Ensure that PHP is configured with the option --with-jpeg-dir=DIR, where DIR is the directory where libJpeg is installed).
- Flash Player 8.0 or better is required for viewing of X-Magnifier images on the client side. Users of systems on which the Flash Player is not installed will be offered to download it.
Installing X-Magnifier
To install X-Magnifier add-on module, follow these steps:
1. Ensure that the system requirements are met. 2. Obtain an X-Magnifier distribution package from the section Software distributives of X-Cart File Area. The package you need is contained in the archive file x-magnifier-x.y.z.tgz, where x, y, z are your X-Cart version numbers. 3. Decompress the distribution package archive to a local directory on your system using your favorite compression program (any archiver with support for TAR files). 4. Upload the resulting files to the server directory where your X-Cart is installed.
5. Point your browser at the location of your store with the addition of /install-xmagnifier.php to launch the Installation Wizard.
6. Follow the Wizard's instructions to install the add-on module at your site:
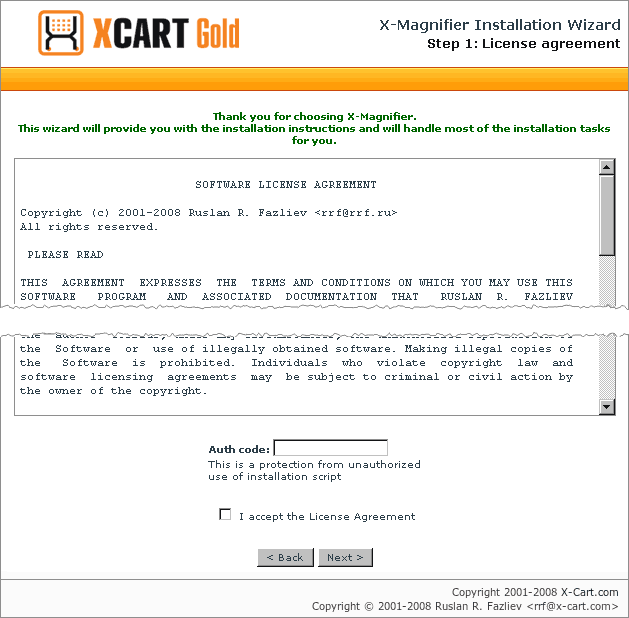
Step 1: License agreement.
This step provides a Software License Agreement for you to accept and requires you to enter your Auth code:
Please read the Software License Agreement. If you agree to all of the terms of this agreement, select the 'I accept the License Agreement' check box.
Use the field 'Auth code' to enter your Auth code. Auth code is a special authentication code that protects your X-Cart installation. Such a code was issued to you when you first installed your X-Cart-based store. If you do not remember your Auth code, you can look it up in X-Cart's file include/install.php or in the 'Summary' section of your store's Admin zone.
Click the Next button.
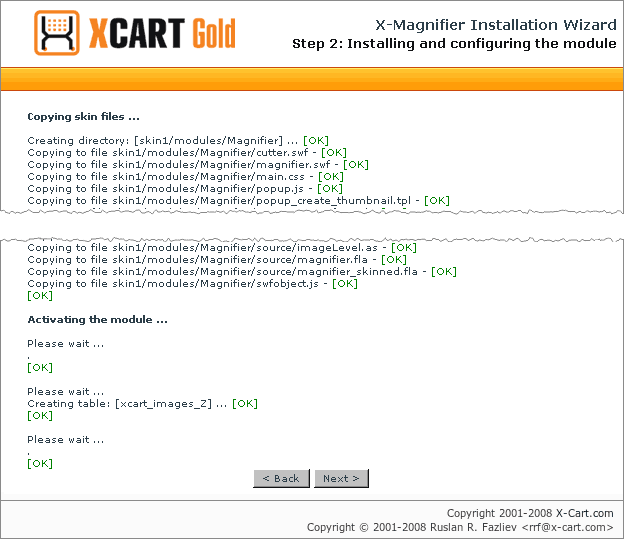
Step 2: Installing and configuring the module.
The installation script will create a directory skin1/modules/Magnifier and copy the module files to that directory. It will also make changes to the database by creating the necessary database tables.
Click Next to proceed.
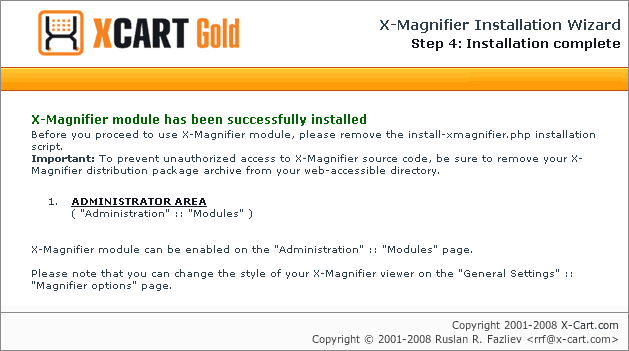
Step 3: Installation complete.
This is the final step of X-Magnifier installation. It notifies you that the module has been successfully installed and provides a link to the administration back-end of the store where you can enable and configure the module.
Uninstalling X-Magnifier
To uninstall X-Magnifier, do the following:
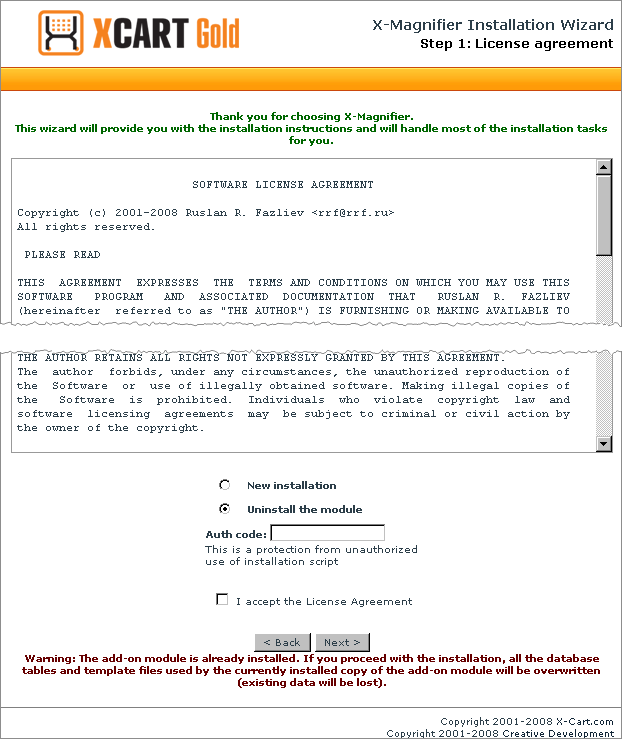
1. Launch the Installation Wizard (Point your browser at the location of your store with the addition of /install-xmagnifier.php) 2. At the first step of the Installation Wizard (Step 1: License agreement), select the 'Un-install the module' radio button.
Click the Next button.
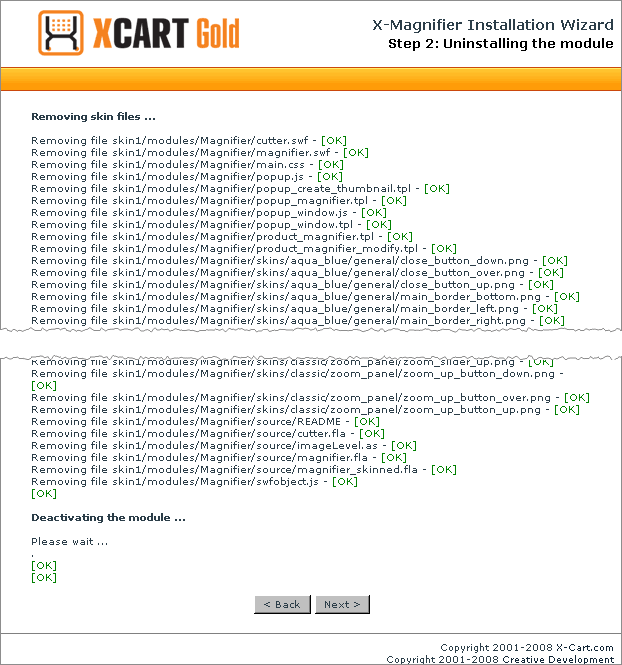
3. The Installation Wizard will remove the module files and deactivate the module (Step 2: Uninstalling the module).
Click Next to proceed.
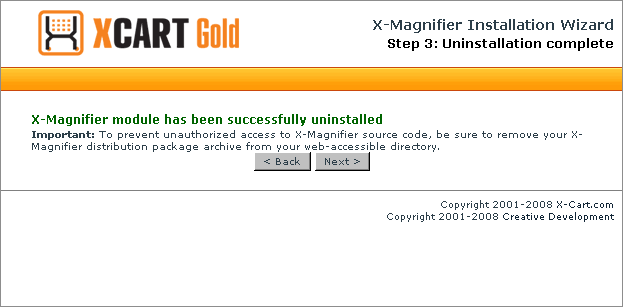
4. Uninstallation complete is the final step of the uninstallation process. It notifies you that the module has been successfully uninstalled.
Please note that the Wizard will not automatically remove the directory '/xcart/images/Z/'. You will need to remove it manually.
Admin Interface
Enabling and Configuring X-Magnifier
Enabling X-Magnifier
After X-Magnifier add-on module is installed, you need to log into the Admin area of your store and enable it:
- Go to the 'Modules' section of the store's administration back-end (Administration menu->Modules).
- In the list of modules and add-ons, find the name 'Magnifier' and select the check box opposite it.
- Click the Update button at the bottom of the list.
Configuring X-Magnifier
After activation, the add-on module needs to be configured:
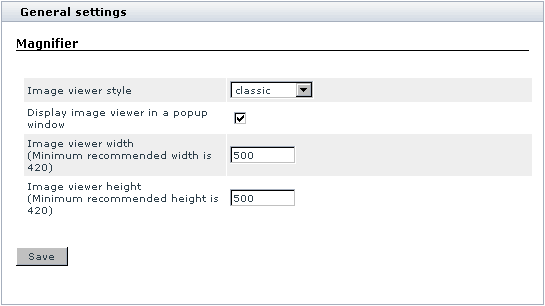
1. Go to the section 'General settings/Modules options->Magnifier options':
2. Adjust X-Magnifier options:
3. Use the option 'Image viewer style' to select a skin for your image viewer. You can choose one of the pre-designed skins provided with the module or create a skin of your own (More information is available in the chapter Skinning X-Magnifier of this manual)
4. Select the check box 'Display image viewer in a popup window' if you wish the image viewer to be displayed in a popup window. Unselect if you wish the viewer to appear in a standard X-Cart dialog box. When displayed in a standard X-Cart dialog box, the image viewer work area is non-resizable.
5. Use the options 'Image viewer width' and 'Image viewer height' to specify the size with which you would like the image viewer to open. When the image viewer is displayed in a popup window, the size defined by these options is used as the initial size of the image viewer frame (the size used before the user resizes the popup window in which the viewer is displayed). When the image viewer is displayed in a standard X-Cart dialog box, the size defined by these options is the only size available.
6. Click the Save button.
