Difference between revisions of "X-Cart:AmazonCDN"
(→Setting up Janrain) |
m (moved Draft:AmazonCDN to X-Cart:AmazonCDN) |
(No difference)
| |
Revision as of 10:26, 29 April 2013
Contents
Overview
The Amazon CDN is an add-on for integrating your X-Cart with Amazon S3 and Amazon Cloudfront. The services allow to delegate content delivering routine to fast and stable CDN (Content delivery network) provider.
Why CDN
A content delivery network or content distribution network (CDN) is a system of computers containing copies of data, placed at various points in a network so as to maximize bandwidth for access to the data from clients throughout the network. A client accesses a copy of the data near to the client, as opposed to all clients accessing the same central server, so as to avoid bottlenecks near that server. (source:Wikipedia)
следуйющий фрагмент из http://www.wpbeginner.com/beginners-guide/why-you-need-a-cdn-for-your-wordpress-blog-infographic/
надо переписать
- Speed – Once we started using a CDN on our site, the site got faster.
- Crash Resistance – Thanks to you guys for sharing our articles, we have received huge spells of traffic from social media on some of our articles. If it wasn’t for the proper CDN and caching setup, then our site would crash so many times. CDN allows us to distribute the load to multiple servers instead of having 100% traffic to our main server thus making it less likely to crash.
- Improved User Experience – Since we started using a CDN, we have noticed a decline in bounce rate on our site. Furthermore, we have also seen increased in pageviews and numbers of pages viewed by each user. So clearly a fast site means improved user experience.
- Improvement in SEO – Google has clearly stated that faster sites tend to rank higher in Search Engines. We have noticed our site ranking higher once we did the optimization on our site.
Key benefits of using the Amazon CDN module in X-Cart
System requirements and installation
System requirements
To be able to successfully install and use the Amazon CDN module, you need a working copy of X-Cart GOLD or PRO v4.1.12, 4.2.3, 4.3.2, 4.4.х or 4.5.х installed on your server. Make sure that the version of the integration module matches the version of your copy of X-Cart.
Installation and removal
To install the Amazon CDN module:
- Obtain a distribution package for the Amazon CDN integration module by downloading it from the File Area section of your X-Cart Account account. The distribution package is archived in the filexamazoncdn-x.y.z.tgz, where x, y and z indicate the version of the module. Make sure the version of the module matches the version of your copy of X-Cart.
- Copy the distribution package to the X-Cart root directory on your server or hosting account.
- If you use a Windows-based server or a UNIX-based server without terminal access:
- a) Extract the contents of the archive with the Amazon CDN module files to a directory on your system using your favorite compression program (WinZIP or any other archiver that supports TAR files).
- b) Use an FTP client to upload all the files extracted from the archive (retaining the directory structure) to the X-Cart root directory on your server or hosting account.
- If you use a UNIX-based server with terminal access:
- a) Use an FTP client to upload the archive with the Amazon CDN module distribution package to the X-Cart root directory on your server or hosting account.
- b) Decompress the package by typing the following command:
tar -xzvf xamazoncdn-x.y.z.tgz
- Important: Make sure that you maintain the directory structure while unpacking and uploading the distribution package; otherwise, some critical files can be overwritten!
- In a web browser, run the installation script at httр://www.example.com/install-xamazoncdn.php, replacing the variable www.example.com with the real domain name, where your X-Cart is installed.
- Enter the Auth code, accept the License Agreement and click the Next button.
- The installation script copies the files and activates the module. Click the Next button to continue.
- The installation script generates a new system fingerprint. Click the Next button to complete the installation.
- Use the ADMINISTRATOR AREA link to log in to the Admin area.
To uninstall the Amazon CDN module:
- In a web browser, run the installation script at http://www.example.com/install-xamazoncdn.php, replacing the "www.example.com" with the real domain name, where your X-Cart is installed.
- Choose the Uninstall the module option, enter the Auth code, accept the License Agreement and click the Next button.
- Once the installation script has removed the Amazon CDN module files and deactivated the module, click the Next button to complete the uninstallation.
- On the Uninstallation complete screen, click Next to leave the Wizard.Important: After you have uninstalled the Amazon CDN module, make sure to remove the module's distribution package from your web directory as well.
Enabling the Amazon CDN Module in X-Cart
Once you have installed the Amazon CDN module, enable it in your store's Admin area.
To enable the Amazon CDN module:
- Log in to the X-Cart Admin area and go to the Modules section (Settings menu->Modules).
- In the list of modules, find the Amazon CDN item and select the check box next to it.
- Click the Apply changes button to apply the changes.
Now you can leave alone your X-Cart for a few moments and switch to Amazon AWS.
Setting up Amazon AWS
To be able to use the Amazon CDN module, you must get an account with Amazon AWS and obtain API keys for integration (See the section Getting a Amazon AWS account below). If you already have a Amazon AWS account, simply log in to the Amazon AWS Dashboard
and create a new application for your X-Cart store (select 'Create Application' on the drop-down list below the Janrain logo on your Dashboard), then proceed to the Configuring providers section.
Getting a Amazon AWS account
The Amazon S3 and Amazon Cloudfront services is available on subscription basis with free amount of service. You can find information about prices and SLA at <URL>
To get a Amazon AWS account:
- Visit [1], and locate a Sign Up button towards right side of this page. Click the button and follow instructions.
- Based on your current subscription levels with Amazon.com, you may see different signup wizards.
- As soon as you finish sign up process, a welcome email will arrive in your inbox.
- This mail will contain the link (longer one) which will take you to ‘ AWS Access Identifiers ' [1] page.
- On this page, you will find Access key and Secret key . These keys are located at right side.
- Your access key is visible but your secret key, which serves as a password, is hidden within "+" sign.
- You need these two keys to start working with Amazon S3 Services.
That is all; you now have a Amazon AWS account and an API keys that will allow you to use Amazon CDN at your store.
Configuring Amazon services
Once you've got API keys, Configure the module fro your API keys.
здесь описать дополнительные шаги на амазоне если они есть
Configuring the Amazon CDN Module in X-Cart
Now, tell your X-Cart what it should do with all the stuff you have just set up -- configure the Amazon CDN module that you installed a few steps earlier.
To configure the Amazon CDN module in your X-Cart Admin area:
- Log in to the X-Cart Admin area.
- Select Settings -> Modules on the menu.
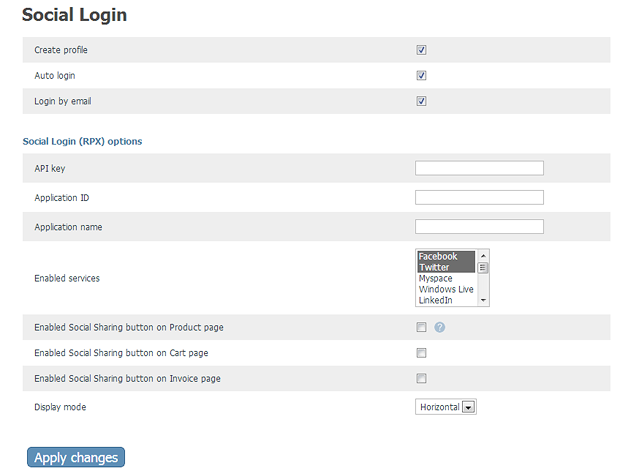
- Scroll down until you see the Amazon CDN module item and click on the Configure link opposite it. The Amazon CDN module configuration page opens.

- Adjust the Amazon CDN module configuration settings and click the Apply changes button.
Amazon CDN module configuration settings
Here are a few notes on the Amazon CDN module configuration settings:
- API key and Application ID: These values can be obtained on the Deployment->Application Settings page in your Janrain Dashboard.
- Application name: This is the name of the application you created for your store.
- Display mode: This setting defines the layout of the user login block.
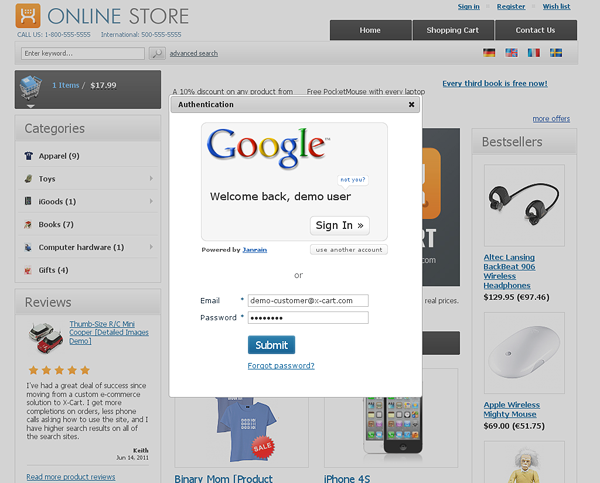
The Horizontal option produces the following result:
The Vertical option gives the following result:
Manage Images loacations
Troubleshooting
Error: Whoops, you've been directed here by mistake
The 'Application name' specified in X-Cart admin back end on the module configuration page is incorrect. Janrain replaces dots with dashes, thus to fix the issue you should do the same, e.g. if your app name is yourappname.domain:
yourappname.domain -> yourappname-domain
You should specify "yourappname-domain" as an 'Application name' in X-Cart.
