Draft:X-Cart:X-Payments Subscriptions and Installments
Contents
Overview
System requirements and installation
See X-Payments Subscriptions and Installments module installation
Getting started
To begin using the X-Payments Subscriptions and Installments module on your system:
- Ensure that your system meets the module system requirements, then install and enable the module:
- Configure the module:
Once these steps are completed, the module is ready to use.
Instructions for using the X-Payments Subscriptions module are available here:
Activating and deactivating the module
It is possible to temporarily disable (deactivate) the installed X-Payments Subscriptions and Installments module. Deactivation stops the module from operation, but it does not remove any settings you made to the module configuration nor clear any data that was generated during the period that the module was in operation. If you wish to completely remove all the data related to using the module, you need to uninstall it. See X-Payments Subscriptions and Installments: Uninstallation for more info.
To disable the module:
- Go to the Modules section of your store's Admin area (Settings menu->Modules).
- Locate the entry for the X-Payments Subscriptions and Installments module and unselect the respective check box on the left.
- Depending on the version of X-Cart you are using, you may need to apply the change by clicking the Apply changes button. The module will be disabled.
If the module X-Payments Subscriptions and Installments is installed, but not active, you can enable (activate) it.
To enable the module:
- Go to the Modules section of your store's Admin area (Settings menu->Modules). This opens the list of your store's installed modules.
- Locate the entry for the X-Payments Subscriptions and Installments module and select the respective check box on the left.
- Depending on the version of X-Cart you are using, you may need to apply the change by clicking the Apply changes button. The module will be enabled.
Configuring the module
After the module has been installed and enabled, it needs to be configured.
To configure the module:
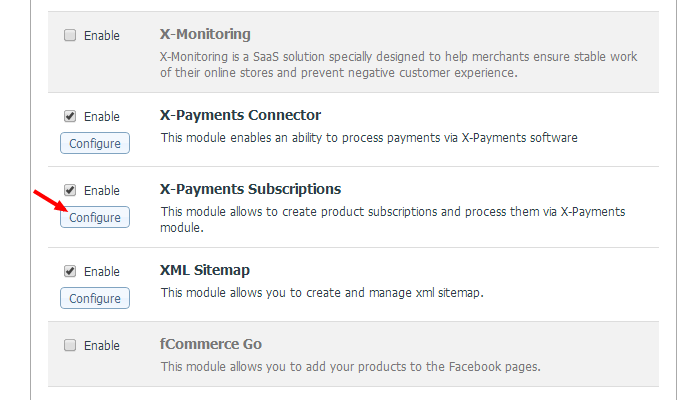
- In the Modules section of your store's Admin area (Settings menu->Modules), locate the entry for 'X-Payments Subscriptions and Installments' module and click the Configure link next to it:
The X-Payments Subscriptions and Installments module configuration page opens: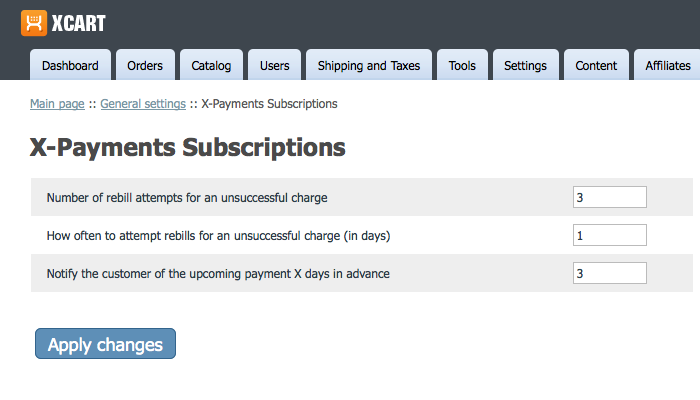
- Adjust the module configuration settings:
- Number of rebill attempts for an unsuccessful charge: Use this to set the maximum number of times that your store must try to charge the customer's card after the initial attempt to process the subscription payment was unsuccessful.
- How often to attempt rebills for an unsuccessful charge (in days): Specify how often your store must attempt to charge the customer's card again if the initial attempt to process the subscription payment was unsuccessful. For example, if you set this value to "3", your store will attempt to charge the customer's card once every three days - until the payment can be processed successfully.
- Notify the customer of the upcoming payment X days in advance: Specify how many days in advance the store must notify customers with active subscriptions of the next subscription payment.
- Click Apply changes.
This is it. Now your module has been configured.
Admin/Provider experience
Setting up a subscription product
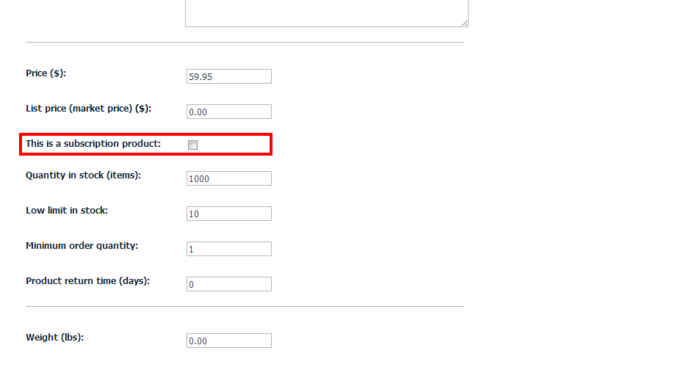
Subscription products are set up the same way as any other product in your store's catalog. The only difference is that, when you create a subscription product, you need to select the option This is a subscription product in the product's details:
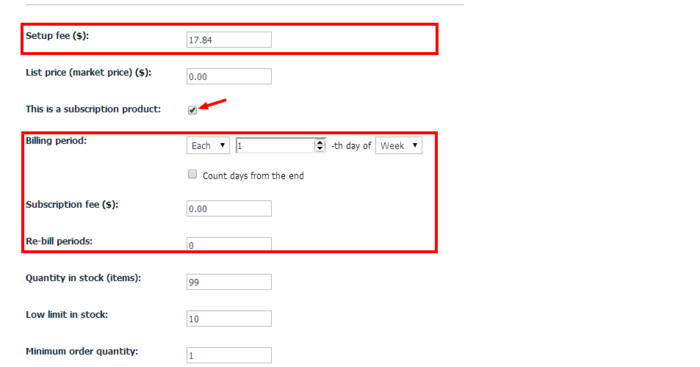
Once you have selected this option, the product details page is expanded with a few new fields:
You must adjust these fields to configure the subscription:
- Setup fee: (This replaces the product's Price field.) Enter a setup fee for your subscription.Note: The product's selling price will be calculated as Setup Fee + Subscription Fee (see below). If you do not intend to charge any subscription setup fee to the buyer, set the Setup fee to "0" (zero); in this case, the product's selling price will equal the Subscription fee.
- Billing period: Set the frequency of recurring payments for the subscription.
Examples:
"[Each] - [ 2 ]-th day of - [Week]" = Every Monday
"[Each] - [ 2 ]-th day of - [Week] + Count days from the end" = Every Saturday
"[Every] - [ 2 ]- [Week(s)]" = Biweekly
"[Every] - [ 1 ] - [Year(s)]" = Once a year - Subscription fee: Specify the amount that the buyer will need to pay for each period for the duration of the subscription. The Subscription fee cannot be "0" (zero).
- Re-bill periods: Specify the number of times that the buyer should be re-billed for this product after the initial payment (This setting determines the duration of the subscription). By default, this is set to 0, which corresponds to an infinite subscription.
- Setup fee: (This replaces the product's Price field.) Enter a setup fee for your subscription.
After adjusting the subscription fields, be sure to save the changes.
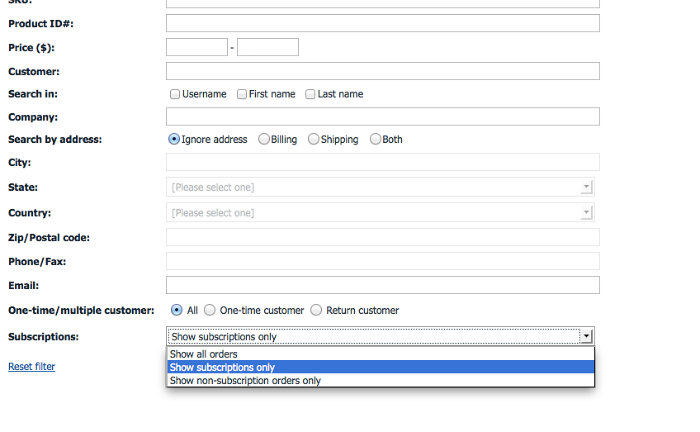
Searching for subscription orders
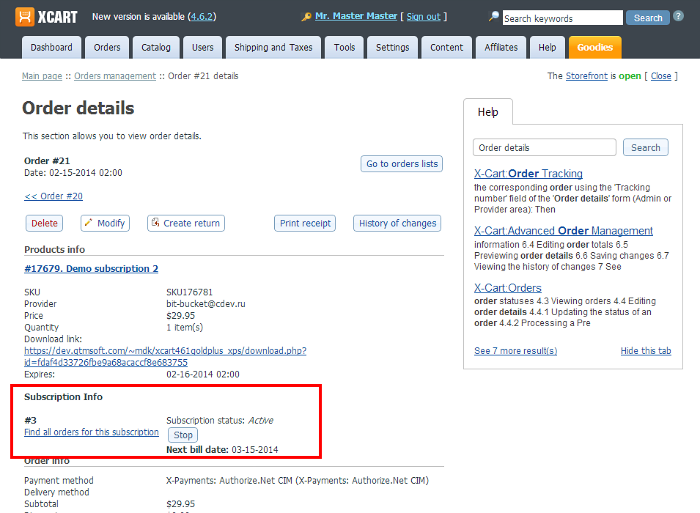
Viewing subscription information for specific orders
Stopping/Re-starting a subscription
Customer experience
Buying subscription products
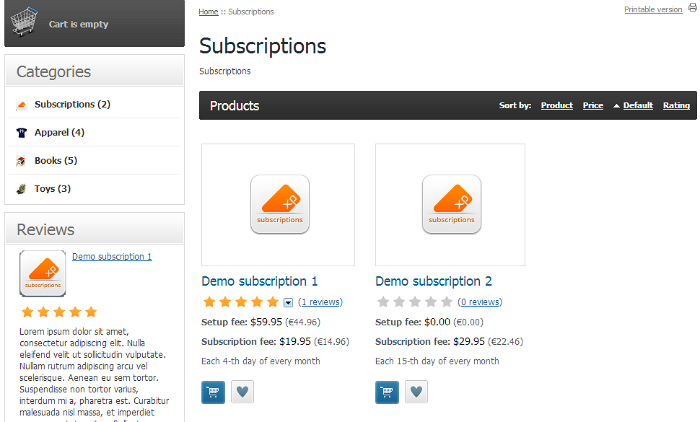
In your store's catalog, subscription products look similar to regular, non-subscription products:
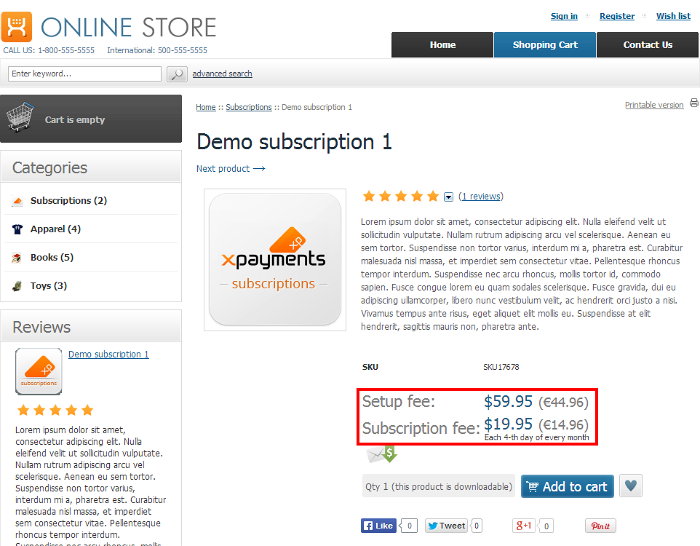
However, instead of the product's price, the product information for subscription products includes the product's setup fee and subscription fee. These can be seen both in the products list and on the product details page:
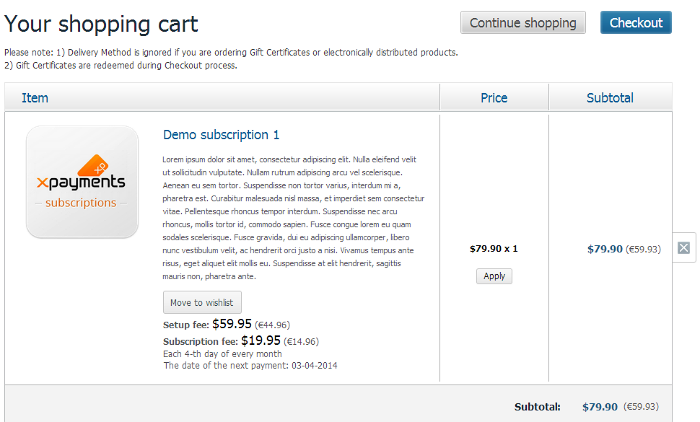
In the shopping cart, the price of a subscription product is calculated as the sum of the product's setup fee and subscription fee:
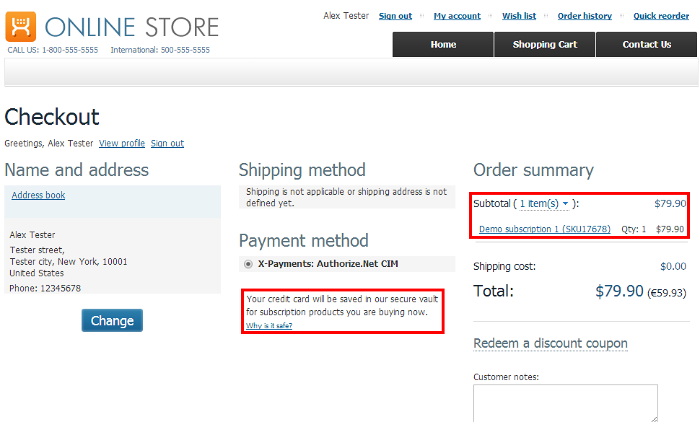
Subscription products use X-Cart's regular checkout routine, and the process of purchasing a subscription is the same as purchasing a regular product in X-Cart integrated with X-Payments. The only difference is that in the background X-Cart Connector passes a special attribute to X-Payments to mark this sale as using tokenization for future re-bills.
As subscription products can only be purchased using X-Payments payment methods that support tokenization, all other payment methods, if they are used by the store, are automatically disabled for customers checking out with a cart containing a subscription product. At checkout, the customer’s credit card is stored and tokenized via X-Payments automatically, so you do not need to worry about PCI compliance issues.
Once the order is placed, the module adds a new subscription to cron job processing to bill the customer for this subscription according to the subscription related settings (Billing period, Subscription fee and Re-bill periods) in the details of the subscription product.
Viewing subscriptions
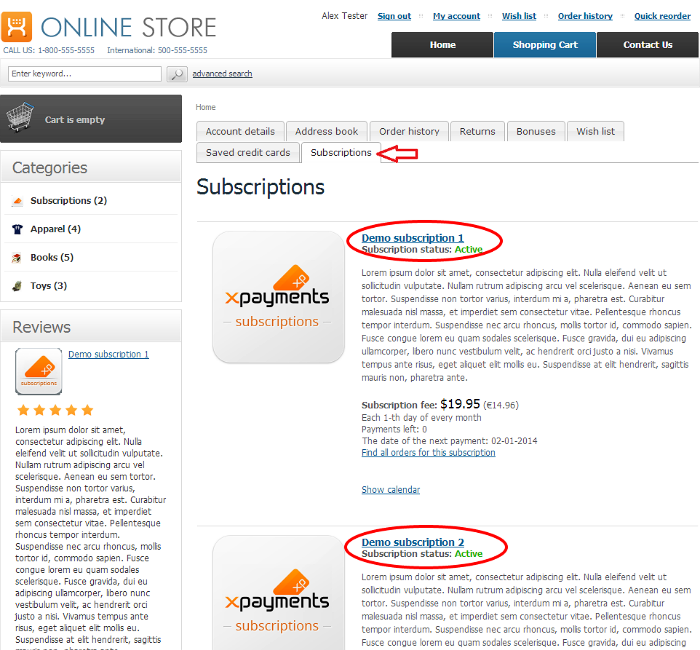
To review their subscriptions, customers use the Subscriptions tab in their accounts. Here they can find comprehensive information about all their subscriptions, including the ones that are currently active as well as the ones that have been stopped.
The subscriptions are displayed as a list:
For each subscription the customer can find out the subscription status, the setup and subscription fees, the number of payments left, and the date of the next subscription payment.
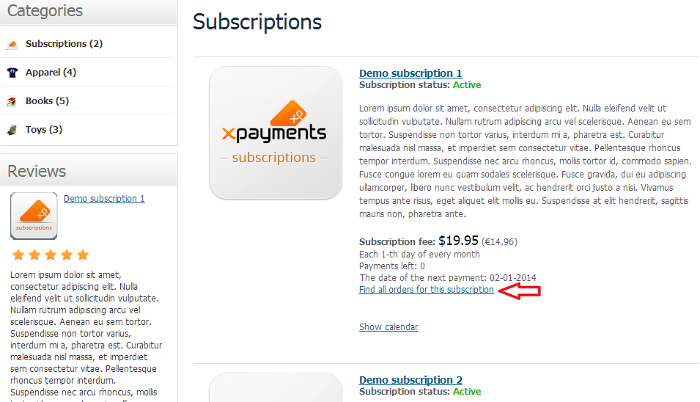
By clicking on the Find all orders for this subscription link, the customer can quickly access all orders associated with the subscription.
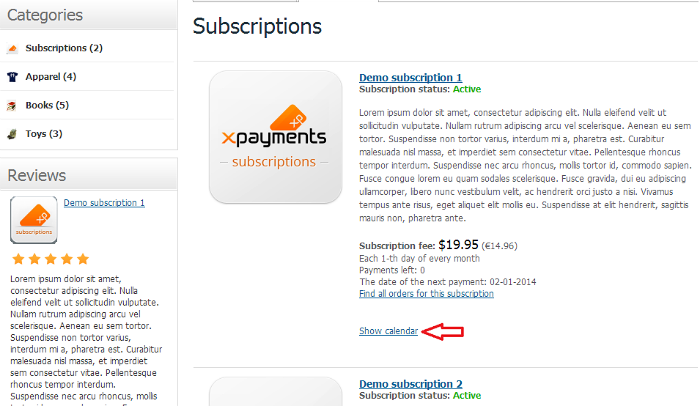
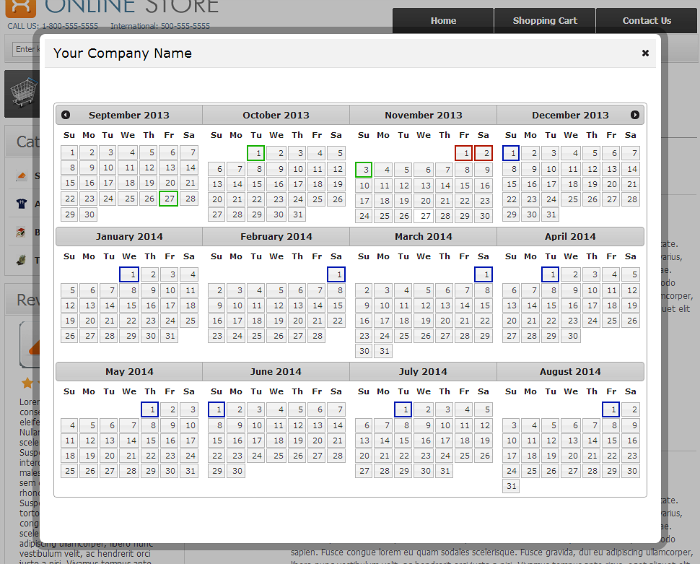
By clicking on the Show calendar link, the customer can view the subscription calendar:
The calendar shows the dates of the past and future payments related to the subscription and color-coded information about the status of each payment (The dates marked by green boxes mean successful payments, red boxes - failed payments, and blue boxes - future payments).
Notifications
The module X-Payments Subscriptions and Installments enables some specific notification messages (see below). To adjust the look/contents of these messages, edit the respective templates.
For X-Cart 4.6.2, the following notification templates are available:
- 1. Notification about the change of subscription status (separate for customer and for orders department):
- /skin/common_files/mail/xps_subscription_status_subj.tpl
- /skin/common_files/mail/xps_subscription_status.tpl
- /skin/common_files/mail/xps_subscription_status_customer.tpl
- /skin/common_files/mail/html/xps_subscription_status.tpl
- /skin/common_files/mail/html/xps_subscription_status_customer.tpl
- This notification is sent if:
- - the subscription has been stopped by admin (eml_xps_subscription_stopped_by_admin_info)
- - the subscription has been stopped after a specified number of failed rebill attempts, as per the module configuration settings (eml_xps_subscription_stopped_info)
- - the subscription has been restarted by admin (eml_xps_subscription_restarted_info)
- - the subscription has been stopped after all the expected subscription payments have been successfully processed (eml_xps_subscription_finished_info)
- In case of a successful subscription payment, a regular order invoice is sent.
- 2. Notification of the upcoming rebill (for customer only):
- This notification is sent to customer a few days before the next subscription payment (the number of days is defined according to the module configuration settings).
- /skin/common_files/mail/xps_upcoming_rebill_subj.tpl
- /skin/common_files/mail/xps_upcoming_rebill.tpl
- /skin/common_files/mail/html/xps_upcoming_rebill.tpl
