LiteCommerce:Setting up Your Online Store for LiteCommerce Integration
To integrate LiteCommerce shopping cart and checkout mechanisms into your existing online store you must first install LiteCommerce in its own directory on your site and populate LiteCommerce database with all the product information, shipping, tax and payment settings as discussed in the sections of this manual.
Next you should modify your existing online store pages to include the key LiteCommerce integration points, namely the shopping cart link and 'Add to Cart' links.
To refer to the shopping cart, you should place a link to the following page 'cart.php?target=cart' located in the root directory of LiteCommerce installation. The full address of the page will look similar to the sample below:
To place an 'Add to Cart' link or button on a product page of your existing store:
- In the Administrator Zone choose the 'Products' section of the 'Catalog' menu. This will redirect you to the 'Search Product' page.
- In the 'Search Product' page find the product that you are working on and click on its name to switch to the 'Product Information' page.
- Choose the 'HTML links' tab.
- Insert the HTML code produced for 'Simple HTML link to add product to cart' or 'HTML button to add product to cart' into your existing product page.
The steps outlined below are all that is needed for proper integration, however you can go further and customize the look of your shopping cart and checkout screens. When LiteCommerce runs in the Checkout Desk mode, it does not utilize the main template of the customer zone 'skins/default/en/main.tpl', but rather uses the 'cart.html' file located in LiteCommerce root directory as a template for the shopping cart and checkout screens. You can customize this file using LiteCommerce Template Editor:
- In the Administrator Zone proceed to the 'Template Editor' section of the 'Look&Feel' menu.
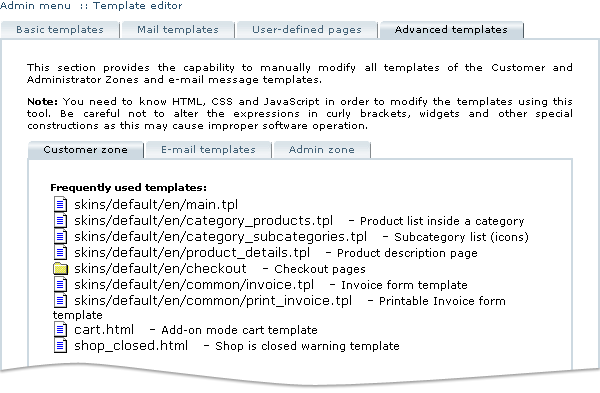
- Select the 'Advanced templates' tab.
- Locate the 'cart.html' file in the list of the frequently used templates (Figure 3-78) and click on it to edit. See the section "Editing Templates" for detailed information on editing the file. Be careful to edit the template only where it says '← YOUR STATIC HTML CONTENT HERE →' and not to modify the rest of the code.
