LiteCommerce:Managing Users
|
For each registered user (customer, administrator or partner) of your online store a user account with full user details is created in the store database. Using the 'Users' section of the 'Management' menu, the store administrator can search for user accounts, review and modify user account information, import user account lists, create and delete accounts. This part of the manual provides details on performing these operations.
Contents
Locating User Accounts
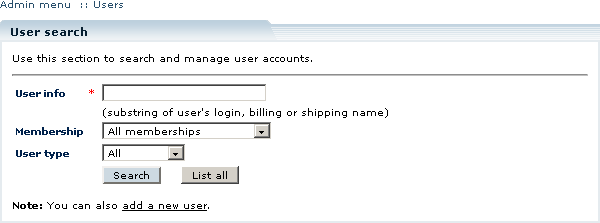
Selecting the 'Users' section from the 'Management' menu opens the 'User search' form (Figure 5-1).
You can search for user accounts that meet your search criteria. The following search parameters are available:
- User info - a text field where a substring of user's account name (e-mail address), billing or shipping name can be specified;
- Membership - a drop-down list of existing membership groups (select the 'All memberships' option if membership level doesn't matter, 'Pending membership' for the list of users who have requested a membership level change that has not been committed yet);
- User type - a drop-down list of existing user types (can be 'Customer', 'Admin' or 'All' in the basic installation of LiteCommerce; select the 'All' option if user type doesn't matter).
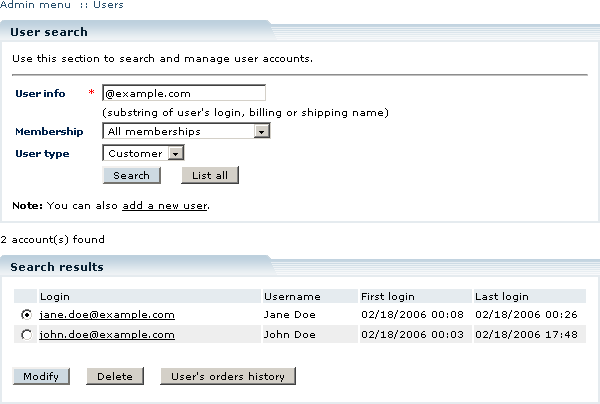
When you have specified the search parameters, click on the 'Search' button to see the list of user accounts that match your search criteria (Figure 5-2). The list shows user logins (e-mail addresses), names of users (comprised of billing first name and last name) and the first and last time the user logged into the store.
After you have located the user account that you needed, you can review and modify user details, delete the account or see the user's order history.
Creating a New User Account
While users can create new accounts using the Customer Zone, sometimes it is important to be able to create new user accounts administrative tools of the Administrator Zone.
To create a new user account, follow the instructions below:
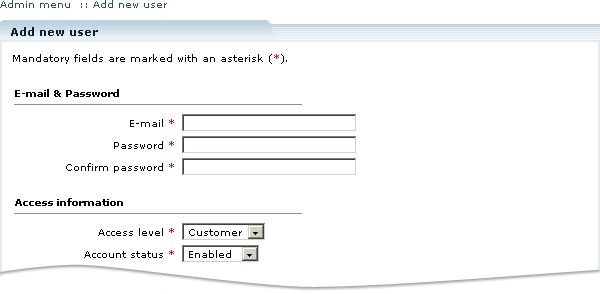
- Select the 'Add new user' section from the 'Management' menu. The screen with 'Add new user' form will appear (Figure 5-5).
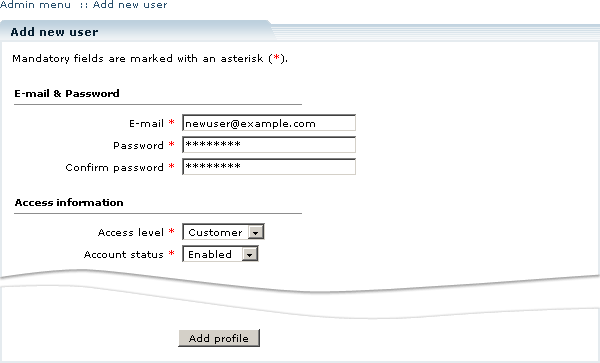
- Type the user profile data in the fields of the form (Figure 5-6), making sure that you fill all the mandatory fields (marked with red asterisks). The fields in the form are identical to the 'Edit profile' form discussed in the section #Modifying a User Account.
- Once you have completed the form, click on the 'Add profile' button.
Modifying a User Account
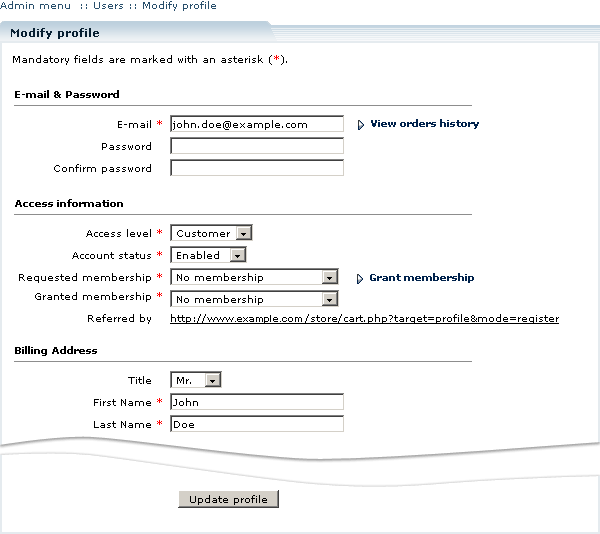
In order to review and modify user account information, locate it using the 'User search' form (see the section #Locating User Accounts for details) and click on the user login name (e-mail address) in the list of search results. Alternatively, you can enable a radio button to the left from the user's e-mail address and click on the 'Modify' button underneath. The 'Modify profile' screen will appear (Figure 5-3).
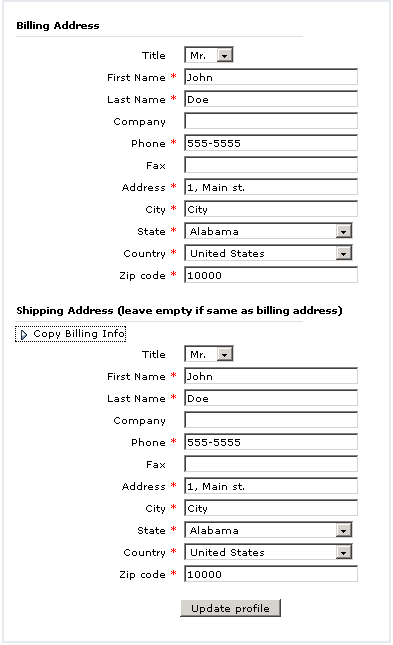
The user data is grouped into 'E-mail & Password', 'Access information', 'Billing Address' and 'Shipping address' data. When editing the user profile make sure that all fields marked with an asterisk are completed.
In the 'E-mail & Password' group the 'E-mail' field must contain a unique and valid e-mail address of a customer. The user's password is not displayed to the store administrator. If a user forgets a password and makes a request to change it, the store administrator can assign a new password to his account by typing the password in the 'Password' and 'Confirm password' fields.
In the 'Access information' group, the 'Access level' field specifies the user's account type (see LiteCommerce:User Account Types page for more details). The 'Account status' field specifies whether a user account is enabled or disabled. If a user account is disabled, the user cannot log into the store, while his account data and order history remain in the database. The 'Requested membership' and 'Granted membership' fields contain the user's membership level information. If membership level specified in the 'Requested membership' field is different from the 'Granted membership' field, it means that a user has filled out a request for membership level change, which has not been approved yet. To approve the request, click on the 'Grant membership' link and the new membership level will be saved automatically (you do not need to click on the 'Update profile' button at the bottom of the form).
The 'Referred by' field is not editable; it provides the store administrator with the information on how the user account was created. If the URL specified in this field contains the 'cart.php' filename, it means that the account was created through the Customer Zone. If it contains the 'admin.php' filename, the account was added by the store administrator using the Administrator Zone. The Affiliate System add-on module also makes it possible to refer customers and partners from other websites.
The 'Billing Address' and 'Shipping Address' groups contain billing and shipping information including the name, telephone and fax numbers and full address of a user. You can leave all the shipping address fields empty - then all the information will be copied from billing address. If shipping address and billing address do not differ much, you do not have to enter all the information again. Click the 'Modify Shipping address' link and then the 'Copy Billing Info' button, and edit the copied information.
Once you are done making changes to the user profile, click on the 'Update profile' button to save your changes. You will see a message informing that the profile has been updated successfully (Figure 5-4).
Deleting a User Account
To delete a user account, locate it using the 'User search' form (see the section #Locating User Accounts for details), enable the radio button to the left from the user's e-mail address and click on the 'Delete' button underneath.
