LiteCommerce:Newsletters
|
LiteCommerce Newsletters add-on module provides your store with a fully-featured newsletter mechanism. The module is intended for posting news announcements at the customer front-end of your online store and distributing those announcements to interested users via e-mail. News messages are grouped into configurable newsletters, each having its own settings and the list of subscribed users. Newsletters can be activated and deactivated, configured to appear in the 'News' section at the customer front-end, distributed to subscribers, or both.
Using newsletters spares your customers the necessity to visit your store every day awaiting for a new product to be announced or for a special sale to come. A visitor who wants to receive updates on your store's offers and deals does not necessarily have to be a registered customer, all he needs to do is to specify an e-mail address to which he would like to receive the announcements. Users who want to cancel the subscription can do so by visiting the URL provided to them at the time of subscription.
This article will guide you through Newsletters add-on module setup and maintenance procedures.
Contents
Administrator Zone
Configuring the Module
After you have successfully installed the Newsletters module, click on the 'Newsletters' module link to configure the module's settings (Figure 3).
The module has the following parameters:
- 'Number of items to show in the news headlines box' defines the maximum number of news headlines to be displayed in the 'News' box at the customer front-end.
- 'Newsletter subscribers per page' defines how many newsletter subscribers will appear simultaneously in the 'Newsletter subscribers' pages.
- 'Subscribers per message send-out screen' allows you to split the newsletter send-out progress screen into multiple pages if the number of subscribers is high, thus avoiding broken web server connections. Set this parameter to '0' if you do not want to split the progress screen.
Managing Newsletters
The store administrator can create and manage multiple newsletters.
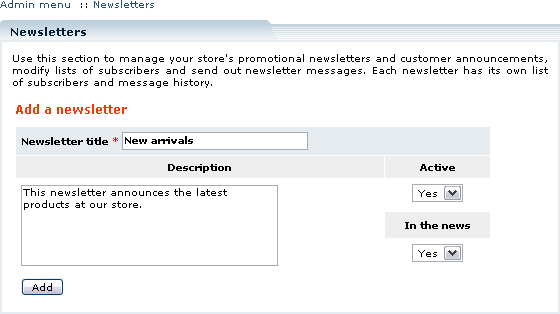
To create a newsletter, follow the steps below (Figure 4):
1. Choose the 'Newsletters' section from the 'Management' menu. The newsletter management page will open.
2. Under the 'Add a newsletter' subtitle:
- Type in the 'Newsletter title' (mandatory).
- Specify the newsletter description in the 'Description' field. The field is visible in both Administrator and Customer Zones.
- Set the value of the 'Active' field to 'Yes' to enable the newsletter, or 'No' to disable. Only active newsletters are available for subscription.
- Set the value of the 'In the news' field to 'Yes' to make its messages appear in the 'News' tab at the customer front-end and in the 'News and announcements' section of the Customer Zone. Active newsletters which appear in the news are available for subscription to unregistered customers. If the value of the 'In the news' field is set to 'No', subscription to the newsletter is only available to registered customers or to the e-mails manually specified by the administrator.
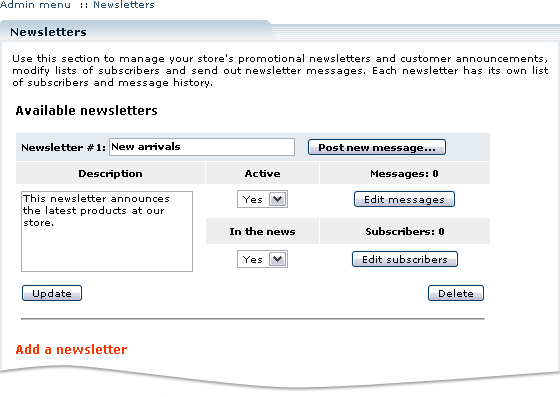
3. Click on the 'Add' button. The newly created list will appear in the list of 'Available newsletters' (Figure 5).
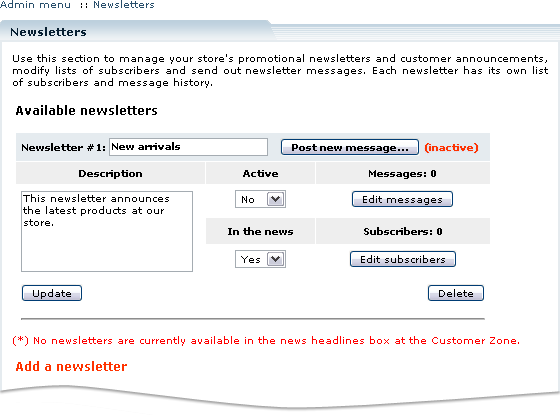
You can make changes to the initial settings of the newsletter: modify the values of the fields as needed and click on the' Update' button underneath the newsletter definition (Figure 6) for those changes to take effect.
After a newsletter has been created, you can manage its subscription list ('Edit subscribers' button) and post messages to the newsletter ('Edit messages' button). To quickly post a message, click on the 'Post new message...' button next to the newsletter title in the newsletter definition.
To delete a newsletter, click on the 'Delete' button below it.
Managing News Messages
After you have created a newsletter, you can start posting news messages to that newsletter.
To post a message, follow the instructions provided below:
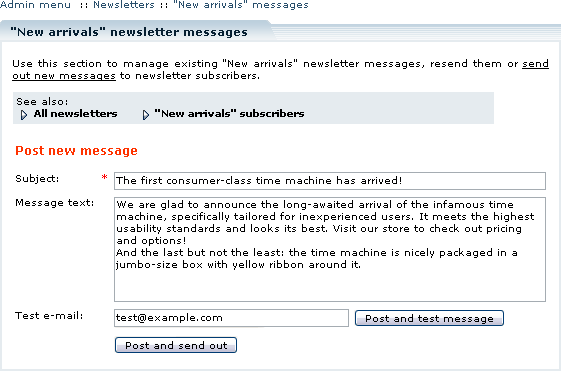
1. In the 'Newsletters' section of the 'Management' menu locate the newsletter in the list of available newsletters and click on the 'Post new message...' button. The 'Newsletter' messages' section will open with the 'Post' new message' form (Figure 7).
2. In the mandatory 'Subject' field type in the title for the news announcement as it will appear in the news headlines box at the customer front-end.
3. In the 'Message text' field type in the full text of the news message either in plain-text or HTML format.
4. Next you must decide whether the message should be sent out to its subscribers or not. To send the message to the newsletter's subscribers right away, click on the 'Post and send out' button. If you want to see how an e-mailed message will look before actually sending it out to subscribers, type in your testing e-mail address in the 'Test e-mail' field and click on 'Post and test message'. You can send a test message to more than one e-mail address by providing a comma-separated list of e-mails in the 'Test e-mail' field, or you can leave the field blank if you do not want to make any testing and just wish to create a message without e-mailing it to anybody.
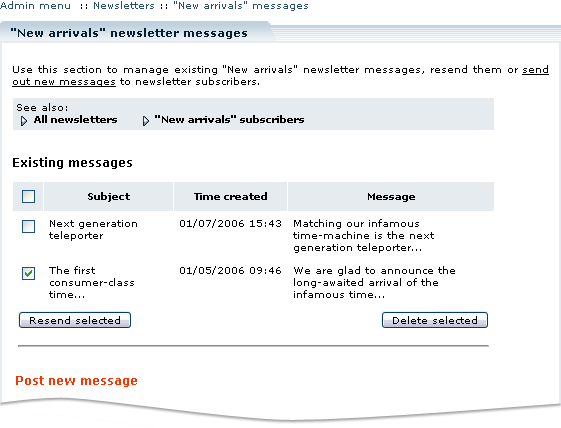
Once posted, a message appears in the 'Newsletter messages' page under the 'Existing messages' subtitle (Figure 8). To manipulate a message in the list you first need to select it by placing checkbox next to it. You can also select and manipulate all messages at once by placing a check-mark in the checkbox at the top of the list. Selected messages can be sent out to the newsletter's subscribers once again by clicking on the 'Resend selected' button (if the message was originally posted to the newsletter without being sent out to the newsletter's subscribers, it can later be distributed to the subscribers using this method). Selected messages can also be removed from the list by clicking on the 'Delete selected' button.
Managing Newsletter Subscriptions
Every newsletter created using the Newsletters module has a subscription list which contains e-mail addresses of its subscribers. Every time a message is sent-out, it is being distributed to all subscribers of a newsletter to which the message belongs.
There are several ways to manipulate newsletter subscriptions:
- e-mails can be added and removed manually one-by-one by the store administrator using the administrator interface;
- subscriber lists can be imported from CSV files;
- visitors can request a subscription by filling out a simple form at the storefront, and registered customers can manage their subscriptions by logging into the store and modifying their profile (see section 'Getting Subscribed' for further details on customer subscriptions). As a spam-protection measure, whenever a visitor or a registered customer requests a subscription, a subscription confirmation e-mail is sent to the specified e-mail address and the request needs to be confirmed finalize the subscription.
To manually add an e-mail to the newsletter subscription list:
- In the 'Newsletters' section of the 'Management' menu locate the desired newsletter.
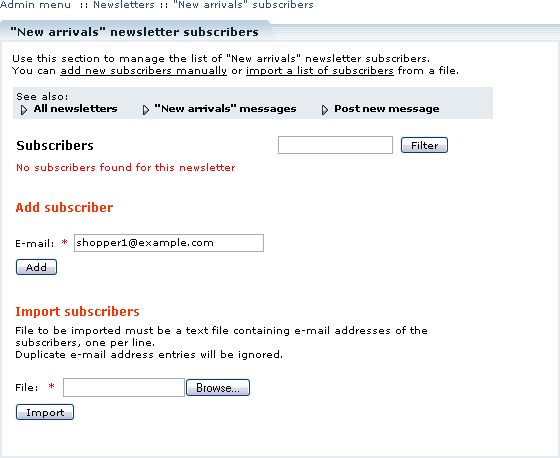
- Click on the 'Edit subscribers' button to switch to the list of newsletter subscribers (Figure 9).
- Locate the 'Add subscriber' subtitle.
- Type in a valid e-mail address in the 'E-mail' field.
- Click on the 'Add' button.
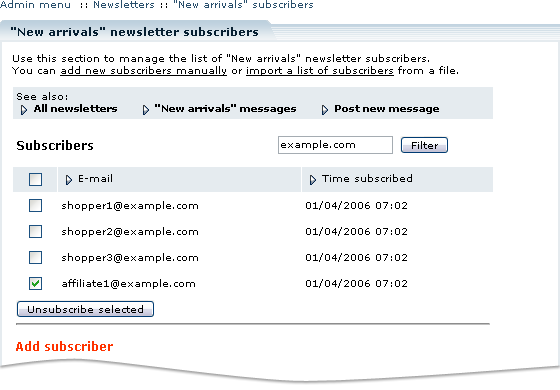
When an e-mail is added, it appears in the list under the 'Subscribers' subtitle. You can see a filtered sub-list of subscribers by typing any part of the desired e-mail address(es) in the field next to the 'Filter' button and clicking the button (Figure 10).
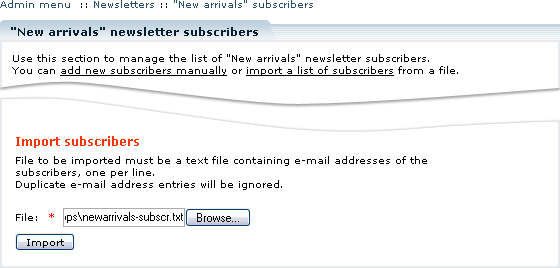
In order to import e-mail addresses from a file (Figure 11):
- Prepare a file with a list of subscribers and save it on your local computer. The file must have a plain text format and contain one e-mail address at each line.
- In the 'Import subscribers' section of the 'Newsletter subscribers' page click on the 'Browse' button and locate the file.
- Click on the 'Import' button. You will see the import progress screen as e-mail addresses get imported into the list.
In order to remove an e-mail address from the subscription list:
- In the ''S'ubscribers' list locate the e-mail you want to remove.
- Place a checkmark next to it (Figure 10) (you can select several e-mail addresses at once; to select all, place a checkmark in a box at the top of the list).
- Click on the 'Unsubscribe selected' button. Unsubscription notification will be sent to the specified e-mail(s) and the specified address(es) will be removed from the subscription list.
Customizing Subscription Notifications
Subscription status change notification e-mail messages are based on templates and can be edited using LiteCommerce Template Editor located in the 'Look & Feel' menu of the Administrator Zone.
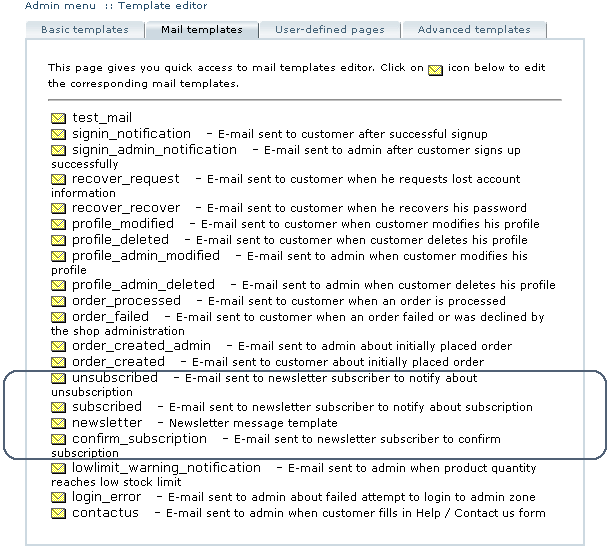
1. Select the 'Mail templates' tab of the Template Editor. This will show the complete list of e-mail templates (Figure 12).
The following four templates are pertinent to the Newsletters add-on module:
- 'unsubscribed',
- 'subscribed',
- 'newsletter' and
- 'confirm subscription'.
2. Choose the template you want to modify and click on its name to edit it.
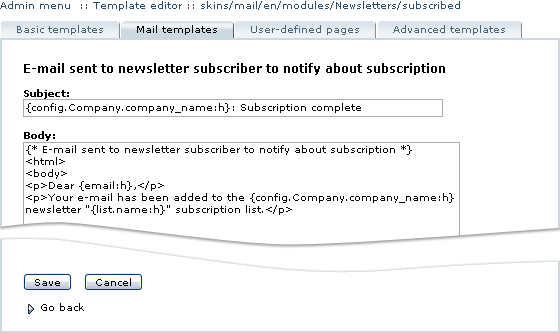
3. Edit the 'Subject', 'Body' and 'Signature' fields of the template (Figure 13). The 'Subject' field is a text field, while the' Body' and 'Signature' fields can be either in plain text or HTML format. Make sure that you do not edit the code placed in curly brackets unless you are sure about what it is and how it works.
4. Save your modifications by clicking on the 'Save' button. Clicking on 'Cancel' discards your changes.
Troubleshooting
If you get errors of the following kind: "Fatal error: Allowed memory size of 16777216 bytes exhausted (tried to allocate 737280 bytes), try to increase the value of the "memory_limit" setting in the etc/config.php file, as described in the LiteCommerce manual:
Configuration Files and Troubleshooting Tools
However, if increasing the value of the "memory_limit" setting still does not help, there is another solution: set the "Subscribers per message send-out progress screen" parameter to a non-zero value, for example 10.
If the parameter is already set to a non-zero value, but the error still persists, try to set it to a smaller value. By default it is set to 100.
Customer Zone
This section demonstrates how introduction of the Newsletters add-on module affects the Customer Zone of your online store.
'News' section
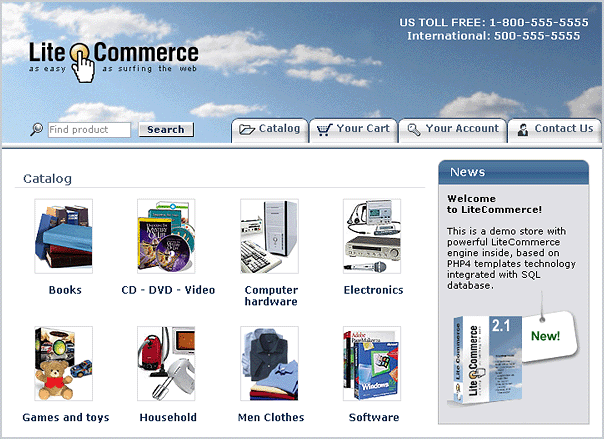
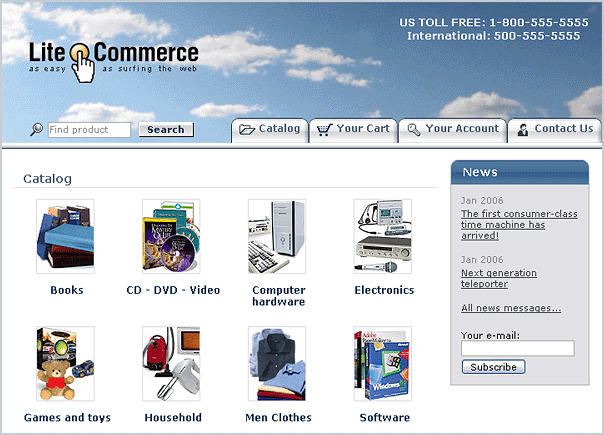
The first notable feature is an upgraded 'News' box at the storefront. While this box existed prior to the installation of the Newsletters add-on module (Figure 14), it could not contain any dynamic content (it was using the basic news template' skins/default/en/news.tpl'). With the introduction of the Newsletters add-on, the 'News' box is updated automatically whenever a new message is added to one of the qualifying newsletters (Figure 15).
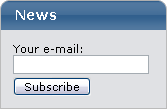
Before any newsletters are added and configured to appear in the news, and messages are added to such newsletters, the' News' box only contains a short subscription form (Figure 16).
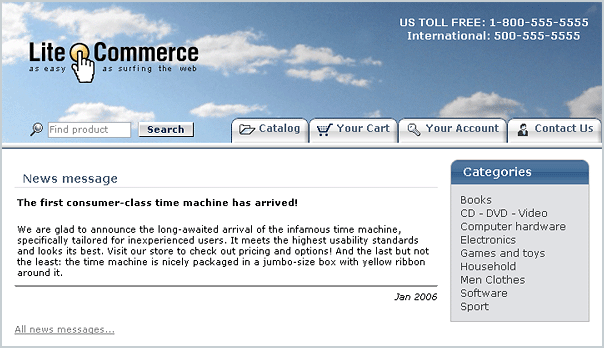
As the store administrator adds messages to the appropriately configured newsletters, their subjects are displayed as news headlines (Figure 15). Clicking on a headline takes a visitor to the page which contains the full text of the news announcement (Figure 17).
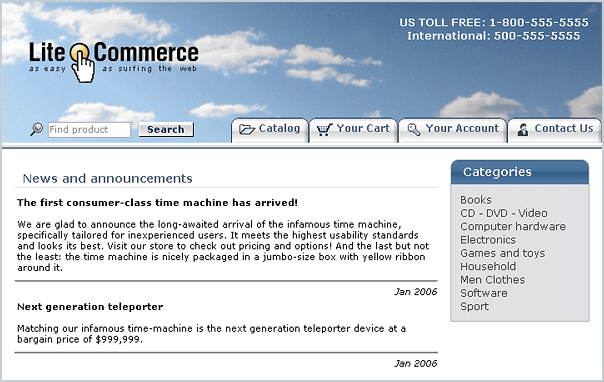
A visitor can see a complete list of all news messages (Figure 18) by clicking on the 'All news messages...' link either in the' News' box or on any news message page.
Getting subscribed
The other feature is the newsletter subscription mechanism, which is available to both registered customers and occasional visitors.
There are two ways to subscribe to the newsletters. The simpler way to subscribe to the store's newsletters is to by typing an e-mail address into the 'Your e-mail' field in the 'News' box and clicking on the 'Subscribe' button underneath it (Figures 15, 16). This way you send a request to get subscribed to all available newsletters for which the 'Active' and 'Show in news' parameters are set to 'Yes'. After submitting a subscription request, you will receive a subscription confirmation e-mail message. The message contains subscription details and a URL he has to visit in order to complete the subscription. The user's e-mail is not added to the subscription list until he confirms the subscription by accessing that URL. After the subscription is confirmed, the user receives a subscription notification for each newsletter to which he has subscribed.
Information on how to unsubscribe from the newsletters is also included in the subscription notification message, as well as in every newsletter message. If a subscriber decides to be removed from the list, all he has to do is visit the unsubscription URL provided there. He then receives an unsubscription confirmation e-mail message for each newsletter to which he had been subscribed.
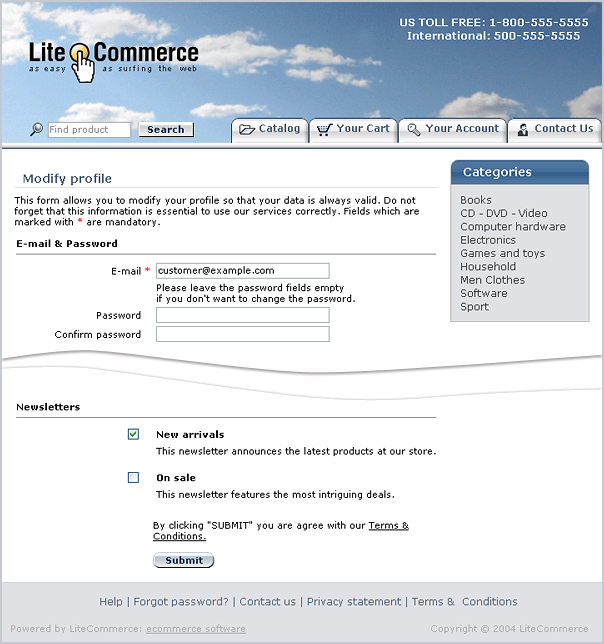
Registered customers can subscribe to all active newsletters, whether they are available in the 'News' box or not, and can manage their newsletter subscriptions more efficiently via their customer profiles. To access the newsletter subscription settings, log into the store, switch to 'Your account' tab and click on the 'Modify profile' button. Customer profile has several groups of settings, one of them is the 'Newsletters' group which lists all active newsletters (Figure 19).
Checkmarks in the boxes corresponding to newsletter titles show which newsletters you are currently subscribed to. Place checkmarks next to the newsletters you want to subscribe to and remove them from those for which you want to cancel the subscription, and then click on the 'Submit' button to save your new settings. No subscription confirmations are necessary. The subscription/unsubscription notifications are sent to the e-mail specified in the profile.

