Draft:X-Cart:Pay with Amazon
Overview
Pay with Amazon
System requirements
To be able to successfully install and use the Pay with Amazon module, you need a working copy of X-Cart version 4.6.2 installed on your server.
Note: If you do not remember the version of X-Cart on which your store is based, you can look it up in the Environment info section of the Summary page in X-Cart Admin area.
Installation
To install Pay with Amazon module:
- Download the Pay with Amazon module archive from the File Area section of your X-Cart Account. Look for a file named like x-pay-with-amazon-x.y.z.tgz, where x, y and z are numbers matching the version of your installed copy of X-Cart.
- Copy the contents of the module achive to the X-Cart root directory on your server or hosting account.
- If you are using a Windows-based server, or a UNIX-based server without terminal access:
- a) Unpack the module archive to a directory on your system using your favorite compression program (WinZIP, 7-Zip or any other archiver with support for TAR files).
- b) Use an FTP client to upload all the files contained in this directory (retaining the directory structure) to the X-Cart root directory on your server or your hosting account.
- If you are using a UNIX-based server with terminal access:
- a) Use an FTP client to upload the module archive to the X-Cart root directory on your server or your hosting account.
- b) Unpack the archive using the following command:
tar -xzvf x-pay-with-amazon-x.y.z.tgz
- (Replace x, y and z with the actual version numbers).
- Important: Make sure you keep the directory structure while unpacking and uploading the module archive, otherwise some necessary files may be overwritten!
- In a web browser, run the installation script httр://<YOUR_XCART_DOMAIN>/install-pay-with-amazon.php replacing <YOUR_XCART_DOMAIN> with the actual domain name of your X-Cart store. This will start the installation wizard. A screen like the following will be displayed:
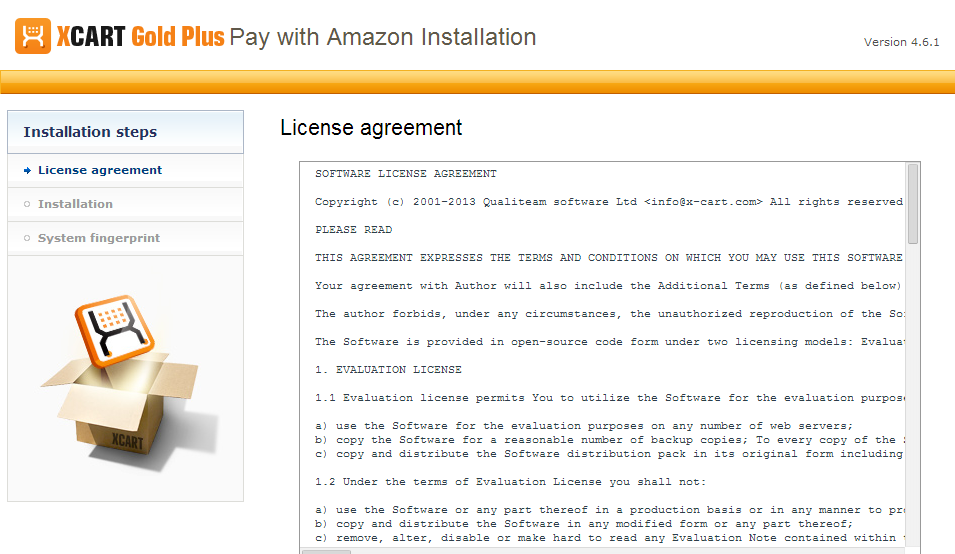
- Carefully read the License agreement, enter the Auth code for your X-Cart installation into the Auth code field and select the "I accept the License Agreement" check box:
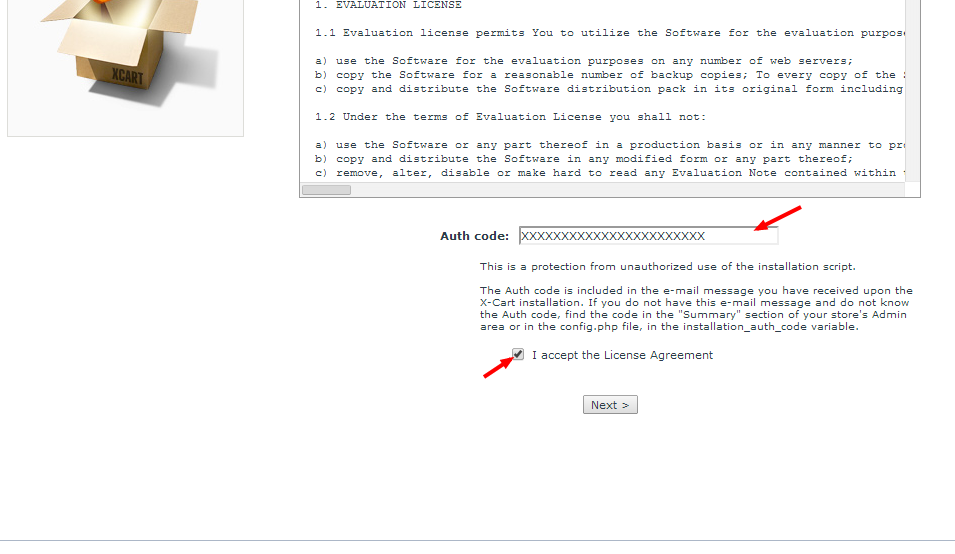
- Click Next to continue. The installation process will start. The installer will make the necessary changes to your X-Cart installation, and the module will be activated:
 Note: If you are using a custom skin, you will need to patch it manually. Otherwise, the module will not work in this skin.
 - Click Next. At the following screen, you will be asked whether you wish a new system fingerprint to be generated:
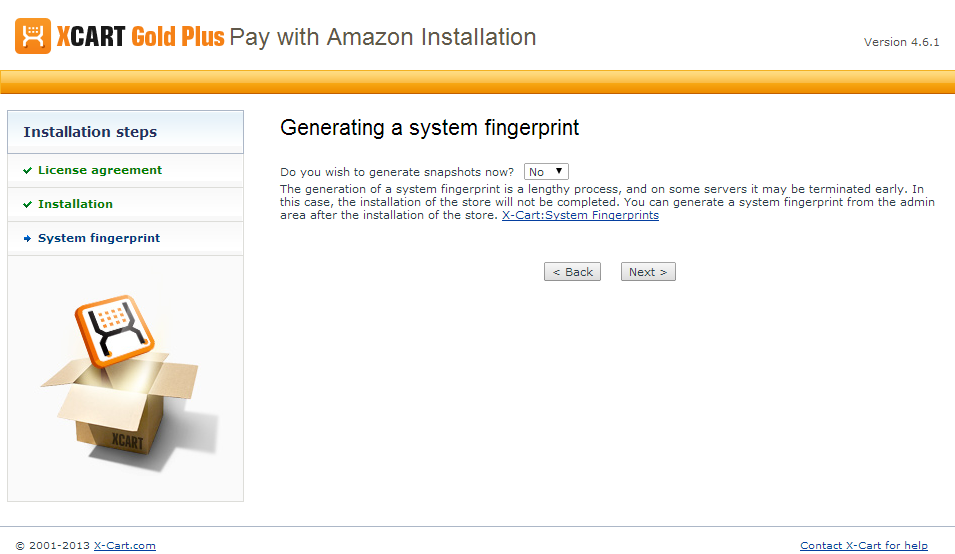
- Make your selection (Yes/No) and click Next. A new system fingerprint will be generated. The process of generating a system fingerprint may take up as long as a few minutes. Once the generation process is completed, click Next.
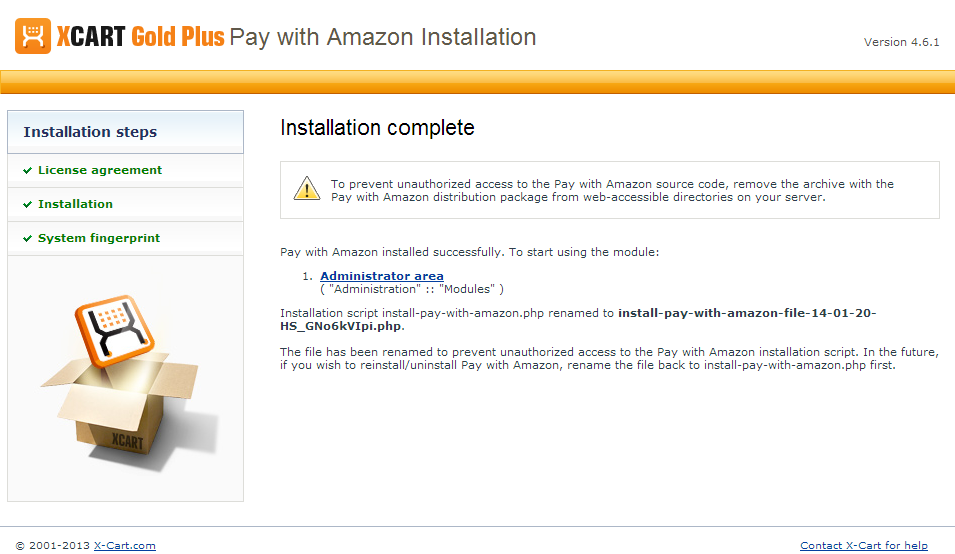
- After clicking Next you should see the "Installation complete" screen: