LiteCommerce:Completing Orders
|
In order to complete an online order, a shopper must pass a checkout procedure. The procedure is slightly different for registered and unregistered shoppers, due to the fact that registered shoppers have their data stored in the customer profile and do not need to specify their address during the checkout.
In order to proceed with the checkout, a shopper would take the following steps:
1. Access and review his shopping cart (Figure 6-3).
2. In the shopping cart page, click on the 'CHECKOUT' button.
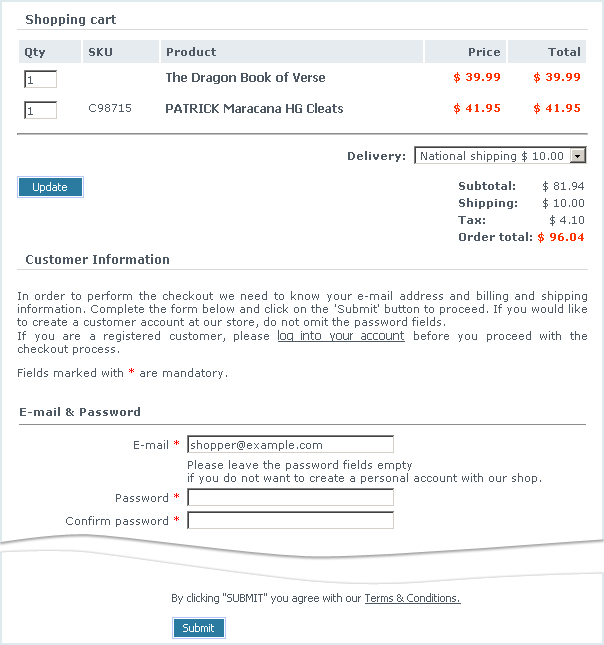
3. In the shopper is not a registered store customer, at this step he is requested to provide e-mail address and shipping and billing information needed for processing the order (Figure 6-5). Registered customers skip this step.
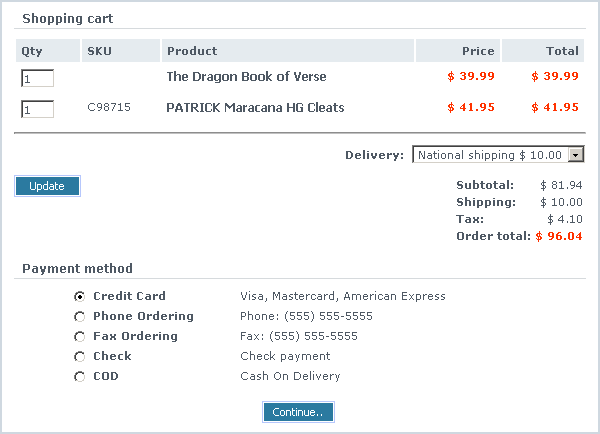
4. At the next step the customer selects his shipping and payment method preferences (Figure 6-6) and clicks on the 'Continue...' button. Please note that a payment method must be selected. If a customer tries to complete an order without selecting a payment method, he gets a corresponding warning and cannot continue the checkout process.
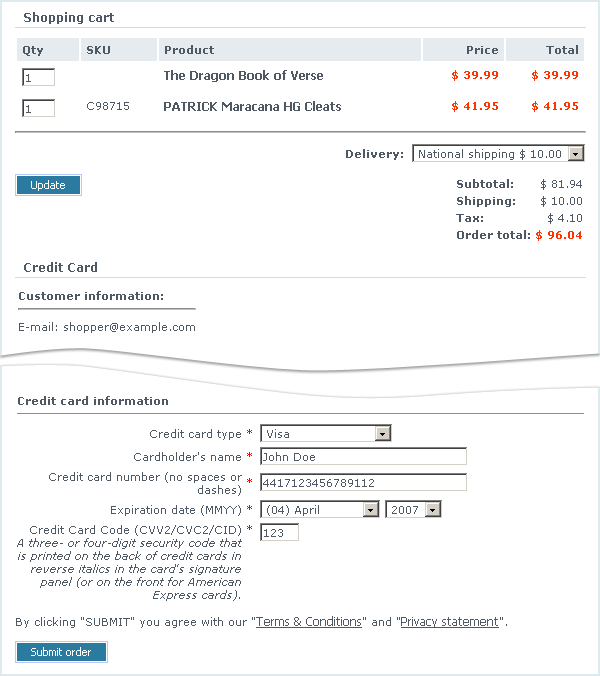
5. The next screen allows the shopper to review and finalize his order, including item quantities, delivery preferences and payment details and change them if necessary. If at the previous step the shopper has specified credit card as a method of payment, he needs to provide his credit card details in this page (Figure 6-7). Clicking on the 'Submit order' finalizes the order and sends the order for initial processing.
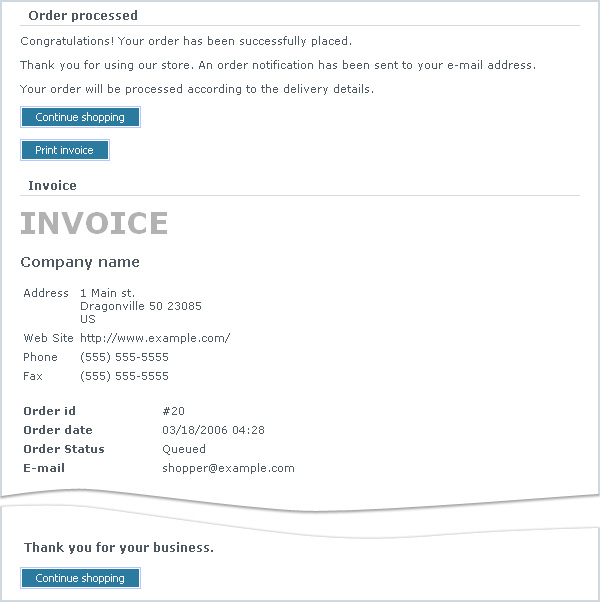
6.The customer's browser is redirected to the invoice page with complete order details (Figure 6-8), where the customer can choose to print the invoice using the 'Print Invoice' button. Additionally, if the 'E-mail order details to customers after order placement' option is enabled in the store settings, the customer receives an e-mail message containing the invoice.
7. Once the order is processed, an e-mail message is sent to the customer to inform him about the change in the order status. If an order is canceled or failed, the customer is also being informed via an automatically generated e-mail message.


