LiteCommerce:Editing Templates
|
Overview
Template Editor component of LiteCommerce software provides access to all available design templates. Using Template Editor the store administrator can modify, add and delete templates and pages. LiteCommerce templates contain elements of HTML, Javascript code and Flexy tags which manipulate LiteCommerce variables and methods.
Template Editor can be accessed through a 'Template Editor' link located in the 'Look&Feel' menu in the Administrator Zone. It contains several groups of templates and pages to be edited, which are arranged into the following tabs:
- Basic templates - a set of templates you are most likely to modify, including the Customer Zone front page template, privacy statement and terms & conditions pages.
- Mail templates - a set of templates used to send out various customer and administrator notifications.
- User-defined pages - additional pages in the Customer Zone; location of those pages depends on the store layout design: they appear in the 'Help' box in case of the standard 3-column design, or in the page footer in case of the 2-column design.
- Advanced templates - this section lists all templates of the Customer and Administrator Zones and e-mail message templates; it provides the capability to manually modify and perform some advanced operations on the templates.
Basic Templates
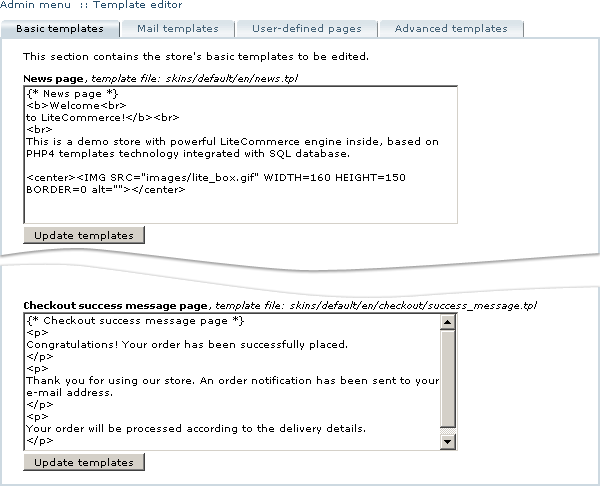
Listed in this group (Figure 3-53) are the templates that contain your company information. You can edit each of these files in the text box provided and click on the 'Update Templates' button to apply your changes. Once you do so, your changes are instantly reflected in the Customer Zone.
Mail Templates
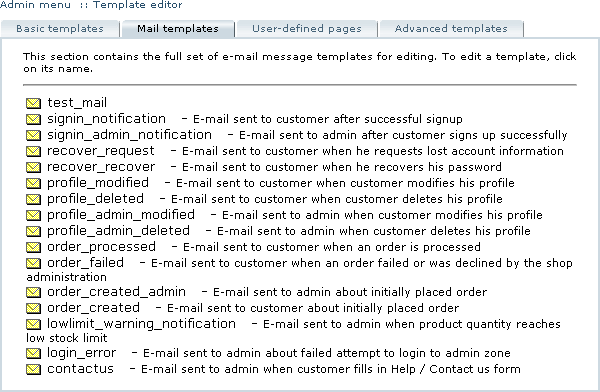
This group contains the full set of e-mail message templates for editing (Figure 3-54).
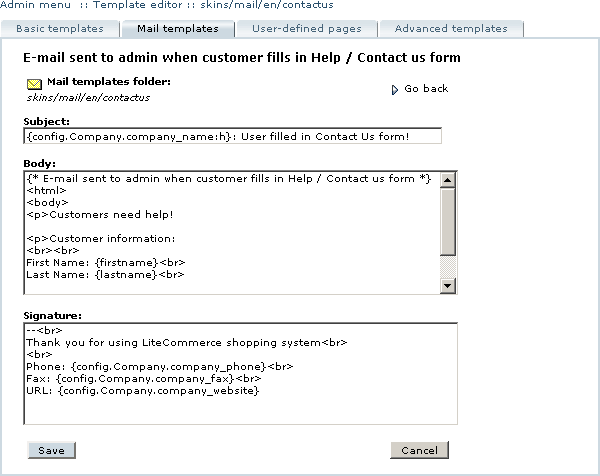
To edit a template, click on its name. Message editing screen allows you to edit the 'Subject', 'Body' and 'Signature' fields of the message (Figure 3-55). Please note that the 'Signature' field is common for all messages, i.e. if you edit it in one of the messages, the change applies to all e-mail messages throughout your LiteCommerce installation. After you have completed the message modifications, click on the 'Save' button. To return to the list of mail templates click on 'Go back'.
User-defined Pages
Using this tab you can create and modify additional pages that will appear at the customer front-end in the 'Help' box in case the standard 3-column design is used, or in the page footer in case of the 2-column design (for reference see Figures 2-3 and 2-4).
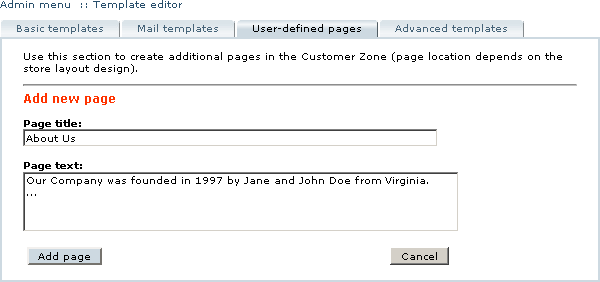
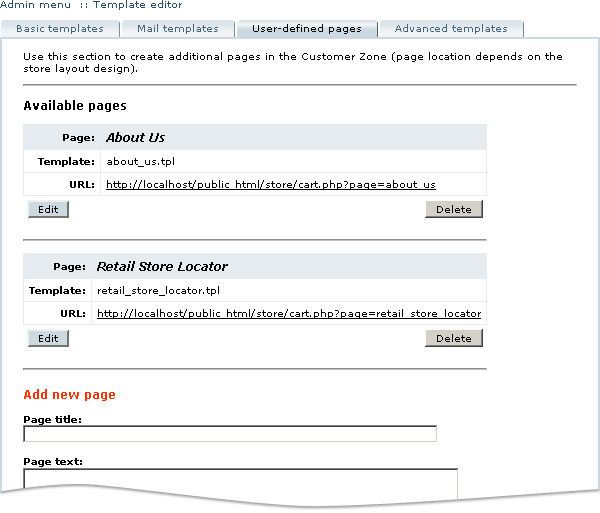
To create a new page, specify the 'Page title' and 'Page text' under the 'Add new page' title and click on the 'Add page' button (Figure 3-56). The page template is created and assigned a unique name automatically. The newly defined page immediately becomes visible at the Customer Zone. In the 'User-defined pages' tab the page template now appears in the list under the 'Available pages' sub-title (Figure 3-57) along with any other user-defined pages you have created.
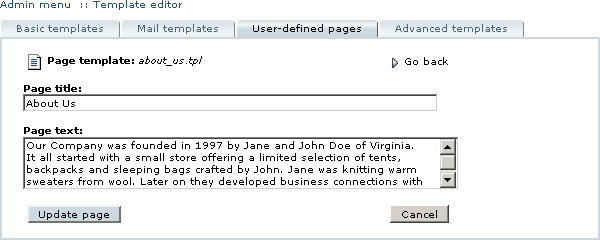
You can edit a user-defined page at any time by clicking on the 'Edit' button underneath the page details. Doing so opens the page editing screen (Figure 3-58). After you have edited the page title and text, click on the 'Update text' button to apply your changes. Click on the 'Cancel' button or 'Go back' link to return to the list of existing pages.
In order to remove a user-defined page, locate it in the list of available pages and click on the 'Delete' button underneath it. In the confirmation screen, click 'Yes' to proceed with the deletion.
Advanced Templates
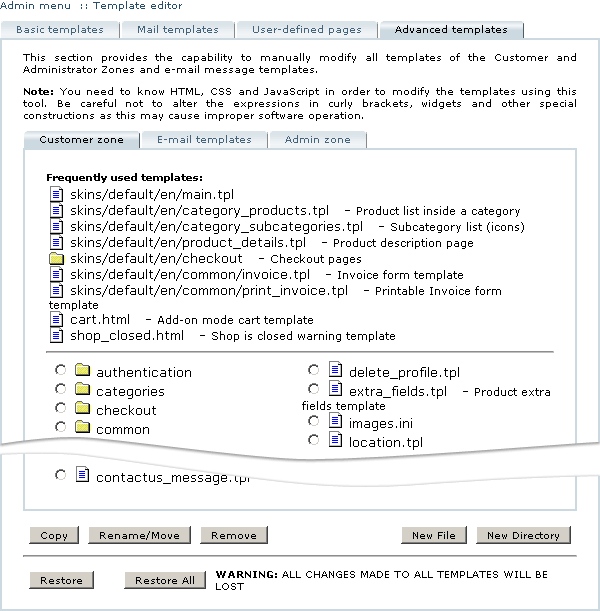
The 'Advanced templates' group contains the full set of Customer and Administrator Zone design templates and all e-mail message templates of your store, including those introduced by the add-on modules, grouped into the corresponding tabs (Figure 3-59). Through the 'Advanced templates' section of the Template Editor you gain the full control over the store templates. This tool allows you to edit all templates in the raw format, which requires certain knowledge of HTML, CSS and Javascript and a solid understanding on how the templates work. You should be exceptionally careful not to alter the expressions in curly brackets, widgets and other special constructions as this may cause improper software operation.
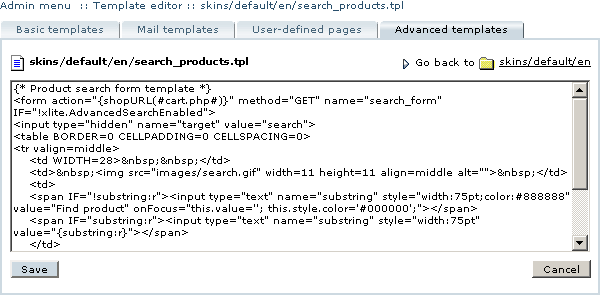
The templates are organized into catalog structures which repeat the actual catalog structures within the corresponding folders of LiteCommerce installation. Most basic templates and folders are supplied with descriptions of their function. You can click on any folder to switch to it and see it's contents, or click on the filename of any template to edit it (Figure 3-60). After editing a template click on the 'Save' button to save your changes, or 'Cancel' button to disregard them. To switch back to the folder to which the template belongs, click on the 'Go back to ...' link located in the right-hand side above the template editing window.
Additionally, the 'Advanced templates' section provides means to copy and move existing templates and folders, delete them, create new ones and restore the original templates (Figure 3-59). To manipulate a template file or directory, select the radio button next to it and click on the functional button at the bottom of the page to perform the desired action.
The 'Restore' and 'Restore All' buttons revert all the changes you have made to any particular template or all the templates by restoring the corresponding original file(s) from the 'skins_original/' folder of your LiteCommerce installation.
Irreversible operations such as template restoration or deletion require a confirmation before the operation is carried out.
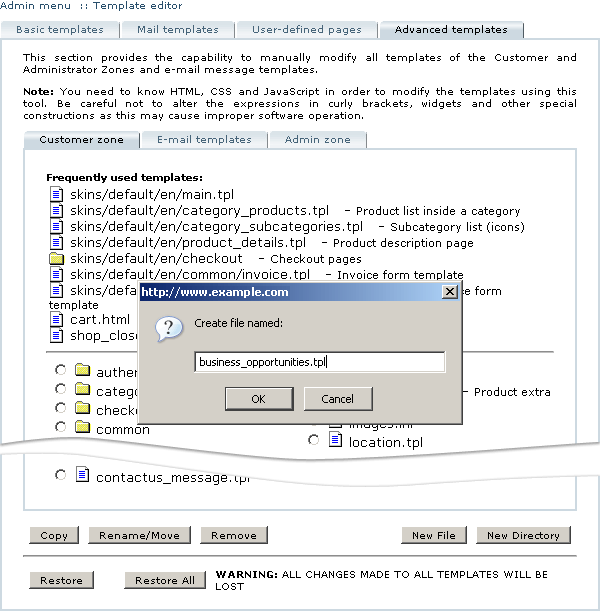
When you create or copy a template file, you are requested to provide a new filename for the template. To create a new template in the current folder, type in the name of the file without a path like shown in the example below (Figure 3-61).
