X-Cart:EBay Integration
Contents
Overview
The eBay Integration module for X-Cart 4 creates a new sales channel for your business by automatically integrating your existing X-Cart store with eBay. The integration allows you get your products listed on eBay in as little as a few minutes using the product titles, images, descriptions, prices, inventory levels, variants and attributes from your X-Cart store. It also allows you to import your eBay orders back into X-Cart and manage all your sales from the X-Cart Admin area so the order information on eBay is updated in real time. The data can be synchronized between the two systems either manually or automatically according to your preferred schedule. The information of your eBay buyers such as names and addresses is also imported from eBay and becomes available in your X-Cart store's Admin back end as customer profiles.
Your store can be connected to any single eBay marketplace site, including the sites for United States, Canada (English or French), UK, Australia, Austria, Belgium (French), France, Germany, Italy, Belgium (Dutch), Netherlands, Spain, Switzerland, Hong Kong, India, Ireland, Malaysia, Philippines, Poland and Singapore.
The integration is provided as a service. Subscription plans for merchants of any size are available.
System requirements
To be able to successfully install and use the eBay Integration module, you must have a working copy of X-Cart installed on your server. The eBay Integration module is currently supported by X-Cart versions 4.7.3 and later. Upon request we may be able to provide a module version compatible with earlier X-Cart versions.
Installation
To install the module:
- Obtain a distribution package for the eBay Integration module: Download >>
- X-Cart versions 4.7.3 and later: Download a file named like XeBayIntegration-X.Y.Zgold.tgz;
- Earlier X-Cart versions: Download a file named like ebay-X.Y.Zgold.tgz.
(X, Y and Z in the distribution file name are version numbers; they must match the version of your installed X-Cart. Note: If you do not remember the version of your installed X-Cart, you can find it in the Environment info section of the Summary page in X-Cart Admin area.)
- Copy the contents of the module archive to the X-Cart root directory on your server or hosting account.
- If you are using a Windows-based server, or a UNIX-based server without terminal access:
- a) Unpack the module archive to a directory on your system using your favorite compression program (WinZIP, 7-Zip or any other archiver with support for TAR files).
- b) Use an FTP client to upload all the files contained in this directory (retaining the directory structure) to the X-Cart root directory on your server or your hosting account.
- If you are using a UNIX-based server with terminal access:
- a) Use an FTP client to upload the module archive to the X-Cart root directory on your server or your hosting account.
- b) Unpack the archive using the following command:
tar -xzvf filename.tgz
- (Replace filename.tgz with the actual name of your module distribution file; for example, XeBayIntegration-4.7.3gold.tgz).
- Important: Make sure you keep the directory structure while unpacking and uploading the module archive, otherwise some necessary files may be overwritten!
- In a web browser, run the installation script httр://<YOUR_XCART_DOMAIN>/install-ebay.php replacing <YOUR_XCART_DOMAIN> with the actual domain name of your X-Cart store. This will start the installation wizard.
- Follow the installation wizard instructions to install the module.
- Once the installation has been completed, you should see the "Installation complete" screen with a link for access to the Admin area of your store with the installed module. Before you proceed, please remove the module archive file if you put it in a web accessible directory; this is needed to protect the module from unauthorized copying.
Important: At the final step of the installation process, the installation script install-ebay.php is automatically renamed as an additional measure to protect the module installation. Please take note of the filename to which the installation script was renamed. If you decide to re-install or uninstall the module later on, you will need to rename the installation script back to install-ebay.php before launching the installation process in your web browser.
Once the module has been installed, it needs to be configured.
Activating and deactivating the module
If the module eBay Integration is installed, but not active, you can enable (activate) it.
To enable the module:
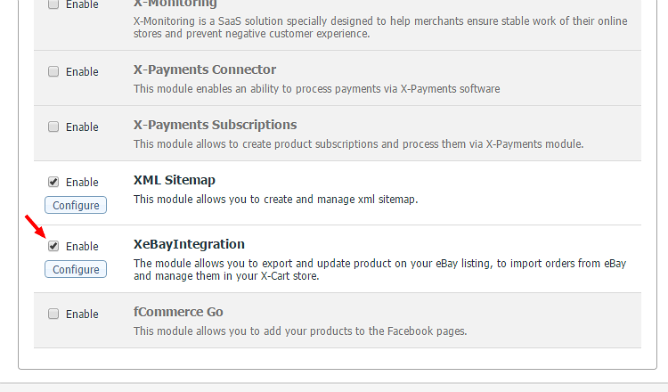
- Go to the Modules section of your store's Admin area (Settings menu -> Modules). This opens the list of your store's installed modules.
- Locate the entry for the eBay Integration module and select the Enable check box on the left.
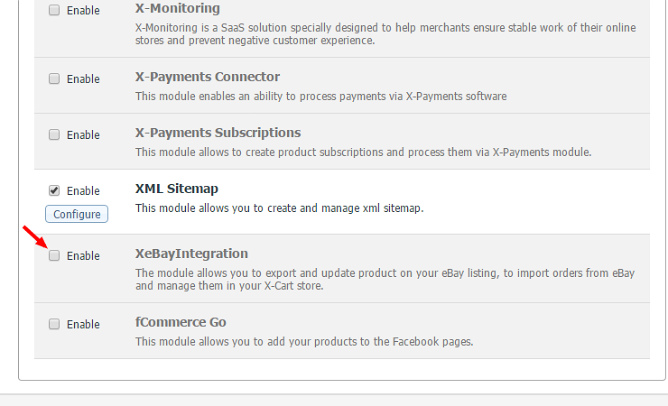
The module will be activated.

It is possible to temporarily disable (deactivate) the installed eBay Integration module. Deactivation stops the module from operation, but it does not remove any settings you made to the module configuration nor clear any data that was generated during the period that the module was in operation. If you wish to completely remove all the data related to using the module, you need to uninstall it.
To disable the module:
- Go to the Modules section of your store's Admin area (Settings menu -> Modules).
- Locate the entry for the eBay Integration module and unselect the Enable check box on the left.
The module will be disabled.
