Difference between revisions of "X-Cart:Social Login (former Janrain Engage) module"
m (→Configuring providers) |
m (→Configuring the Social Login Module in X-Cart) |
||
| Line 157: | Line 157: | ||
'''To configure the Social Login module in your X-Cart Admin area:''' | '''To configure the Social Login module in your X-Cart Admin area:''' | ||
| − | + | # Log in to the X-Cart Admin area. | |
| − | + | # Select <u>Settings</u> -> <u>Modules</u> on the menu. | |
| − | + | # Scroll down until you see the Social Login module item and then click on the <u>Configure</u> link opposite it. This opens a box with the options and settings for the Social Login module.<br />[[File:Social_login_settings.png|border]] | |
| − | + | # In the Social Login (RPX) Options section, enter your API key and Application name and then click the '''Apply changes''' button. | |
| − | |||
| − | |||
| − | This opens a box with the options and settings for the Social Login module. | ||
| − | |||
| − | |||
| − | |||
| − | |||
==Administrator sign-in over identity providers== | ==Administrator sign-in over identity providers== | ||
Revision as of 17:17, 12 March 2013
Contents
Overview
The Social Login module is an add-on for integrating your X-Cart with Janrain’s services. The services allow your visitors with existing accounts with social networks – including Facebook, Twitter, Google, Yahoo! and LinkedIn and over a dozen of others – to quickly sign in to your online store via their existing social network accounts. The solution lets users bypass your traditional registration process and sign in with one click, resulting in an accelerated sign-up process for new users and a simple login experience for returning visitors.
Why Social Login
According to Consumer research study conducted by Blue Research in October 2011
Resistance to Traditional Registration Processes
- Four in five (86%) people are bothered by the need to create new accounts when registering on a website and will change their behavior as a result; this represents an increase of more than 10% over the 2010 findings
- 54% may leave the site or not return
- 26% go to a different site, if possible
- 6% leave/avoid the site
- 14% say they will complete the registration
- 88% admit to having given incorrect information or left forms incomplete when creating a new account at a website, up from 76% in 2010.
- 9 in 10 people (90% versus 45% in 2010) admit they have left a website if they forgot their password or log-in info, instead of answering security questions or re-setting their password.
Irrelevant Targeting by Brands
- 100% of respondents reported receiving information or promotions from companies that are not relevant to them
- Almost 3 in 4 (74%) have received conflicting messages across different marketing channels
- Two-thirds (66%) have received an offer that clearly shows a company does not know who they are
- Over half have received offers targeted to the wrong name, gender or age
Increased Brand Affinity in Fans of Social Login
- 77% believe social login is a good solution that should be offered, an increase of over 10% from the year prior (66% in 2010). Among that population…
- 78% of social login fans have posted a comment or message to their social networks about a product or service they liked or thought others should know about or purchase
- 4 in 5 people (83%) say they are influenced to consider buying new products or services based on positive comments or messages from people in their social network
- 69% say positive reviews may increase their likelihood to purchase a product or service
- 82% seek out or avoid companies based on reviews from friends in their social graph
Key benefits of using the Social Login module in X-Cart
- Converts anonymous visitors into your registered customers.
- Fast customer sign-in.
- Fast personnel sign-in (admin/provider/affiliates).
- Linking multiple external profiles with a single profile at your store.
- Social Sharing – lets your users share comments, purchases or other activities from your site to their friends on multiple social networks.
On top of that, Janrain Engage allows your visitors to share their comments, purchases, reviews or other activities directly from your online store to their friends on multiple social networks, all without leaving your store. Social sharing with Janrain Engage lets you trigger sharing based on any number of user's actions, including purchases, posting comments, user-generated content or clicking a share button, enabling the word of mouth marketing for your business and transforming your users into brand advocates.
For more information on Janrain Engage, please visit Janrain Engage Online Home.

System requirements and installation
Social Login is available as a built-in module in X-Cart GOLD PLUS and PLATINUM editions v4.5.3 and later. In the said editions, it does not require installation and can be enabled in the Modules section of X-Cart Admin area.
For X-Cart GOLD and PRO editions v4.1.12, 4.2.3, 4.3.2, 4.4.х and 4.5.х, this module can be purchased and installed separately. The following instructions will guide you through the process of installing the Social Login module in your store.
System requirements
To be able to successfully install and use the Social Login module, you need a working copy of X-Cart GOLD or PRO v4.1.12, 4.2.3, 4.3.2, 4.4.х or 4.5.х installed on your server. Make sure that the version of the Social Login integration module matches the version of your copy of X-Cart.
Installation and removal
To install the Social Login module:
1. Obtain a distribution package for the Social Login integration module by downloading it from the File Area section of your X-Cart Account account. The distribution package is archived in the file xauth-x.y.z.tgz, where x, y and z indicate the version of the module. Make sure the version of the module matches the version of your copy of X-Cart.
2. Copy the distribution package to the X-Cart root directory on your server or hosting account.
- If you use a Windows-based server or a UNIX-based server without terminal access:
- a) Extract the contents of the archive with the Social Login module files to a directory on your system using your favorite compression program (WinZIP or any other archiver that supports TAR files).
- b) Use an FTP client to upload all the files extracted from the archive (retaining the directory structure) to the X-Cart root directory on your server or hosting account.
- If you use a UNIX-based server with terminal access:
- a) Use an FTP client to upload the archive with the Social Login module distribution package to the X-Cart root directory on your server or hosting account.
- b) Decompress the package by typing the following command:
tar -xzvf xauth-x.y.z.tgz
3. In a web browser, run the installation script at httр://www.example.com/install-xauth.php, replacing the variable www.example.com with the real domain name, where your X-Cart is installed.
4. Enter the Auth code, accept the License Agreement and click the Next button.
5. The installation script copies the files and activates the module. Click the Next button to continue.
6. The installation script generates a new system fingerprint. Click the Next button to complete the installation.
7. Use the ADMINISTRATOR AREA link to log in to the Admin area.
To uninstall the Social Login module:
1. In a web browser, run the installation script at http://www.example.com/install-xauth.php, replacing the "www.example.com" with the real domain name, where your X-Cart is installed.
2. Choose the Uninstall the module option, enter the Auth code, accept the License Agreement and click the Next button.
3. Once the installation script has removed the Social Login module files and deactivated the module, click the Next button to complete the uninstallation.
4. On the Uninstallation complete screen, click Next to leave the Wizard.
Enabling the Social Login Module in X-Cart
Once you have installed the Social Login module, enable it in your store's Admin area.
To enable the Social Login module:
- Log in to the X-Cart Admin area and go to the Modules section (Settings menu->Modules).
- In the list of modules, find the Social Login item and select the check box next to it.
- Click the Apply changes button to apply the changes.

Now you can leave alone your X-Cart for a few moments and switch to Janrain.
Setting up Janrain
To be able to use the Social Login module, you must first get an account with Janrain. If you already have an account, simply log in to the Janrain Dashboard and create a new application for your X-Cart store (select 'Create Application' on the drop-down list below the Janrain logo on your Dashboard).
Getting a Janrain Engage account
The Social Login solution by Janrain Engage is available on subscription basis. There are several subscription plans with different pricing levels, including a free basic plan. You can choose a plan that best suits your needs depending on the expected number of users per year. For example, you could choose the free basic plan to get you started and then, as your business grows, upgrade to a more advanced plan.
To get a Janrain Engage account:
- Visit Janrain Engage Online Home, choose the subscription plan you require and click on the Sign Up link.
- On the Create Account screen, click on the logo of the social network you would like to use with your store.
- On the sign-in page, enter your credentials for that social network and then click 'Sign In'.
- On the profile linking confirmation prompt, click 'Allow'.
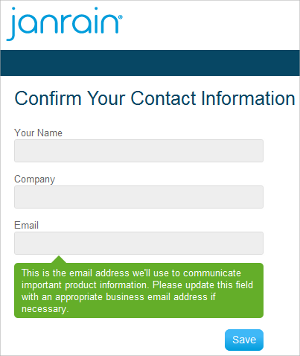
- On the Confirm Information screen, enter your contact information (your name, company name and e-mail address) and click 'Next'.
- On the Create Application screen, create a new application for your store: enter your application name (This should be a recognizable name of your store; your customers will see this name on the identity providers’ sign-in or permission screen when signing in to your site) and click the Create Application button.


That is all; you now have a Janrain Engage account and an application that will allow you to use Social Login at your store.
Now you can click the 'Get started' button to access the Janrain Dashboard where you will be able to continue setting up your application.
Configuring providers
Once your application is activated at Janrain, configure the identity providers you are going to use with your store.
To configure an identity provider:
- On the Janrain Dashboard page, select Deployment -> Provider Configuration on the menu.

- On the Configure Providers page, click on the provider to be configured and then click the Configure button.
- Follow the configuration wizard's instructions and complete the configuraton.

Repeat these steps for every identity provider you want to enable for your store and then move on to the next section.
Configuring the Social Login Module in X-Cart
Now, tell your X-Cart what it should do with all the stuff you have just set up -- configure the Social Login module that you installed a few steps earlier.
To configure the Social Login module in your X-Cart Admin area:
- Log in to the X-Cart Admin area.
- Select Settings -> Modules on the menu.
- Scroll down until you see the Social Login module item and then click on the Configure link opposite it. This opens a box with the options and settings for the Social Login module.

- In the Social Login (RPX) Options section, enter your API key and Application name and then click the Apply changes button.

Administrator sign-in over identity providers
To enable signing in as administrator over an external identity provider:
1. Sign in to your X-Cart store using your regular credentials.
2. In the X-Cart Admin area, click on the administrator profile link at the top of the page.
3. On the Account details page, click on the 'Add an identifier' link.
4. Sign-in using your preferred identity provider.
Adding Social Sharing to your online store
To add the Social Sharing widget to your online store:
1. On the Janrain Dashboard page, select Deployment -> Social Sharing for Web on the menu.
2. Follow the instructions provided on the Social Widget Setup page for adding the social widget to your online store.
For more information on creating and using activity objects, please refer to Janrain's social sharing documentation.
Troubleshooting
Error: Whoops, you've been directed here by mistake
The 'Application name' specified in X-Cart admin back end on the module configuration page is incorrect. Janrain replaces dots with dashes, thus to fix the issue you should do the same, e.g. if your app name is yourappname.domain:
yourappname.domain -> yourappname-domain
You should specify "yourappname-domain" as an 'Application name' in X-Cart.