Difference between revisions of "X-Cart:Static Pages"
(→Defining Static Page Details) |
|||
| (37 intermediate revisions by 4 users not shown) | |||
| Line 1: | Line 1: | ||
==Overview== | ==Overview== | ||
| − | + | The customer-facing area of your store's website will consist primarily of product, category and manufacturer pages. However, you may feel the need to add some more information that does not fit into pages of the said types; for example, you may want to add your store's Terms and Conditions, Privacy Policy and the like. X-Cart allows you to add pages to your website where you can place any content that you feel is needed. Such pages in X-Cart are called ''static pages''. X-Cart supports two types of static pages: | |
* Embedded | * Embedded | ||
| − | * Root | + | * Root level |
Root level pages are fully independent HTML files. They exist in X-Cart root (the directory where your X-Cart store is installed), hence the name. Root pages do not depend on the rest of X-Cart pages, so they must be full HTML-files (must include tags like <HTML>...</HTML>). | Root level pages are fully independent HTML files. They exist in X-Cart root (the directory where your X-Cart store is installed), hence the name. Root pages do not depend on the rest of X-Cart pages, so they must be full HTML-files (must include tags like <HTML>...</HTML>). | ||
| − | Embedded pages are pages that are placed inside standard X-Cart pages. Their | + | Embedded pages are pages that are placed inside standard X-Cart pages. Their appearance depends on the design of your store in general, as you create only the page content. The content of embedded pages is displayed in your store's Information column (the widest column in any X-Cart's standard template scheme). Embedded pages do not use tags like <HTML>, <HEAD>, <BODY>. |
| − | Root level pages are stored in the | + | Root level pages are stored in the X-Cart root directory, embedded pages - in the subdirectories of the directory <u>skin/common_files/pages</u> named after the respective languages (for example, pages for the English language are stored in the directory <u>skin/common_files/pages/en</u>, pages for the German language - in the directory <u>skin/common_files/pages/de</u>, etc.) |
| − | + | {{XC 4.0}} | |
| + | {{Note1| <b>Note</b>: In versions prior to 4.4.x, embedded pages are stored in the corresponding subdirectories of the directory <u>skin1/pages</u> named after the respective languages (for example, pages for the English language are stored in the directory <u>skin1/pages/US</u>, pages for the German language - in the directory <u>skin1/pages/DE</u>, etc.)}} | ||
| − | + | X-Cart comes with the following root level static pages out of the box: | |
| − | * | + | * message (<xcart_dir>/message.html) |
| − | * | + | * permission_denied (<xcart_dir>/permission_denied.html) |
| − | * | + | * shop_closed (<xcart_dir>/shop_closed.html) |
| − | + | It also has a few pre-created embedded pages: | |
| + | * About our site (<xcart_dir>/skin/common_files/pages/en/about_our_site.html) | ||
| + | * FAQ (<xcart_dir>/skin/common_files/pages/en/faq.html) | ||
| + | * Terms & Conditions (<xcart_dir>/skin/common_files/pages/en/terms.html) | ||
| + | * Privacy statement (<xcart_dir>/skin/common_files/pages/en/privacy_statement.html) | ||
| + | * Publicity (<xcart_dir>/skin/common_files/pages/en/publicity.html) | ||
| + | (By default, links to the above named embedded pages are included into the '<u>Help</u>' menu box in your store's Customer area.) | ||
| − | + | On a fresh X-Cart install, the above pages contain dummy text. Before going live with your store, you should edit the contents of the said pages so they provide meaningful content for your customers. If you do not want to use these pages, remove or disable them (See [[X-Cart:Static_Pages#Managing_Static_Pages|Managing Static Pages]] for more info). | |
| + | |||
| + | The file <u>include/func/func.pages.php</u> defines aliases for your store's default embedded pages: | ||
| + | <pre> | ||
| + | $page_aliases = array( | ||
| + | 'faq' => 'faq', | ||
| + | 'about' => 'about_our_site', | ||
| + | 'business' => 'privacy_statement', | ||
| + | 'conditions' => 'terms', | ||
| + | 'publicity' => 'publicity', | ||
| + | ); | ||
| + | </pre> | ||
| + | As a result, the pages can be accessed at the following aliases:<br /> | ||
| + | * About our site: httр://<YOUR_XCART_STORE>/pages.php?alias=about<br /> | ||
| + | * FAQ: httр://<YOUR_XCART_STORE>/pages.php?alias=faq<br /> | ||
| + | * Terms & Conditions: httр://<YOUR_XCART_STORE>/pages.php?alias=conditions<br /> | ||
| + | * Privacy statement: httр://<YOUR_XCART_STORE>/pages.php?alias=business<br /> | ||
| + | * Publicity: httр://<YOUR_XCART_STORE>/pages.php?alias=publicity<br /> | ||
==Adding Static Pages== | ==Adding Static Pages== | ||
| + | |||
| + | Both embedded and root-level static pages can be created using the '<u>Static pages</u>' section of your store's Admin area. | ||
To add a new static page: | To add a new static page: | ||
| − | # Go to the '<u>Static pages</u>' section of your store's Admin area (<u> | + | # Go to the '<u>Static pages</u>' section of your store's Admin area (<u>Content</u> -> <u>Static pages</u>). This opens the '<u>Static pages</u>' form.<br><br>[[File:Static_pages.png|632px]]<br><br> |
| − | # ''(If your store supports | + | # ''(If your store supports multiple languages)'' From the '''Language''' selector at the top of the '<u>Static pages</u>' form, select the language in which you are going to add a static page. This switches the active language of the Admin area so you can provide content for the new page in the chosen language. |
| − | # | + | # Depending on the type of static page you are adding (embedded or root-level), choose either the '<u>Embedded level</u>' or the '<u>Root level</u>' subsection of the '<u>Static pages</u>' form. In the respective subsection, click the '''Add new...''' button. This opens the '<u>Static page details</u>' form. |
| + | # Use the '<u>Static page details</u>' form to provide the details of the new static page (See [[#Defining Static Page Details]]). | ||
| + | # Click the '''Save''' button at the bottom of the '<u>Static page details</u>' form to save the changes. | ||
| + | |||
| + | Clicking '''Save''' creates the static page. You should see a confirmation message. | ||
| + | |||
| + | The '''Pages list''' button at the top of the '<u>Static page details</u>' form allows you to return to the '<u>Static pages</u>' form where you will be able to see the new page added to the static pages list. | ||
| + | |||
| + | {{Note|At any moment in time, the static pages list displays only the static pages that were created in the language currently used for viewing the Admin area.}} | ||
| + | |||
| + | ==Defining Static Page Details== | ||
| + | |||
| + | When you create or edit a static page, you define its details using the '<u>Static page details</u>' form. | ||
| + | |||
| + | For embedded static pages, the '<u>Static page details</u>' form looks as follows: | ||
| + | |||
| + | : [[File:Embedded_static_page_details.png|640px]] | ||
| + | |||
| + | It contains the following fields: | ||
| + | |||
| + | * <u>Page file</u>: File name of the static page. | ||
| + | * <u>Page name</u>: Name by which you and your customers will be able to identify this static page. | ||
| + | * <u>Clean URL</u>: Clean URL value for this static page. Instructions on editing this field are available in [[X-Cart:Clean URLs#Defining Clean URL Values]]. | ||
| + | |||
| + | {{Note|The 'Clean URL' field needs to be adjusted only if the Clean URLs functionality is enabled in your X-Cart store. If the Clean URLs functionality is disabled, the 'Clean URL' field appears inactive.}} | ||
| + | |||
| + | * <u>Page content</u>: Content/HTML source code of the page. | ||
| + | |||
| + | {{Note|You can edit the content of the page in WYSIWYG mode if your store has the HTML Editor module enabled. For details, see the [[X-Cart:HTML Editor]] section in this manual.}} | ||
| + | |||
| + | * <u>Title tag</u>: Title to be used in the title tag of the static page. | ||
| + | * <u>META keywords</u>: Keywords to be listed in the keywords meta tag of the static page. | ||
| + | * <u>META description</u>: Description to be placed in the description meta tag of the static page. | ||
| − | + | {{Note|For more information on using the description and keywords meta tags, see the [[X-Cart:Configuring Page Titles and Meta Tags]] section of this manual.}} | |
| − | + | * <u>Status</u>: This option allows you to specify whether the page should be available for viewing to the visitors of your store's Customer area. | |
| − | + | * <u>Position</u>: Position of the static page title in the list of static pages within the '<u>Static pages</u>' form and (if the '<u>Show a link to the page in Help menu?</u>' option is enabled) on the Help menu box of your store's Customer area. | |
| + | * <u>Show a link to the page in Help menu?</u>: This option allows you to specify whether the link to this page should be included in the <u>Help</u> menu box of your store's Customer area. | ||
| − | + | For a root level static page, the '<u>Static page details</u>' form contains only the following fields: | |
| − | + | : [[File:Root_static_page_details.png|640px]] | |
| − | + | * <u>Page file</u>: Filename for this static page. | |
| + | * <u>Page name</u>: Name by which you will be able to identify this static page. | ||
| + | * <u>Page content</u>: Content/HTML source code of this page. | ||
| + | |||
| + | To define the details of a static page, you need to provide all the necessary information in the respective fields of the '<u>Static page details</u>' form and click the '''Save''' button at the bottom. After the static page details have been saved, you should see a confirmation message. | ||
==Managing Static Pages== | ==Managing Static Pages== | ||
| − | Your store's embedded and root level static pages can be managed using the controls of the '<u>Static pages</u>' | + | Your store's embedded and root level static pages can be managed using the controls of the '<u>Static pages</u>' form. |
| − | + | '''Finding all static pages in a specific language''' | |
| − | # | + | The '<u>Static pages</u>' form can be used to output a list of static pages for a specific language. This function is especially important if you created or edited your store's static pages using an external HTML editor: to manage externally created pages from within your store's Admin area, you need to get them listed in the '<u>Static pages</u>' form. The same holds true for the pre-configured root-level pages that come with X-Cart (message.html, permission_denied.html and shop_closed.html): the said pages do not appear on the static pages list until you get X-Cart to find all the existing static pages for the English language. |
| − | # Click the '''Find pages''' button. The '<u>Static pages</u>' | + | |
| + | To get the 'Static pages' form to display all your store's static pages in a specific language: | ||
| + | # ''If your store is based on X-Cart 4.5.0 or later'': Make sure that any custom HTML pages in your store use the UTF-8 charset. Failure to use UTF-8 may later cause problems displaying such pages: in your store's front end some characters in such pages may appear as diamonds with question marks (the Unicode replacement character), whereas in your store's Admin area such pages will not be displayed at all (so you will not be able to view or edit them, which rather defeats the purpose of displaying the list of static pages in Admin). | ||
| + | # In Admin area, open the 'Static pages' form and select the desired language as current. | ||
| + | # Click the '''Find pages''' button. The '<u>Static pages</u>' form opens up a list of all the root-level static pages it finds in the directory <u>/xcart</u> and all the embedded pages it finds in the directory <u>/xcart/skin/common_files/pages/<current_language></u> (where <current_language> is a two-letter code of the language currently selected in the language selector). | ||
| + | |||
| + | {{Note1|Warning: In fact, the resulting list will include any HTML pages that X-Cart finds in the directories <u>/xcart</u> and <u>/xcart/skin/common_files/pages/<current_language></u>. This means, for example, that if you have an HTML catalog in your store's root, clicking the '''Find pages''' button will result in that the pages of the HTML catalog will be included into the static pages list.}} | ||
| + | |||
| + | You can quickly preview the content of any static page in the static pages list by clicking the '''Preview''' link opposite its title. | ||
| + | |||
| + | '''Editing the details of an existing static page''' | ||
| + | |||
| + | You can edit the details (name, content, etc) of any static page in your store. | ||
| − | To | + | To edit the details of a static page: |
# Select the language of the page as current. | # Select the language of the page as current. | ||
| − | # Find the page in the '<u>Static pages</u>' | + | # Find the page in the list on the '<u>Static pages</u>' form and then click on its title. |
| + | # On the '<u>Static page details</u>' form, edit the necessary details (See [[#Defining Static Page Details]]). | ||
| + | # Click the '''Save''' button. The static page details are updated. You should see a confirmation message. | ||
| + | |||
| + | '''Changing the availability status of an embedded static page''' | ||
| − | + | It is possible to restrict access of users to specific embedded static pages. For example, when you are editing the content of a static page, it is a good idea to make the page temporarily unavailable for viewing, i.e. to disable it. | |
| − | + | To temporarily disable an embedded page: | |
| − | |||
| − | |||
| − | + | # Select the language of the page as current. | |
| + | # Find the page in the list on the '<u>Static pages</u>' form and deselect the <u>Status</u> check box opposite its title. | ||
| + | # Click the '''Update''' button. This makes the page unavailable: anyone who requests this page (excluding your store's administrator users) will get the '403 access denied' error. Disabling a static page also disables the link to this page from the <u>Help</u> menu box of your store's Customer area, if such a link is provided. | ||
| − | + | To re-enable a previously disabled static page, select the respective <u>Status</u> check box and click '''Update'''. | |
| − | |||
| − | |||
| − | + | {{Note|For earlier versions, the status of a static page can be changed by selecting either ''Enabled'' or ''Disabled'' from the STATUS drop-down box opposite the page title and clicking '''Update'''.}} | |
| − | + | '''Deleting a static page''' | |
| − | |||
| − | |||
| − | |||
| − | + | If you decide you no longer need one or more static pages, you can permanently remove them: | |
# Select the language of the page as current. | # Select the language of the page as current. | ||
| − | # Find the page | + | # Find the page in the list on the '<u>Static pages</u>' form and select the check box next to its title. |
| − | # Click the '''Delete selected''' button. | + | # Click the '''Delete selected''' button. This removes the selected static pages. You should see a confirmation message. |
| − | + | '''Providing links to embedded static pages in the Help menu box''' | |
| − | The | + | You can specify which embedded static pages need to be linked to from the '<u>Help</u>' menu box in your store's Customer area. The set of static page links included into the '<u>Help</u>' menu box is adjusted separately for each of the supported languages. |
| − | : | + | To include a link to a specific embedded static page into the '<u>Help</u>' menu box: |
| − | + | # Select the desired language as current. | |
| + | # Select the '<u>Show Link</u>' check box opposite the title of the embedded static page which needs to be made accessible via a link in the '<u>Help</u>' menu box. | ||
| + | # Click the '''Update''' button. This updates the static page details and creates a link to the page in the '<u>Help</u>' menu box. You should see a confirmation message. | ||
| − | + | '''Reordering the items in the Static pages list / Help menu box''' | |
| − | |||
| − | |||
| − | + | The value of the Pos. field opposite each static page title in the 'Static pages' form defines the position of the page's title in the list on the 'Static pages' form and - for embedded pages - in the '<u>Help</u>' menu box in your store's Customer area. In general, items with a smaller Pos. field value appear earlier in the list. The order of static page titles is adjusted separately for each of the supported languages. | |
| − | + | To reorder static page titles for a specific language: | |
| − | + | # Select the desired language as current. | |
| + | # Readjust the page position numbers in the Pos. column of the '<u>Static pages</u>' form. | ||
| + | # Click the '''Update''' button. The page titles are reordered. You should see a confirmation message. | ||
| − | + | <div id="ParseSmartyTags"></div> | |
| − | + | '''Using Smarty with embedded static pages''' | |
| − | |||
| − | + | You can allow or disallow the use of Smarty tags and syntax in your store's embedded static pages. This is done by adjusting the check box option '<u>Parse Smarty tags in the content of embedded pages</u>' displayed below the list of embedded static pages in the 'Static pages' form. All you need to do is select or deselect the check box and click the '''Update''' button. | |
| − | + | Alternatively, you can adjust the option '<u>Parse Smarty tags in the content of embedded static pages</u>' on the '<u>General settings/General options</u>' page ('Miscellaneous' section). That is exactly the same option which appears in two places. | |
| − | |||
| − | |||
| − | For | + | For more information on Smarty, see http://www.smarty.net/docs/en/ (4.7.0 and later) http://www.smarty.net/docsv2/en/ (4.6.6 and earlier). |
| − | + | ==Creating Versions of a Static Page for Different Languages== | |
| − | |||
| − | |||
| − | + | If your store uses multiple languages, each static page used in your store will need to have a version for each of the supported languages. | |
| − | + | To create a version of an existing static page in another language: | |
| − | + | # Go to the '<u>Static pages</u>' section of your store's Admin area. | |
| − | + | # Use the language selector to switch the interface of your store's Admin area to the language, in which the static page already exists. | |
| − | # | + | # Find the name of the static page in the list on the '<u>Static pages</u>' form and click on it. This opens the '<u>Static page details</u>' form with the details of the page you have selected. |
| − | # | + | # Switch the language selector to the language you want to translate the page to. |
| − | # | + | # Edit the fields of the '<u>Static page details</u>' form: |
| − | # Switch the | + | #* Provide the language-specific page name, content, status and position. |
| − | # | + | #* For an embedded static page, provide the language-specific meta keywords and meta description and specify whether the link to the page in this language is to be included in the <u>Help</u> menu box of your store's Customer area. <br />{{Note|The value of the '<u>Clean URL</u>' field is the same for all the versions of an embedded static page regardless of the language. Althought the '<u>Clean URL</u>' field remains editable while a static page is being translated into another language, editing the contents of this field does not create a separate clean URL for the page version being created.}} |
| − | #* Provide | ||
| − | #* For an embedded static page, provide language-specific meta keywords and meta description | ||
# Click the '''Save''' button. | # Click the '''Save''' button. | ||
| − | + | Clicking '''Save''' creates the static page in the selected language. You should see a confirmation message. | |
== See also == | == See also == | ||
| − | [[X-Cart:FAQs#Where_do_I_edit_my_.22About_our_site.22.2C_.22Terms_.26_Conditions.22.2C_.22Privacy_statement.22_pages.3F | Where do I edit my "About our site", "Terms & Conditions", "Privacy statement" pages?]] | + | * [[X-Cart:FAQs#Where_do_I_edit_my_.22About_our_site.22.2C_.22Terms_.26_Conditions.22.2C_.22Privacy_statement.22_pages.3F | Where do I edit my "About our site", "Terms & Conditions", "Privacy statement" pages?]] |
| + | * [[X-Cart:Setting_up_file_permissions#Templates_and_directories_containing_templates_and_embedded_static_pages | Setting up proper permissions for embedded static pages' directories and files.]] | ||
| + | [[Category:X-Cart user manual]] | ||
| + | |||
| + | [[Category:X-Cart user manual]] | ||
| + | [[Category:X-Cart user manual]] | ||
| + | [[Category:X-Cart user manual]] | ||
[[Category:X-Cart user manual]] | [[Category:X-Cart user manual]] | ||
Latest revision as of 13:26, 21 April 2015
Contents
Overview
The customer-facing area of your store's website will consist primarily of product, category and manufacturer pages. However, you may feel the need to add some more information that does not fit into pages of the said types; for example, you may want to add your store's Terms and Conditions, Privacy Policy and the like. X-Cart allows you to add pages to your website where you can place any content that you feel is needed. Such pages in X-Cart are called static pages. X-Cart supports two types of static pages:
- Embedded
- Root level
Root level pages are fully independent HTML files. They exist in X-Cart root (the directory where your X-Cart store is installed), hence the name. Root pages do not depend on the rest of X-Cart pages, so they must be full HTML-files (must include tags like <HTML>...</HTML>).
Embedded pages are pages that are placed inside standard X-Cart pages. Their appearance depends on the design of your store in general, as you create only the page content. The content of embedded pages is displayed in your store's Information column (the widest column in any X-Cart's standard template scheme). Embedded pages do not use tags like <HTML>, <HEAD>, <BODY>.
Root level pages are stored in the X-Cart root directory, embedded pages - in the subdirectories of the directory skin/common_files/pages named after the respective languages (for example, pages for the English language are stored in the directory skin/common_files/pages/en, pages for the German language - in the directory skin/common_files/pages/de, etc.)
X-Cart comes with the following root level static pages out of the box:
- message (<xcart_dir>/message.html)
- permission_denied (<xcart_dir>/permission_denied.html)
- shop_closed (<xcart_dir>/shop_closed.html)
It also has a few pre-created embedded pages:
- About our site (<xcart_dir>/skin/common_files/pages/en/about_our_site.html)
- FAQ (<xcart_dir>/skin/common_files/pages/en/faq.html)
- Terms & Conditions (<xcart_dir>/skin/common_files/pages/en/terms.html)
- Privacy statement (<xcart_dir>/skin/common_files/pages/en/privacy_statement.html)
- Publicity (<xcart_dir>/skin/common_files/pages/en/publicity.html)
(By default, links to the above named embedded pages are included into the 'Help' menu box in your store's Customer area.)
On a fresh X-Cart install, the above pages contain dummy text. Before going live with your store, you should edit the contents of the said pages so they provide meaningful content for your customers. If you do not want to use these pages, remove or disable them (See Managing Static Pages for more info).
The file include/func/func.pages.php defines aliases for your store's default embedded pages:
$page_aliases = array(
'faq' => 'faq',
'about' => 'about_our_site',
'business' => 'privacy_statement',
'conditions' => 'terms',
'publicity' => 'publicity',
);
As a result, the pages can be accessed at the following aliases:
- About our site: httр://<YOUR_XCART_STORE>/pages.php?alias=about
- FAQ: httр://<YOUR_XCART_STORE>/pages.php?alias=faq
- Terms & Conditions: httр://<YOUR_XCART_STORE>/pages.php?alias=conditions
- Privacy statement: httр://<YOUR_XCART_STORE>/pages.php?alias=business
- Publicity: httр://<YOUR_XCART_STORE>/pages.php?alias=publicity
Adding Static Pages
Both embedded and root-level static pages can be created using the 'Static pages' section of your store's Admin area.
To add a new static page:
- Go to the 'Static pages' section of your store's Admin area (Content -> Static pages). This opens the 'Static pages' form.
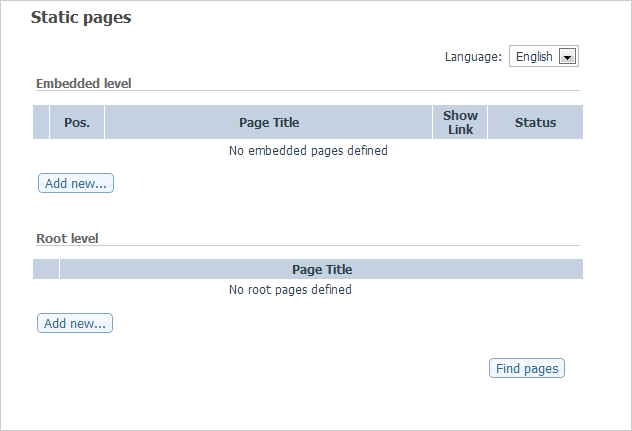
- (If your store supports multiple languages) From the Language selector at the top of the 'Static pages' form, select the language in which you are going to add a static page. This switches the active language of the Admin area so you can provide content for the new page in the chosen language.
- Depending on the type of static page you are adding (embedded or root-level), choose either the 'Embedded level' or the 'Root level' subsection of the 'Static pages' form. In the respective subsection, click the Add new... button. This opens the 'Static page details' form.
- Use the 'Static page details' form to provide the details of the new static page (See #Defining Static Page Details).
- Click the Save button at the bottom of the 'Static page details' form to save the changes.

Clicking Save creates the static page. You should see a confirmation message.
The Pages list button at the top of the 'Static page details' form allows you to return to the 'Static pages' form where you will be able to see the new page added to the static pages list.
Defining Static Page Details
When you create or edit a static page, you define its details using the 'Static page details' form.
For embedded static pages, the 'Static page details' form looks as follows:

It contains the following fields:
- Page file: File name of the static page.
- Page name: Name by which you and your customers will be able to identify this static page.
- Clean URL: Clean URL value for this static page. Instructions on editing this field are available in X-Cart:Clean URLs#Defining Clean URL Values.
- Page content: Content/HTML source code of the page.
- Title tag: Title to be used in the title tag of the static page.
- META keywords: Keywords to be listed in the keywords meta tag of the static page.
- META description: Description to be placed in the description meta tag of the static page.
- Status: This option allows you to specify whether the page should be available for viewing to the visitors of your store's Customer area.
- Position: Position of the static page title in the list of static pages within the 'Static pages' form and (if the 'Show a link to the page in Help menu?' option is enabled) on the Help menu box of your store's Customer area.
- Show a link to the page in Help menu?: This option allows you to specify whether the link to this page should be included in the Help menu box of your store's Customer area.
For a root level static page, the 'Static page details' form contains only the following fields:

- Page file: Filename for this static page.
- Page name: Name by which you will be able to identify this static page.
- Page content: Content/HTML source code of this page.
To define the details of a static page, you need to provide all the necessary information in the respective fields of the 'Static page details' form and click the Save button at the bottom. After the static page details have been saved, you should see a confirmation message.
Managing Static Pages
Your store's embedded and root level static pages can be managed using the controls of the 'Static pages' form.
Finding all static pages in a specific language
The 'Static pages' form can be used to output a list of static pages for a specific language. This function is especially important if you created or edited your store's static pages using an external HTML editor: to manage externally created pages from within your store's Admin area, you need to get them listed in the 'Static pages' form. The same holds true for the pre-configured root-level pages that come with X-Cart (message.html, permission_denied.html and shop_closed.html): the said pages do not appear on the static pages list until you get X-Cart to find all the existing static pages for the English language.
To get the 'Static pages' form to display all your store's static pages in a specific language:
- If your store is based on X-Cart 4.5.0 or later: Make sure that any custom HTML pages in your store use the UTF-8 charset. Failure to use UTF-8 may later cause problems displaying such pages: in your store's front end some characters in such pages may appear as diamonds with question marks (the Unicode replacement character), whereas in your store's Admin area such pages will not be displayed at all (so you will not be able to view or edit them, which rather defeats the purpose of displaying the list of static pages in Admin).
- In Admin area, open the 'Static pages' form and select the desired language as current.
- Click the Find pages button. The 'Static pages' form opens up a list of all the root-level static pages it finds in the directory /xcart and all the embedded pages it finds in the directory /xcart/skin/common_files/pages/<current_language> (where <current_language> is a two-letter code of the language currently selected in the language selector).
You can quickly preview the content of any static page in the static pages list by clicking the Preview link opposite its title.
Editing the details of an existing static page
You can edit the details (name, content, etc) of any static page in your store.
To edit the details of a static page:
- Select the language of the page as current.
- Find the page in the list on the 'Static pages' form and then click on its title.
- On the 'Static page details' form, edit the necessary details (See #Defining Static Page Details).
- Click the Save button. The static page details are updated. You should see a confirmation message.
Changing the availability status of an embedded static page
It is possible to restrict access of users to specific embedded static pages. For example, when you are editing the content of a static page, it is a good idea to make the page temporarily unavailable for viewing, i.e. to disable it.
To temporarily disable an embedded page:
- Select the language of the page as current.
- Find the page in the list on the 'Static pages' form and deselect the Status check box opposite its title.
- Click the Update button. This makes the page unavailable: anyone who requests this page (excluding your store's administrator users) will get the '403 access denied' error. Disabling a static page also disables the link to this page from the Help menu box of your store's Customer area, if such a link is provided.
To re-enable a previously disabled static page, select the respective Status check box and click Update.
Deleting a static page
If you decide you no longer need one or more static pages, you can permanently remove them:
- Select the language of the page as current.
- Find the page in the list on the 'Static pages' form and select the check box next to its title.
- Click the Delete selected button. This removes the selected static pages. You should see a confirmation message.
Providing links to embedded static pages in the Help menu box
You can specify which embedded static pages need to be linked to from the 'Help' menu box in your store's Customer area. The set of static page links included into the 'Help' menu box is adjusted separately for each of the supported languages.
To include a link to a specific embedded static page into the 'Help' menu box:
- Select the desired language as current.
- Select the 'Show Link' check box opposite the title of the embedded static page which needs to be made accessible via a link in the 'Help' menu box.
- Click the Update button. This updates the static page details and creates a link to the page in the 'Help' menu box. You should see a confirmation message.
Reordering the items in the Static pages list / Help menu box
The value of the Pos. field opposite each static page title in the 'Static pages' form defines the position of the page's title in the list on the 'Static pages' form and - for embedded pages - in the 'Help' menu box in your store's Customer area. In general, items with a smaller Pos. field value appear earlier in the list. The order of static page titles is adjusted separately for each of the supported languages.
To reorder static page titles for a specific language:
- Select the desired language as current.
- Readjust the page position numbers in the Pos. column of the 'Static pages' form.
- Click the Update button. The page titles are reordered. You should see a confirmation message.
Using Smarty with embedded static pages
You can allow or disallow the use of Smarty tags and syntax in your store's embedded static pages. This is done by adjusting the check box option 'Parse Smarty tags in the content of embedded pages' displayed below the list of embedded static pages in the 'Static pages' form. All you need to do is select or deselect the check box and click the Update button.
Alternatively, you can adjust the option 'Parse Smarty tags in the content of embedded static pages' on the 'General settings/General options' page ('Miscellaneous' section). That is exactly the same option which appears in two places.
For more information on Smarty, see http://www.smarty.net/docs/en/ (4.7.0 and later) http://www.smarty.net/docsv2/en/ (4.6.6 and earlier).
Creating Versions of a Static Page for Different Languages
If your store uses multiple languages, each static page used in your store will need to have a version for each of the supported languages.
To create a version of an existing static page in another language:
- Go to the 'Static pages' section of your store's Admin area.
- Use the language selector to switch the interface of your store's Admin area to the language, in which the static page already exists.
- Find the name of the static page in the list on the 'Static pages' form and click on it. This opens the 'Static page details' form with the details of the page you have selected.
- Switch the language selector to the language you want to translate the page to.
- Edit the fields of the 'Static page details' form:
- Provide the language-specific page name, content, status and position.
- For an embedded static page, provide the language-specific meta keywords and meta description and specify whether the link to the page in this language is to be included in the Help menu box of your store's Customer area. Note: The value of the 'Clean URL' field is the same for all the versions of an embedded static page regardless of the language. Althought the 'Clean URL' field remains editable while a static page is being translated into another language, editing the contents of this field does not create a separate clean URL for the page version being created.
- Click the Save button.
Clicking Save creates the static page in the selected language. You should see a confirmation message.