LiteCommerce:AOM:Using the module
Contents
Using the module
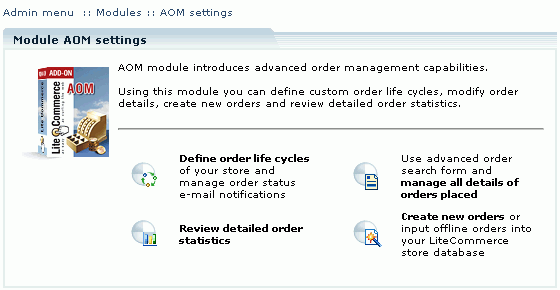
After you have successfully installed the AOM module, click on the 'AOM' module link to enter the advanced order management page (Figure 3).
The page contains links to the 'Order life cycles' configuration page (described in 'Managing Order Life Cycles' section of this manual) and the sections affected by the introduction of AOM module, namely 'Orders', 'Create order' and 'Order statistics'.
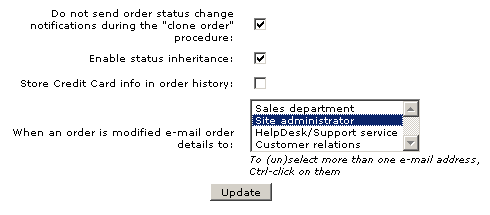
You can also configure the following general options according to your preferences.
Do not send order status change notifications during the "clone order" procedure: select this check box to reduce the number of unnecessary notifications.
Enable status inheritance: select this check box for the child order statuses to inherit all the properties from their parent order statuses. If the option is selected and an order receives one of the child order statuses, the same actions take place as if the order received the parent order status.
Store Credit Card info in order history: leave this check box empty in order not to copy credit card information into the order history.
When an order is modified e-mail order details to: select a department where you want a notification about order modification to be sent.
Understanding LiteCommerce order life cycles
Every customer's order placed through LiteCommerce shopping system goes through a life cycle comprised of several order statues.
When a visitor places an item into his shopping cart, a 'Temporary' order is created to accommodate the contents of his cart. Orders with the "Temporary" (or just 'T') status do not appear in the Administrator zone in the order list. Temporary orders are stored for the default period of 2 hours, and if their status does not change during that period, they expire from the database. Keeping shopping cart contents for a certain period of time allows store customers to return to the store after some time and complete their orders without having to repeat product selection process again.
After a customer selects shipment and payment methods and completes corresponding information, the order acquires an' Incomplete' (or 'I') status. Typically an order remains in this status until a customer presses the 'Submit order' button, at which time an order using an offline payment method is assigned the "Queued" status and the invoice is displayed to the customer. Orders with interactive payment methods selected remain in 'Incomplete' status while being processed by the payment gateway and then acquire an order status according to results received from the payment gateway (either "Processed" for successful transactions or "Failed" for unsuccessful ones).
If your shopping system has AntiFraud add-on module installed and configured to perform order checkups, upon successful payment gateway processing the 'Processed' orders are being analyzed by anti-fraud service. If fraud checkup finds the order to be suspicious, the order is marked for manual processing by changing its status to "Queued".
"Queued" orders are the orders that require attention from the store administrator. These can be the orders using offline shipping methods or the orders found to be suspicious by the fraud protection service. Once the order details are reviewed by the administrator, and the necessary actions are taken, the administrator would typically change the order status to either "Processed" or "Declined".
"Declined" orders are essentially the same as the orders with the "Failed" status. Similarly they do not affect stock amounts, do not take up gift certificates, bonus points or discount coupons and are kept in the order database for book-keeping purposes. While "Failed" status results from payment processors rejecting the payment, "Declined" status can be set by the store administrator for a number of reasons.
"Complete" orders are the orders that have been paid for and shipped out and thus do not require further attention. LiteCommerce system treats such orders just like the "Processed" orders, except for that they do not appear in the list of recent orders available in the 'Orders' section of the 'Management' menu.
"Failed" orders remain in the database for book-keeping records. They do not affect stock amounts (if you have the Inventory Tracking module enabled), neither do they take up gift certificates (introduced by the Gift Certificates module), bonus points or discount coupons (introduced by the Promotion Tools module).
Described above is a standard order life cycle of a LiteCommerce-based online store. You can adjust it according to your business needs by defining and utilizing additional order statuses, which are the subsidiary statuses of the predefined (primary) statuses discussed above.
Defining Order Lifecycles
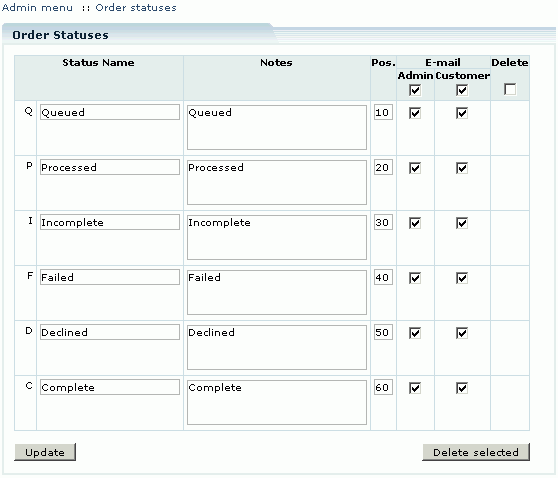
In order to review and customize the list of available order statuses, select 'Order life cycles' section in the 'Settings' menu. This section contains a list of existing order statuses (Figure 4) sorted according to their 'Pos.' values.
You can change a name, corresponding notes and a position value of any available status or sub-status. Make the necessary modifications and click on the 'Update' button to save them.
To add a new subsidiary status, scroll down to the end of the list of statuses and locate the form for new status addition (Figure 5). Type in the status name and corresponding notes, choose a status code from the list of unassigned codes and the parent status, and specify the 'Pos.' number of the status. 'Pos.' values define the order of sub-statuses of a given status - the lower the number, the closer to the top of the list the subsidiary status will appear. Review the details you have provided and click on the 'Add' button to create the sub-status. It will now appear in the list of statues and immediately become available throughout your shopping cart system.
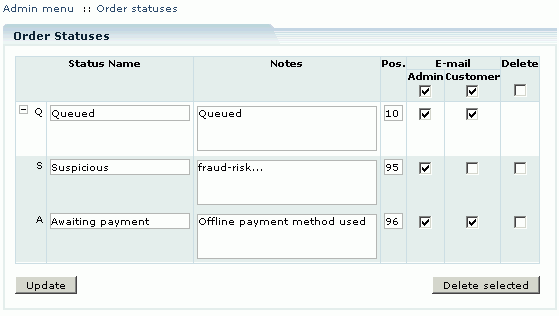
To delete a sub-status or several statuses at once, place checkmarks in the corresponding fields in the right-side column, click on the 'Delete selected' button and confirm the deletion in the confirmation window. Only unused subsidiary statuses can be deleted, primary statuses and sub-statuses in use (marked with a red asterisk) cannot be deleted (Figure 6). To delete all unused subsidiary statuses at once, place a checkmark in the box at the top of the right-side column and click on the 'Delete selected' button.
Configuring order status notifications
The AOM module provides a possibility to setup e-mail notifications of order status changes. You can choose to notify customers and/or the store administrator when order statuses change to a particular value ('Failed', 'Declined', 'Processed', 'Queued' or other, see the section 'Understanding LiteCommerce order life cycles' of this manual for more details).
In the 'Order life cycles' page of the 'Settings' menu locate the order status which requires e-mail notifications and place checkmarks in the corresponding 'E-mail Admin' and/or 'E-mail Customer' fields to enable administrator and customer notifications, respectively; then click on the 'Update' button to save your settings (Figure 6). To disable certain status change notifications, clear the corresponding checkboxes and click on the 'Update' button.
To enable all administrator status change notifications at once, place a checkmark in the box at the top of the 'E-mail Admin' column. For all customer status change notifications at once, use the box at the top of the 'E-mail Customer' column. To disable administrator or customer notifications, remove the checkmarks from the above-mentioned boxes. Click on the 'Update' button to save your settings.
Customizing order status notification messages
Using LiteCommerce template editor you can customize the text of order status notification e-mail messages. Choose the 'Template editor' section from the 'Look & Feel' menu and switch to the 'Advanced templates' tab. Template files pertinent to order status change e-mail notifications are located in the 'E-mail templates' section within the 'modules/AOM/status_changed/' and 'modules/AOM/status_changed_admin/' subfolders.
Please refer to LiteCommerce reference manual for details on how to use LiteCommerce template editor.


