LiteCommerce:Changing Skin
|
LiteCommerce software distribution includes four stylish design and layout skins. When installing your LiteCommerce software you were requested to choose one skin for your store (see LiteCommerce:Running Web Installation wizard page and Figure 1-18). Should you decide to apply a different skin, you can always do so in the Administrator Zone or by using the 'install.php' script.
To change the skin in the Administrator Zone:
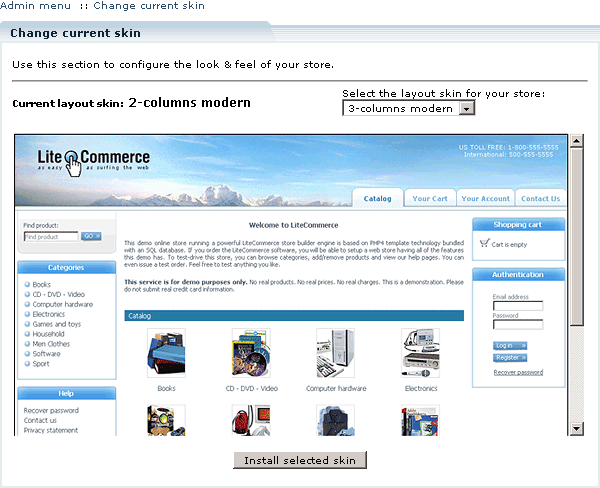
1. Proceed to the 'Change current skin' section of the 'Look&Feel' menu.
2. Select a different layout skin from the drop-down list of predefined skins (Figure 3-72). Four predefined layouts are available: two 2-column layouts and two 3-column layouts.
3. Click on the 'Install selected skin' button to apply your changes.
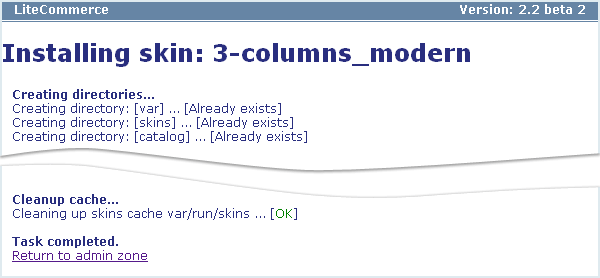
4. The skin installation progress screen will appear (Figure 3-73). Once the installation is complete, click on the 'Return to admin zone' link.
To change the skin using the 'install.php' script:
1. In your LiteCommerce installation directory locate a PHP file, which has a filename comprised of 32 hexadecimal figures (1-9 and a-f) followed by '.php', and rename it into 'install.php'.
2. Launch your web browser and type the URL of LiteCommerce Installation Wizard in the 'Location' field of the browser: http://www.example.com/litecommerce_directory/install.php
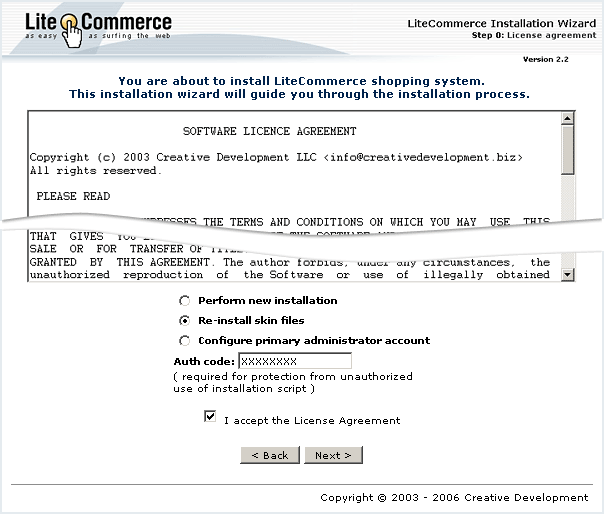
3. In the software license agreement screen (Figure 3-74):
- select the 'Re-install skin files' option,
- specify the authentication code in the corresponding field,
- place a checkmark in a box next to 'I accept the license agreement' to acknowledge acceptance of its terms and conditions, and then
- click on the 'Next >' button to proceed to the next screen.
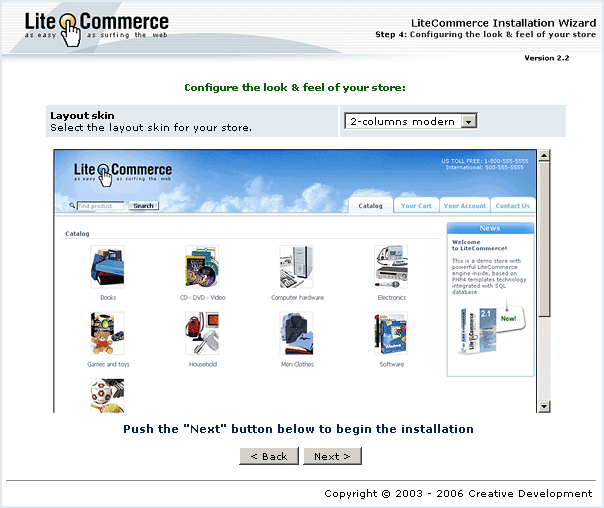
4. At the next step you are requested to choose the design layout for your store (Figure 3-75). Click on the 'Next >' button to proceed with the installation.
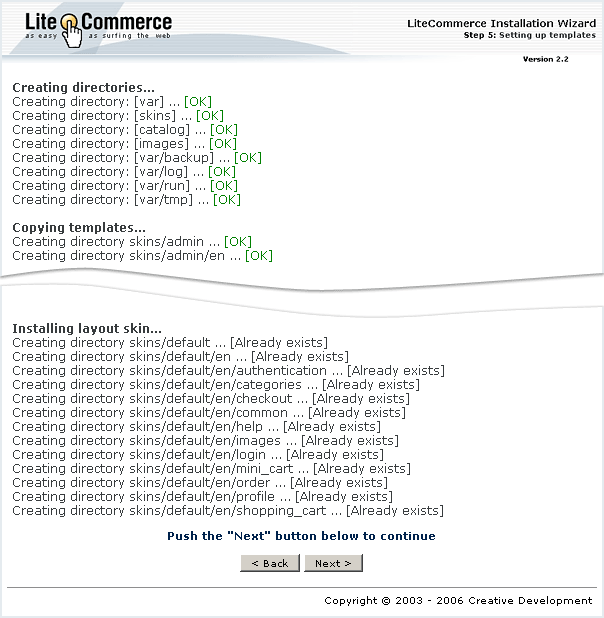
5. After you have specified the desired layout, the corresponding template files are copied to the destination location. Review the details (Figure 3-76) and click on the 'Next >' button.
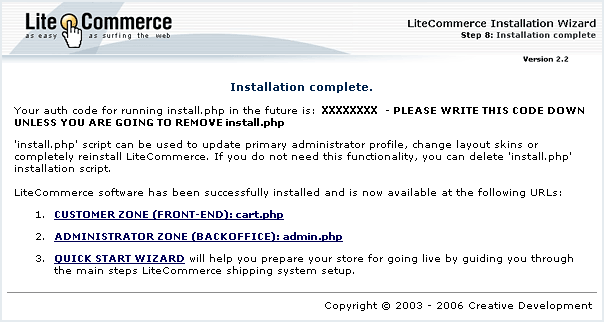
6. Once the installation of the skin is complete, the Installation Wizard displays the 'Installation complete' screen (Figure 3-77). For security purposes, the 'install.php' script is then renamed into a PHP file which has a filename comprised of 32 hexadecimal figures (1-9 and a-f) followed by '.php'.
