LiteCommerce:Customizing the Look of Your Store Using CSS Editor
|
The 'CSS Editor' tool of LiteCommerce is an easy and intuitive tool intended for customizing the look of various textual elements of your store. It allows you to control the styles of multiple tags and classes used by your store components by specifying font style and size, and colors for the text and its background. Using CSS Editor does not require knowledge of CSS (Cascading Style Sheets) coding.
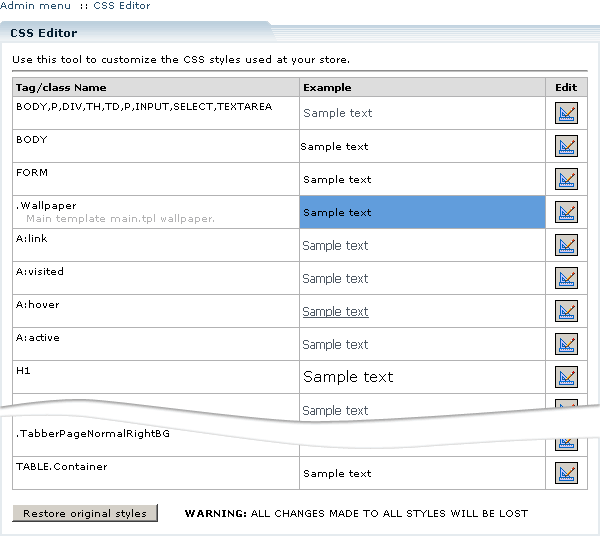
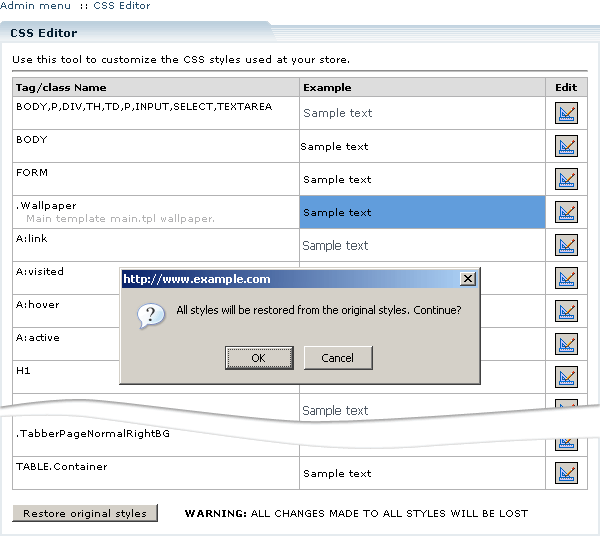
CSS Editor can be accessed through a 'CSS Editor' link located in the 'Look&Feel' menu in the Administrator Zone (Figure 3-62). The main screen of the CSS Editor lists all available style definitions for various tags and classes. Class names are supplied with brief descriptions of the classes' areas of use.
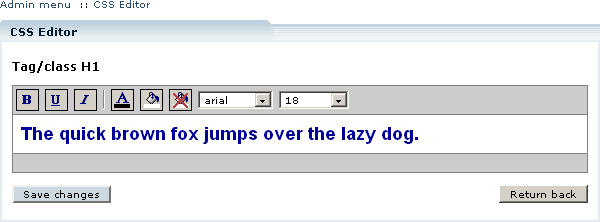
Example of how each particular style looks is provided in the 'Example' field next to the tag/class name. In order to edit a style, click on the corresponding 'Edit' icon. This will open the style editing page (Figure 3-63).
In this page you can specify various attributes of a class or a tag. Menu buttons provided here are interactive, which means that every modification you make is instantly reflected on the sample text provided.
- [ B ] button toggles the bold/normal text weight.
- [ U ] button switches text underlining on and off.
- [ I ] button toggles the italic/normal text style.
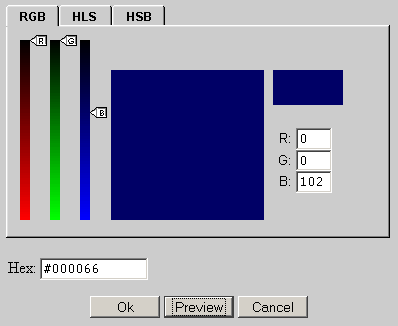
- [ A ] button allows you to edit the color of the text. It opens a new browser window with a color selector tool in it (Figure 3-64).
The tool allows you to choose the color of the text using one of the three color pickers, which represent RGB, HLS and HSB color spaces. Once you have selected a color, clock on the 'Preview' button to see how the sample text in the main window will look in this color, without closing the color selector window. Once you are satisfied with the color, click on 'Ok' to apply the color and close the window. Click on the 'Cancel' button to exit the tool without changing the color.
- paint bucket button allows you to edit the color underneath the text (background color). It opens a new browser window with a color selector tool identical to the one used for editing the color of the text.
- crossed paint bucket button makes the background of the text transparent.
- 'Font' drop-down menu provides the means for assigning a specific font style to the text.
- 'Size' drop-down menu allows you to change the size of the font.
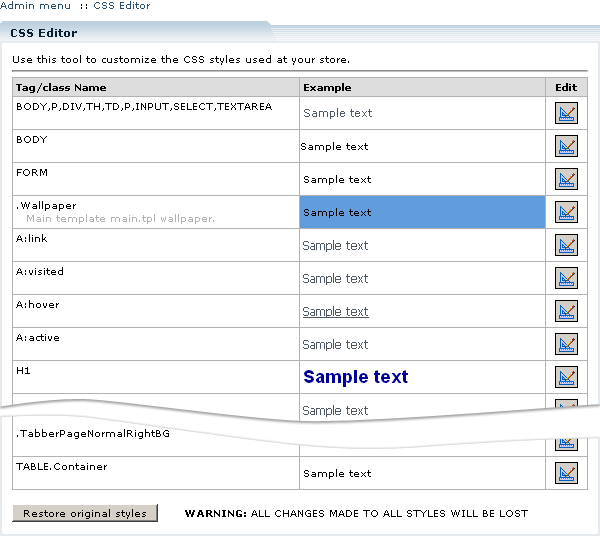
Once you are done with the modifications to the style of a class or a tag, click on the 'Save changes' button. Your changes will be instantly reflected on your store. To go back to the CSS Editor, click on the 'Return back' button (Figure 3-63).
Restoring original styles
You can revert all your style modifications by restoring the original styles using the CSS Editor main screen. Navigate to the bottom of the list of tags and classes, and click on the 'Restore original styles' button. Confirm your action (Figure 3-66). Once the operation is done, you will be redirected back to the CSS Editor main screen.
