LiteCommerce:ProductAdviser
|
LiteCommerce Product Adviser add-on module introduces multiple cross-selling opportunities to your LiteCommerce-based online store, including the means to dynamically relate products to one another based on customers' selection of products and to notify customers of new arrivals, select items availability and price changes. Cross-selling is one of the easiest and least intrusive marketing techniques designed to widen the customer's reliance on the company and decrease the likelihood of the customer switching to a competitor. Using customer notification mechanism is an ideal way to remind your customers of products and services your business offers without being annoying or pointless – you know what your customers are interested in and offer them just that. It reveals your customers' preferences and needs, and helps you plan your sales accordingly.
This article will guide you through the process of Product Adviser module configuration and use.
Contents
Configuring the module
After you have successfully installed the Product Adviser module, you can configure its settings. In the 'Modules' section click on the Product Adviser module link to enter the module's settings page (Figure 3).
Several functionality components are configured here; each can be enabled or disabled independently.
Related products
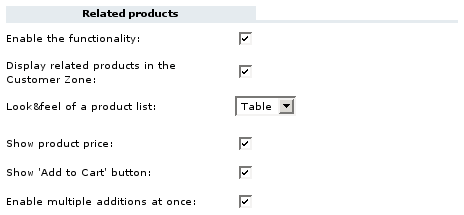
When this component is enabled, the store administrator can relate products to one another, and a customer viewing the details of a product for which related products are defined will also see a clickable set of related products. Fields and options listed below (Figure 4) control related products settings:
- Enable the functionality - select this checkbox to be able to define related products, deselect to disable the functionality;
- Display related products in the Customer Zone - select this checkbox to enable displaying of related products in the Customer Zone (you might want to deselect this checkbox while you are working on product links to temporarily hide this functionality);
- Look&feel of a product list - this setting defines how the set of related products is to be presented to customers, available options are: 'List', 'Icons' and 'Table'. If you choose the 'List' option, the following additional setting will appear:
- Show product description – select this checkbox if you want to display brief product descriptions in the list of related products;
If you choose the 'Icons' option, the following additional setting will appear:
- Number of columns - choose the number of related product icon columns to display to a customer;
- Show product price - select this checkbox if you want to display related products' prices;
- Show 'Add to Cart' button - select this checkbox if you want to display 'Add to Cart' buttons for related products.
- 'Enable multiple additions at once' – this option becomes available when 'Show 'Add to Cart' button' option is activated. Place a check mark in this field if you want to enable the capability to add multiple related items to the shopping cart at once.
If the option 'Enable multiple additions at once' is activated in the Product Adviser configuration, it will work in accordance with the ProductOptions logic.
Example:
You have two products: product A has no options and product B has some options. You add product B as a 'Related product' of product A and enable multiple additions at once. In the Customer Zone a "Checkmark to add" option will be displayed for product A, but for product B displaying such an option is not possible because we have to define the product options first. So an 'Add to Cart' button will be displayed for product B. Clicking on it will redirect the customer to the product options page. After selecting the necessary product options the customer will be able to add the product to cart.
Recently viewed
When this component is activated, a 'Recently viewed' box with a list of several previously viewed products is displayed to a customer while browsing the catalog. The option below (Figure 5) controls this component:
- Number of products in the "Recently viewed" box – enter the amount of recently viewed products to be displayed, entering '0' (zero) deactivates the component.
New Arrivals
When this component is activated, a certain number of newly offered products are showcased on the storefront and in the catalog pages. The options below (Figure 6) control the corresponding settings:
- Number of products in the "New Arrivals" box – enter the amount of newly offered products to be listed in the 'New Arrivals' box at the storefront, entering '0' (zero) deactivates the component. If amount of products that meet the new arrivals criteria is higher than this number, the list is split into several pages and the number is used to specify how many products should appear on one page.
- Period during which a product is to be marked as "New" (hours) – this is the main new arrivals criteria: specify how many hours from being added to the store database a product is to be considered as a new arrival. Enter a '0' (zero) value here to deactivate the component.
- Show category-specific new arrivals – with this option activated, the list of new arrivals displayed in a particular category or subcategory contains only new arrivals that belong to this category and its subcategories. When the option is deactivated, the list of new arrivals is the same throughout the catalog and contains new products from all categories.
- New arrivals displayed in – this setting defines where the list of new arrivals is to be located. The default setting is to display it in a side box as a brief list ('a side box' option), alternatively you can choose to display it as a detailed product list in the main section of the customer's screen ('the main section' option).
People who buy this product also buy
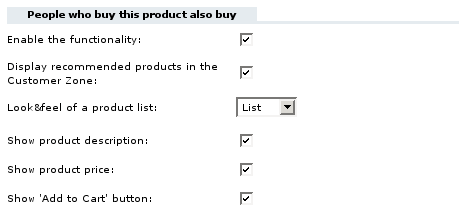
When this component is enabled, product pages contain a clickable list of products that are popular among the store customers who bought the product displayed. Fields and options listed below (Figure 7) control the settings of this component:
- Enable the functionality - select this checkbox to set up your store to collect and analyze the statistics on product purchases;
- Display recommended products in the Customer Zone - select this checkbox to enable displaying of recommended products in the Customer Zone;
- Look&feel of a product list - this setting defines how the set of accompanying products is to be presented to the customers, available options are: 'List', 'Icons' and 'Table'. If you choose the 'List' option, the following additional setting will appear:
- Show product description – select this checkbox if you want brief product descriptions of accompanying products to be displayed;
If you choose the 'Icons' option, the following additional setting will appear:
- Number of columns - choose the number of accompanying product icon columns to be displayed to a customer;
- Show product price - select this checkbox if you want the prices of recommended products to be displayed;
- Show 'Add to Cart' button - select this checkbox if you want to display 'Add to Cart' buttons for accompanying products.
Customer notifications
When this component is activated, customers can place requests to be notified of product availability and price changes via e-mail. The options below (Figure 8) control the corresponding settings:
- Enable the functionality – select one of the options from a drop-down list:
- select 'All notifications' option to enable all notifications;
- select 'In-stock notifications only' option to enable product availability notifications (this functionality requires InventoryTracking module to be enabled);
- select 'Price change notifications only' option to enable price change notifications;
- select 'None' to disable the functionality.
- Number of notification requests per page (in Admin zone) – specify the number of notification requests to be listed simultaneously in the 'Customer notifications' section of the 'Management' menu.
Click on the 'Update' button to save the settings.
Product-Specific Settings
Setting custom 'New' period
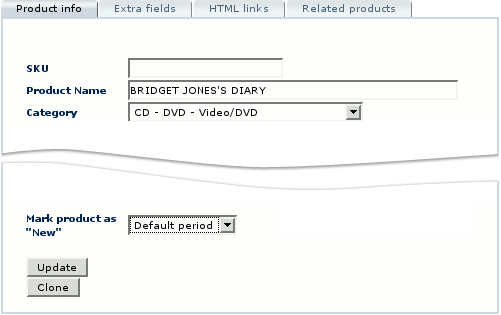
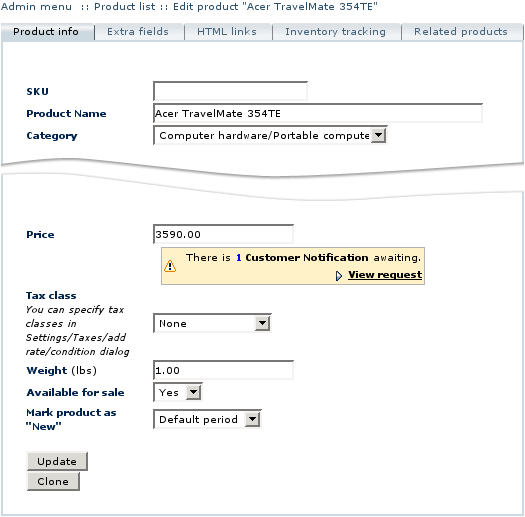
When the Product Adviser module is configured to feature new arrivals, every product added to the stock is automatically marked as 'New' and added to the 'New Arrivals' list. Sometimes you might want to remove a product from the list or want to keep it there after the 'New' period expires. To change this setting for a product, find the product in the 'Products' section of the 'Catalog' menu using the search form, then click on the product title. At the bottom of the 'Product Info' page find the 'Mark product as "New"' option (Figure 9). Select 'Forever' if you want the product to stay in the 'New Arrivals' list infinitely, 'Unmark' to take the product out of the 'New Arrivals' list. If the product is not listed as new, selecting 'Default period' marks it as 'New' for a default period of time starting from the current moment. Click on the 'Update' button after you change the product settings.
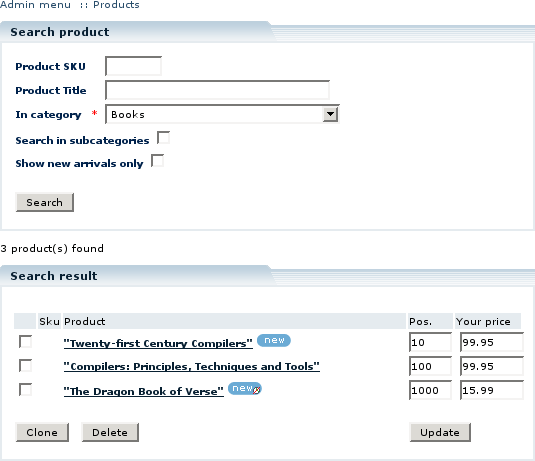
When the Product Adviser module is installed and enabled, it customizes the look of the product search form by adding a' Show new arrivals only' search option. If you place a checkmark against it, product search will only be performed within the set of products with a new arrival status. Note the icons placed next to the names of products with the 'New' status (Figure 10). Products with the 'Forever new' status have an icon with crossed out watch in it.
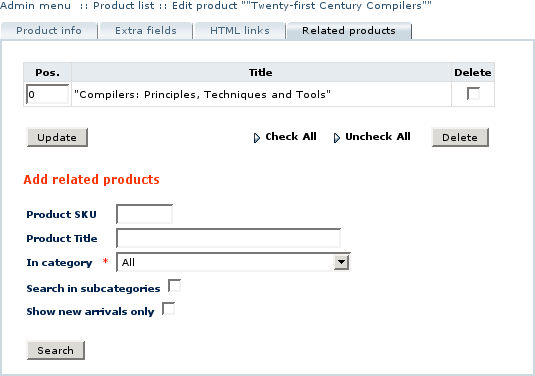
When the Product Adviser module is installed and 'Related Products' functionality is enabled, a new 'Related Products' tab is added to the product details page of each product. Click on the tab to review the list of products related to the selected one (Figure 11).
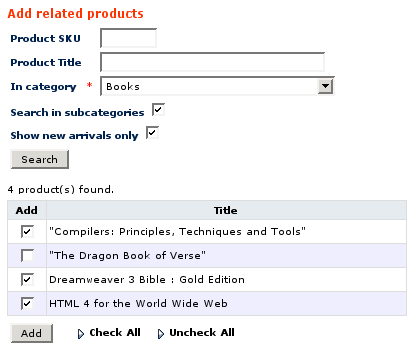
To add a product to the list, specify the search options under the 'Add related products' title and click on the 'Search' button. Place a check mark against the products you want to add to the list and click on the 'Add' button (Figure 12).
You can define the order in which the products will be presented to the customers. In the list of related products, change the values in the 'Pos.' field to sort the products, assigning lower values to the products that should appear at the top of the list and click on the 'Update' button to save the changes (Figure 11).
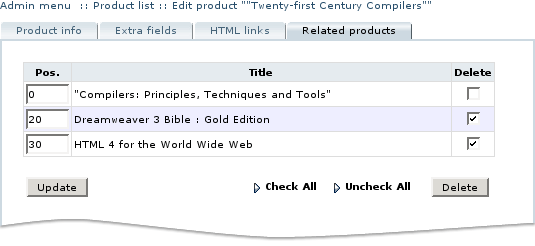
To take the product out of the related products list, place a check mark against its title in the 'Delete' field and click on the ' Delete' button (Figure 13). To remove all related products, click on 'Check All' to mark all the check boxes and then click on the'Delete' button. Click on 'Ok' in the pop-up confirmation window to proceed with deletion.
Customer Notifications
Shoppers find it extremely convenient and practical to use customer notification services: no need to visit a web-site ten times a day trying to catch a moment when some rare product is finally in stock or when a price on a dream computer goes downs. Being a helpful tool for your customers, notification mechanism comes handy for you as a merchant. It helps you identify your customers' preferences and needs, thus assisting in planning your sales without employing market experts or sales assessment consultants.
Here is how the mechanism works: when your store users fill out notification requests, those requests are placed in a database. When the notification condition is met, a 'Ready' flag is set on the request. The store administrator reviews the request and approves the notification dispatch. The paragraphs below describe the procedure in more detail.
Reviewing Customer Notifications
To review customer notifications enter the 'Customer Notifications' section of the 'Management' menu. 'Search filters' form (Figure 14) allows you to select specific notification requests from the database.
The following filter settings are available:
- Type – this setting allows filtering notification requests by notification type: 'Product' means product availability and' Price' means price drop.
- Status - this setting allows to filter notification requests by their current status:
- Waiting – this is the initial status assigned to requests when they are placed;
- Ready – the status assigned to requests when the condition of a request is met;
- Sent – the status of a processed request (when the condition of a request is met and a notification message is sent);
- Declined – this status can be assigned to a request by the store admin;
- Search period – this setting allows you to refine search results by the time period, 'Custom period' option allows you to specify exact dates to search through.
To save your search preferences click on 'Save filter preferences'; to restore default search preferences click on 'Clear all filters'.
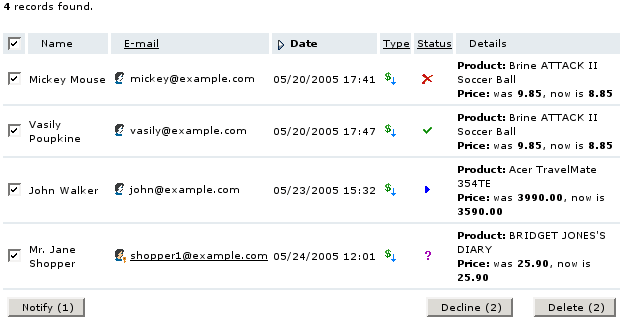
Click on the 'Search' button (Figure 14) to see the notifications that meet the specified filters (Figure 15).
The list of customer notifications can be sorted alphabetically by subscription e-mail, or by request date, type or status; click on the corresponding field title to sort the list according to it. Notification requests submitted by registered store customers are distinguishable from those submitted by unregistered users: registered customers' e-mails are clickable and reveal customer profiles when clicked.
Managing customer notifications
Notifications are not sent automatically to notification subscribers, to send out notification e-mails you need to approve the notification requests.
- To approve a request, place a check mark against each request you want to process and click on the 'Notify' button. You will be redirected to 'Send Customer Notifications' page (See the section 'Sending out customer notifications' for details). After the notification is sent, its status automatically changes from 'Ready' to 'Sent'.
- If you do not authorize a notification request, place a checkmark against the request and click on the 'Decline' button, the status of the request will be changed to 'Declined'.
- To delete a request from the store database place a checkmark against it and click on 'Delete'.
Sending out customer notifications
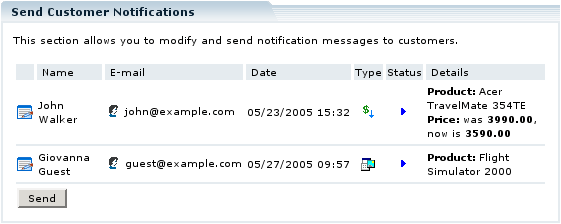
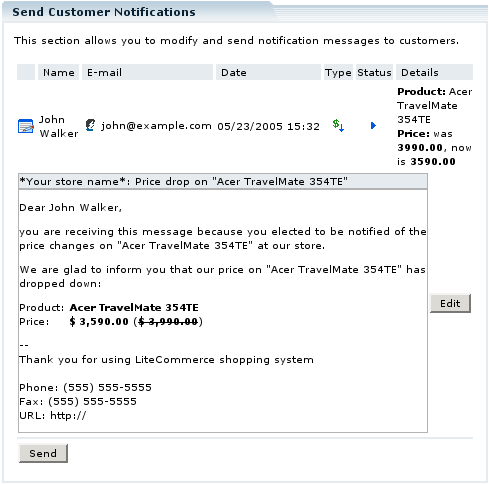
After you submit a list of customer notification requests for sending, you will see the 'Send Customer Notifications' page where you can review notification messages to be sent to customers (Figure 18).
To review and edit a message, click on the 'Edit' icon to the left from the notification details. Click on the 'Edit' button to the right of the message text if you want to modify it, and then click on the 'Preview' button to see the modified message (Figure 19). When you finish reviewing the notification messages, click on the 'Send' button to send them out.
After the messages are sent you will be redirected back to the 'Customer Notifications' page.
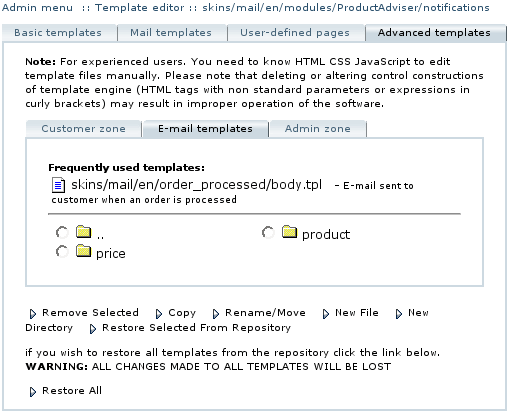
Default texts of e-mail notifications on product availability and price reduction are stored in the templates located at “skins/mail/en/modules/Product Adviser/notifications/” subfolder of LiteCommerce installation and can be edited using Template editor. Editing an e-mail message on the 'Send Customer Notifications' page does not modify a corresponding template.
To modify a template, choose the 'Advanced templates' tab in the 'Template Editor' section of the 'Look&Feel' menu. In the inner box choose the 'E-mail templates' tab, and then proceed to 'modules'' -> ''Product Adviser'' -> ''notifications' (Figure 20). Choose 'product' folder for subject and body of product availability message templates, and 'price' folder for price reduction message templates. Please consult LiteCommerce reference manual for detailed information on using the template editor.
Customer zone
Related products
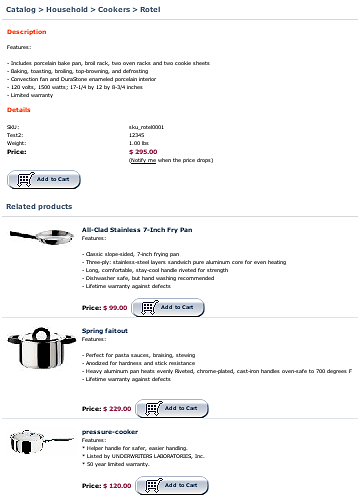
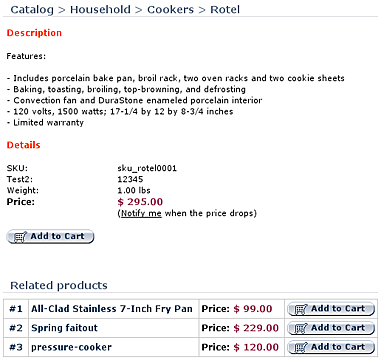
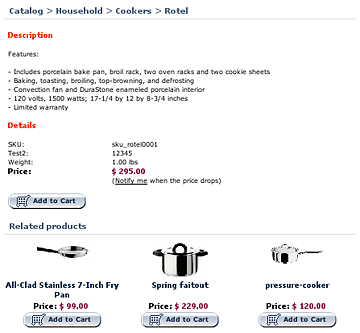
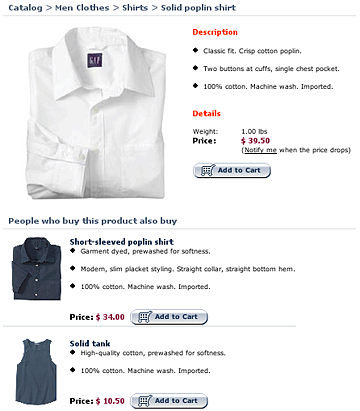
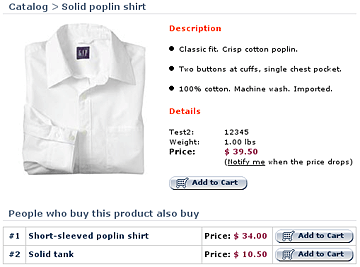
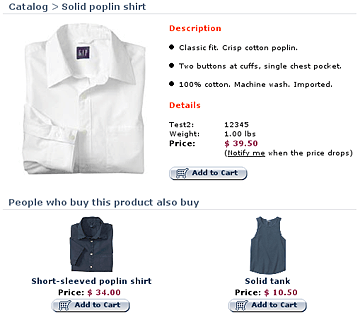
When enabled, the 'Related products' component adds a set of related products to product detail pages. Depending on the Product Adviser module settings, the set is displayed either as a list (Figure 21), a table (Figure 22) or a set of icons (Figure 23).
Recently viewed products
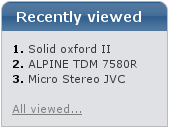
The 'Recently viewed' component generates a clickable box with a number of links to products recently viewed by a store user (Figure 24a), thus allowing for easier navigation of your online store catalog.
The 'Recently viewed' box is displayed in all online catalog pages. If the number of products recently viewed by a user is higher than the number specified by the store administrator, 'All viewed…' link appears at the bottom of the box (Figure 24b). Click on the link to see the full list of products viewed during the store visit.
New arrivals
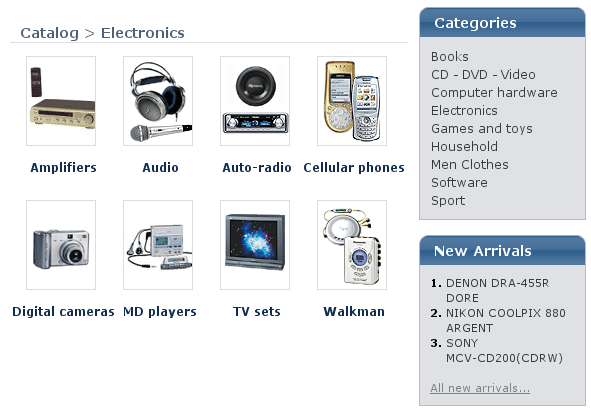
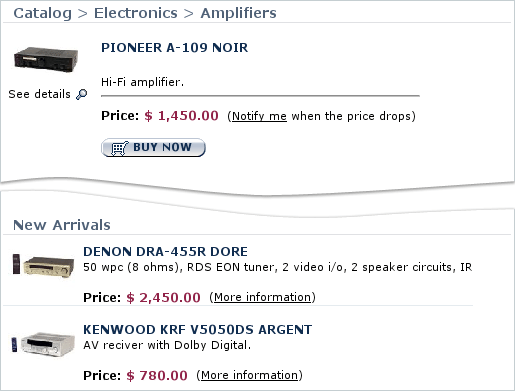
The 'New arrivals' component helps you draw your customers' attention to the newest additions to your store. It displays a clickable list with links to select new products either in a side box (Figure 25) or inside the main section of the screen underneath the catalog entries (Figure 26). You can choose to display new arrivals in all catalog pages irrespective of their categories, or on a per-category basis. In the second case, the new arrivals box appears only in the sections which contain products or subcategories with products that meet the new arrivals criteria. If the number of new arrivals is higher than the maximum number of products in the list, the 'All new arrivals...' link appears at the bottom of the box. Click on the link to see the full list of new arrivals.
People who buy this product also buy
The name of the 'People who buy this product also buy' component is self-explanatory – it analyzes purchase trends and displays sets of products that people tend to buy together. Depending on the Product Adviser module settings, the set is displayed either as a list (Figure 27), a table (Figure 28) or a set of icons (Figure 29).
Submitting notification requests
When customer notifications are enabled, a user browsing your LiteCommerce-powered online store catalog is offered to be notified of price drops on every product, of availability of products that are currently out of stock or in short supply.
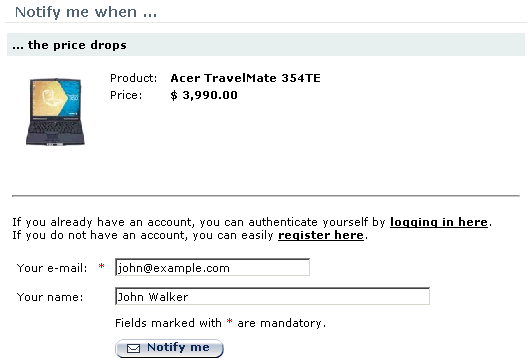
When a user clicks on a 'Notify me' link, he is redirected to a page where he can either authenticate himself using existing customer login and password or provide details necessary to subscribe for a notification without registering (Figure 30).
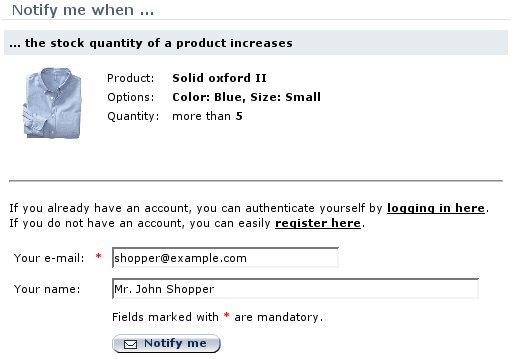
In case a limited amount of some product is available in stock and a user is interested in purchasing a higher quantity, he can request to be notified when the stock amount of a given product increases (Figure 31).
Clicking on the 'Notify me' button submits the notification request. After the request is submitted, the user's browser is redirected back to the product details page.
