X-Cart:News Management
Contents
What News Management module does
News Management module allows you to inform your customers about different kinds of news at your store (special offers, discounts, new products, etc):
- you can create messages about your store news using the 'News management' section of the Admin area;
- the messages appear in the 'News' section of the Customer area and/or get sent to those of your clients who are subscribed to your newsletter.
The module functions in such a way that any news message created with it is posted not independently, but as part of a news list. News lists are news categories that organize your news messages by topic. Setting up several news lists in one store provides more flexibility for your customers who subscribe to the store newsletter: they can subscribe not to all of your news, but just to the news lists in which they are interested.
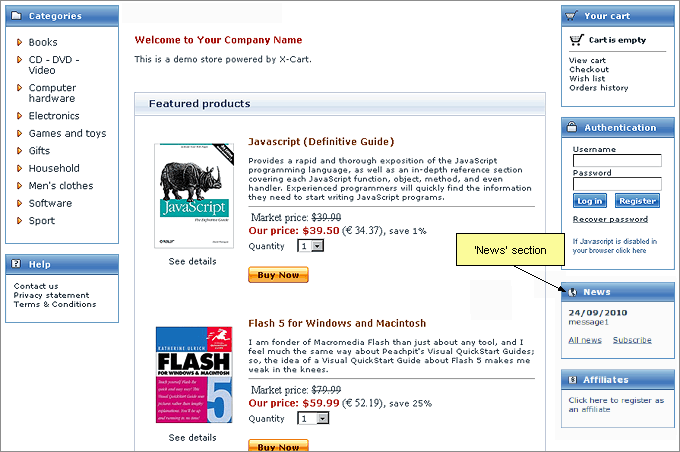
'News' section
The 'News' section is a place in the Customer area which can display your latest news.
This section appears on the front end only when there is at least one news list which is active and needs to be shown as news.
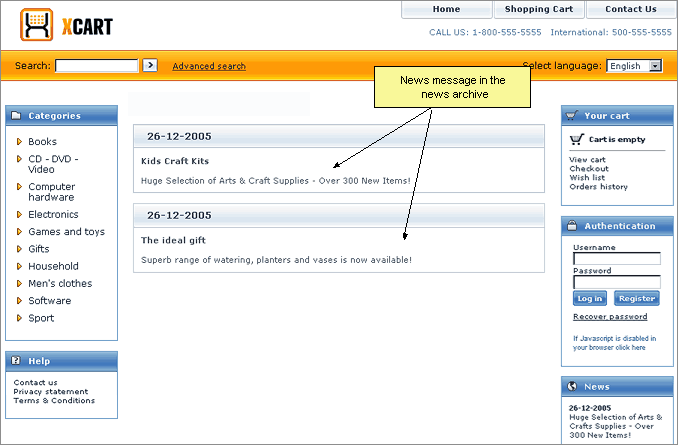
Before you post any news messages, the 'News' section says 'No news available at the moment'. After you have added one or more news messages, the message added latest of all appears in the 'News' section. The news messages posted previously are available for viewing in the news archive (accessible by clicking the 'Previous news' link).
Newsletter
Newsletter is an information letter available to store users by subscription. In order to receive newsletter emails, a client needs to provide an email address and specify, which of the available news lists he or she would like to read. When you have news lists which are active and available for subscription, newsletter subscription is available to any visitors of your store site, no matter if they are registered or anonymous.
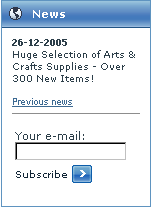
Anonymous visitors can subscribe by entering their email address into 'Your email' field in the 'News' section:
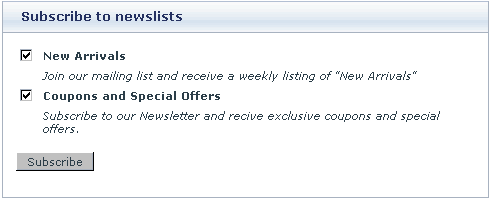
and select the news lists to which they would like to subscribe from the list in the 'Subscribe to newslists' form (This form is displayed as soon as an email address is entered in the 'News' section):
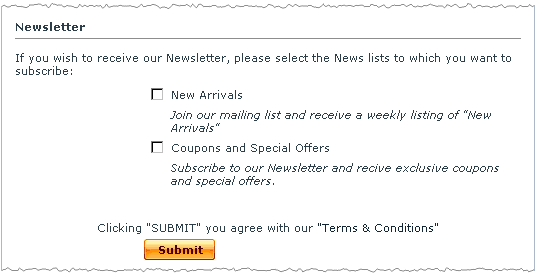
Registered customers and new clients getting registered can subscribe to the newsletter using the 'Newsletter' section of the 'Profile details' form:
As soon as a client subscribes to a news list, his or her email address is automatically added to the mailing list for that news list so the client can begin getting the newsletter.
If you wish, you can enable notification emails to subscribers. Notification emails not only notify your new subscribers of the fact that their email address has been entered into a mailing list, but also provide a link allowing these subscribers to unsubscribe from newsletter emails.
An 'Unsubscribe' link is provided with each newsletter, so if any of your customers wish to discontinue their newsletter subscription, they will be able to do so at any time.
Starting with X-Cart version 4.3.0, News Management is available as a built-in module in all X-Cart editions. It does not require installation and can be enabled in the Modules section of X-Cart Admin area.
Roles in News Management module management
If you are an X-Cart GOLD or GOLD PLUS administrator/provider or an X-Cart PLATINUM or PRO administrator:
- You can enable/disable and configure the module News Management (See #Enabling and Configuring 'News Management').
- You can create and manage news lists (Check out #News lists)
- You have full control over mailing lists (Check out#Mailing lists). You can:
- add email addresses to any mailing list (manually or by importing a file with a list of email addresses),
- delete email addresses from a mailing list,
- export email addresses from a mailing list.
- You can create messages for news lists, manage created news messages and send them to newsletter subscribers (See #News List Messages)
If you are an X-Cart PLATINUM or PRO provider:
- You cannot post any news on the store site or send newsletters by yourself.
Enabling and Configuring 'News Management'
To begin using the module:
1. Enable the News Management module (Administration menu->Modules).
- When the module is enabled, you can see:
- News management link in the Management menu;
- News management options section in General settings/Modules options.
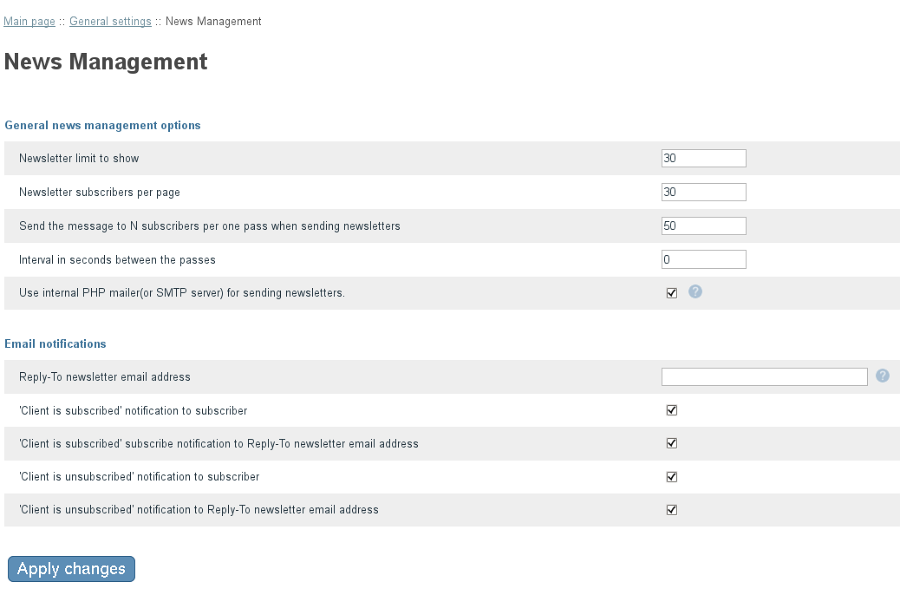
2. Adjust the module settings via General settings/Modules options->News management options.
- Newsletter limit to show: Maximum number of newsletters to display on one page in the 'News list' dialog box in the store's back end.
- Newsletter subscribers per page: Maximum number of subscribers to display per page in the list of newsletter subscribers in the store's back end.
- Send a message to N subscribers per one pass when sending newsletters: Number of subscribers to which a newsletter message can be sent per one pass (Set this option if you wish to send newsletter emails in batches, N emails at a time).
- Interval in seconds between the passes: An interval between the passes in which newsletter messages are sent.
- Use internal PHP mailer(or SMTP server) for sending newsletters: If selected, an internal PHP mailer (or SMTP server) is used for sending newsletters. You can unselect this check box to use the external admin/newsletter.sh mailer. When the number of newsletter subscribers is large, using the external mailer is recommended.
(The setting "Use internal PHP mailer(or SMTP server) for sending newsletters" is available in the News Management options section in X-Cart versions 4.7.2 and later. In previous versions it can be found in the General settings/Email section). - Reply-To newsletter email address: An email address that appears in the 'From:' field of newsletter emails sent to customers (might be used by your customers to reply to your newsletter emails).
- 'Client is subscribed' notification to subscriber: If selected, an email notification is sent to a store site visitor who joins a newsletter mailing list that he or she has subscribed to a newsletter .
| Plain text mail templates for this notification | HTML mail templates for this notification |
|---|---|
| mail/newsletter_subscribe.tpl
mail/mail_header.tpl mail/signature.tpl mail/newsletter_subscribe_subj.tpl |
mail/html/newsletter_subscribe.tpl
mail/html/mail_header.tpl mail/html/signature.tpl |
- 'Client is subscribed' subscribe notification to Reply-To newsletter email address: If selected, an email notification is sent to the Reply-To newsletter email address that a new client has subscribed to a newsletter.
| Plain text mail templates for this notification | HTML mail templates for this notification |
|---|---|
| mail/newsletter_admin.tpl
mail/mail_header.tpl mail/signature.tpl mail/newsletter_admin_subj.tpl |
mail/html/newsletter_admin.tpl
mail/html/mail_header.tpl mail/html/signature.tpl |
- 'Client is unsubscribed' notification to subscriber: If selected, an email notification is sent to a subscriber who has unsubscribed from a newsletter that his or her subscription is terminated.
| Plain text mail templates for this notification | HTML mail templates for this notification |
|---|---|
| mail/newsletter_unsubscribe.tpl
mail/mail_header.tpl mail/signature.tpl mail/newsletter_unsubscribe_subj.tpl |
mail/html/newsletter_unsubscribe.tpl
mail/html/mail_header.tpl mail/html/signature.tpl |
- 'Client is unsubscribed' notification to Reply-To newsletter email address: If selected, an email notification is sent to the Reply-To newsletter email address if somebody unsubscribes from a newsletter.
| Plain text mail templates for this notification | HTML mail templates for this notification |
|---|---|
| mail/newsltr_unsubscr_admin.tpl
mail/mail_header.tpl mail/signature.tpl mail/newsltr_unsubscr_admin_subj.tpl |
mail/html/newsltr_unsubscr_admin.tpl
mail/html/mail_header.tpl mail/html/signature.tpl |
3. Click the Save button.
News Lists
Creating news lists
Before you can create any news messages, you need to create one or more news lists. News lists are categories in which specific news messages are created.
Examples:
'New Arrivals' could be a good name for a news list intended for messages like 'Newest & hottest products for your Mac' or 'Over 50 new items in Books category'.
'Coupons and Special Offers' could be a good name for a news list intended for messages like '20% off of any order Dec 20 - Jan 1' or 'Buy 2 books - get a 3rd one FREE!'.
You can create as many news lists as you need in any of the languages supported by your store.
To create a news list:
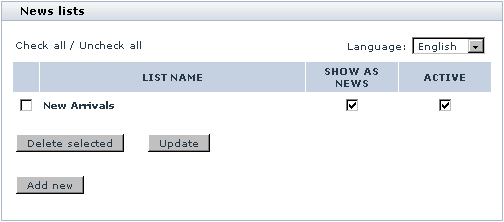
- Go to the 'News Management' section of the store's back end (Management menu->News management). You should see a dialog box titled 'News Lists'. The first time you enter the 'News Management' section, this form will be empty:

On your subsequent visits, after you add some news lists, the 'News Lists' dialog box will contain a list of existing news lists. - In the 'News Lists' dialog box, click the Add new button. This should open a form titled 'News list details'.
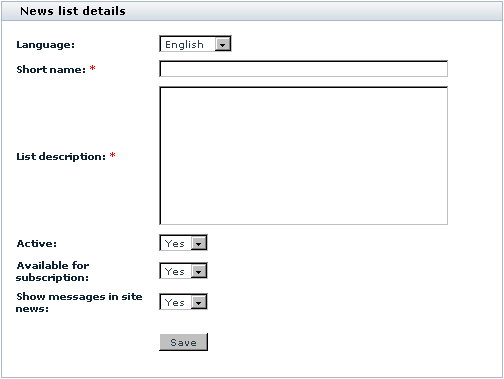
- Use the 'News list details' form to provide information about the news list being created:
- Each news list can exist only in one language, so you need to specify the language of the news list being created. Use the 'Language' drop-down box to select a language.
- Use the 'Short name' field to provide a title for the news list.
- Enter a description for the news list into the 'List description' field.
- Use the 'Active' drop-down box to enable/disable the news list.
News lists which are enabled ('Active' = Yes) are available to customers. Depending on the 'Available for subscription' and 'Show messages in site news' options, such news lists may be available for subscription or may show messages in the 'News' section of the Customer area.
News lists which are disabled ('Active' = No) are not available for subscription and do not appear in the site news ('News' section or news archive) regardless of the 'Available for subscription' and 'Show messages in site news' options.
- Use the 'Available for subscription' drop-down box to specify, whether the news list should be available for subscription
- Use the 'Show messages in site news' drop-down box to specify, whether the news list messages should be shown in the site news.
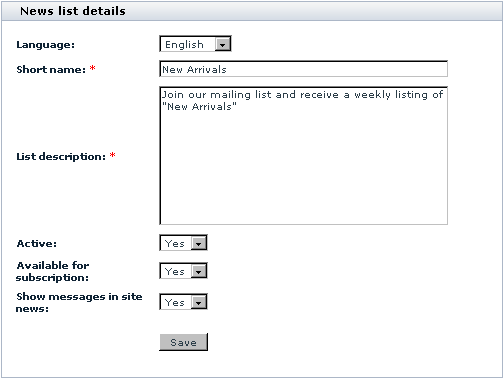
- Click on Save. The news list should be created. After an automatic page refresh, you should see an information box with a confirmation message.
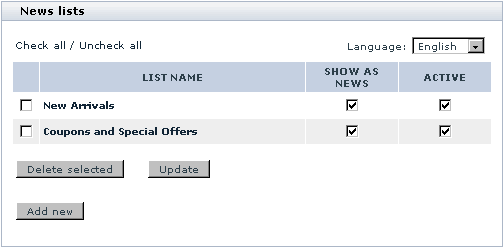
To view the newly created news list added to the list of news lists within the 'News Lists' dialog box, click the News lists link in the 'See also' menu at the top of the page. Your 'News Lists' dialog box with the added news list will look like this:
After you have created a news list, you may want to set up its mailing list or create messages that will be sent to the news list subscribers or shown as news on your site.
Managing news lists
You can view/modify the details of any news list (rename, edit the description or change the status), as well as delete any news list if you are not going to use it any more.
All the operations on existing news lists can be performed using the controls of the 'News lists' dialog box in the 'News Management' section of the store's back end (Management menu->News management).
To view/modify the details of a news list (rename, edit the description or change the news list's 'Available for subscription' status):
- Open the 'News lists' dialog box.
- Use the language selector at the top of the 'News lists' dialog box to select the language of the news list which you wish to view/modify. This should produce a list of all the available news lists for the selected language. News lists in other languages will not be displayed.
- Find the news list whose details you wish to view/modify and click on its name. The details of the news list should be opened in the 'News list details' form.Note: The language selector in this 'News list details' form should be inactive, as it is not possible to change the language of news lists. Also you cannot change the language of the page, while you are editing a news list.
- If necessary, edit any of the news list details.
- Click the Save button to save the changes.
The updated details should be saved. An information box with a confirmation message should appear.
If you need just to enable/disable a news list, or change a news list's show as news status, you can do it directly in the 'News lists' dialog box:
- Open the 'News lists' dialog box.
- Use the language selector at the top of the 'News lists' dialog box to select the language of the news list(s) whose status(es) you wish to change. This should produce a list of all the available news lists for the selected language.
- Find the news list(s) whose statuses you wish to change.
- Select the check boxes in the ACTIVE column for all the news lists that need to be enabled (unselect to disable).
- Select the check boxes in the SHOW AS NEWS column for all the news lists whose news messages you wish to be displayed on the store front end.
- Click the Save button to save the changes.
The statuses should be updated. An information box with a confirmation message should appear.
To delete one or more news lists:
- Open the 'News lists' dialog box.
- Use the language selector at the top of the 'News lists' dialog box to select the language of the news list(s) you wish to delete. This should produce a list of all the available news lists for the selected language.
- Select the check boxes next to the names of the news list(s) you wish to delete.
- Click the Delete selected button.
The selected news lists should be removed. An information box with a confirmation message should appear.
Mailing Lists
Each of the news lists that you make available for subscription has its own mailing list - a list of subscriber email addresses to which messages of this news list are sent.
Viewing a news list's mailing list
To view the contents of a mailing list, you need to open this mailing list.
To open a mailing list, do the following:
- Find the news list whose mailing list you wish to edit and open its details for viewing/modification (Click on the news list name in the 'News Lists' dialog box).
- Click the Subscriptions link in the 'News Management' section menu. This displays a dialog box titled 'News list mailing list'.
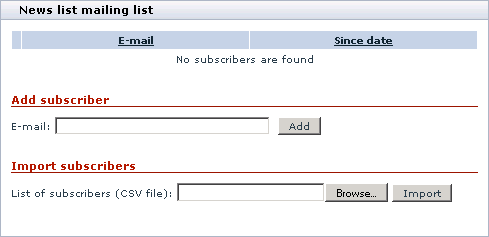
- Before any email addresses are added to the mailing list of the current news list (by you or your customers), the mailing list will be empty:
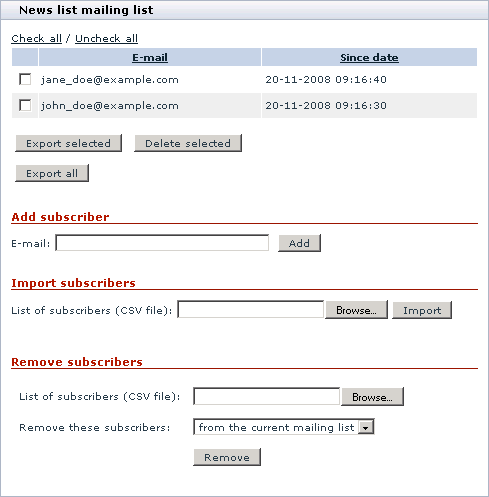
- After some of your customers subscribe to the news list (or after you add some email addresses to the mailing list from the Admin area), the mailing list will contain a list of subscriber email addresses:
- (The dates in the 'Since date' column opposite the email addresses are the dates when the corresponding subscriptions were set up).
Adding email addresses to a mailing list
Typically, email addresses will be added to mailing lists automatically as your store' visitors subscribe to your news lists. However, there may be situations in which you may need to add one or more email addresses to a mailing list by yourself. There are two methods that you can use to add email addresses to a mailing list: add email addresses manually one at a time or importing them from a file. Adding email addresses manually is a convenient method when you need to add just a few addresses; importing from a file is good when a large number of email addresses needs to be added (for example, when you move your subscribers' data to a new store or when you set up a mailing list for a new news list using an already existing mailing list).
To add an email address to a mailing list manually:
- Open the mailing list to which you wish to add an email address.
- Enter the email address into the 'email' field of the 'Add subscriber' subsection of the 'News list mailing list' dialog box.
- Click the Add button.
When you click on Add, the email address is added to the list. An information box with a confirmation message should appear.
To add email addresses to a mailing list by importing:
Obtain a text file with a list of email addresses that need to be imported.
The format of the file must be the following:
email1@example.com
email2@example.com
email3@example.com
- Open the mailing list to which you wish to import the email addresses from your file.
- Use the Browse button next to the 'List of subscribers (CSV file)' field in the 'Import subscribers' subsection of the 'News list mailing list' dialog box to locate and select the file that needs to be imported.
- When the name of the import file appears in the 'List of subscribers (CSV file)' field, click the Import button.
When you click on Import, the email addresses contained in your import file are added to the mailing list.
Managing email addresses contained in a mailing list
You can remove email addresses from mailing lists to unsubscribe owners of these email addresses from the newsletter. Email addresses can be removed from a mailing list manually or by importing.
To remove one or more email addresses from a mailing list manually:
- Open the mailing list from which you wish to remove email addresses.
- Select the check boxes next to the email addresses that need to be removed.
- Click the Delete selected button.
When you click on Delete selected, the selected email addresses are removed.
To remove email addresses from a mailing list by importing a CSV file:
- Prepare a CSV file with a list of email addresses that need to be removed from a mailing list.
- Open the mailing list from which you wish to remove the email addresses contained in the CSV file.
- Use the 'Remove subscribers' section of the 'News list mailing list' dialog box to import the file and remove the email addresses:
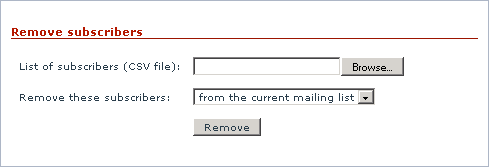
- Use the Browse button next to the 'List of subscribers (CSV file)' field to locate and select the CSV file that needs to be imported.
- Use the 'Remove these subscribers' selectbox to specify whether you want the addresses from the CSV file to be removed only from the current mailing list or from all the mailing lists in the store.
- Click the Remove button.
When you click on Remove, the addresses contained in the CSV file are removed (depending on the selected option - from the current mailing list or from all the mailing lists).
You can export some or all of the email addresses contained in a mailing list to a separate file (This file can then be re-imported into X-Cart to add email addresses to some other mailing list).
To export specific email addresses from a mailing list:
- Open the mailing list from which you wish to export email addresses.
- Select the addresses you wish to export by selecting the respective check boxes.
- Click the Export selected button.
- When prompted, save the export file.
To export all the email addresses from a mailing list:
- Open the mailing list from which you wish to export email addresses.
- Click the Export all button.
- When prompted, save the export file.
News List Messages
Adding messages to a news list
After you have created a news list, you can create messages for it.
To add a news message:
1. (If necessary) Find the news list to which you wish to add a news message.
2. Open the details of the news list for viewing/modification (Click on the news list name in the 'News Lists' dialog box).
3. Click the Messages link in the 'News Management' section menu. This should open a dialog box titled 'News list messages'.
- Before any messages are added to the current news list, the list of messages in the 'News list messages' dialog box will be empty:
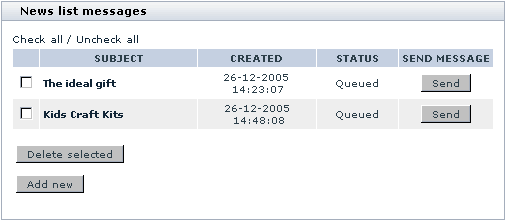
- On your subsequent visits, after you add some messages to the news list, the 'News list messages' dialog box will contain a list of news list messages.
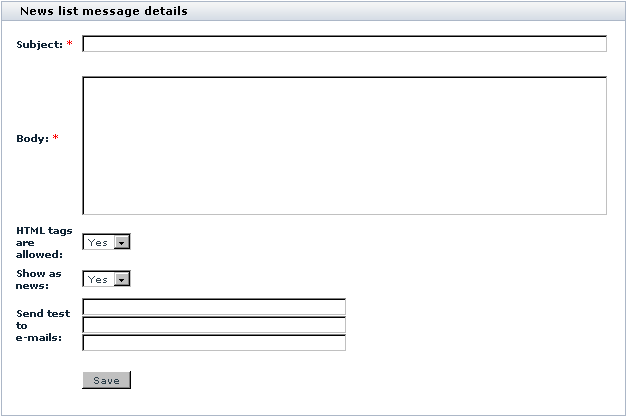
4. Click the Add new button at the bottom of the 'News list messages' dialog box. A form titled 'News list message details' should appear:
5. Use the 'News list message details' form to provide information about the news message being created:
- a) Use the 'Subject' field to specify the subject of the message (If the news list is available for subscription, the subject specified in this field will be used as the subject of the email message sent to the news list subscribers).
- b) Use the 'Body' field to enter the text of the news message.
- Note: If you wish to use HTML tags to format your news message, enable the 'HTML tags are allowed' option. You can put any HTML tags in the 'Body' field except for <HTML>, <HEAD>, <BODY>.
- c) Use the 'HTML tags are allowed' drop-down box to specify whether you want to use HTML tags in the news message.
- d) Use the 'Show as news' drop-down box to specify whether the message should be shown in site news.
- e) (Optional) If you are intending to send the message as a newsletter, you may want to make sure it looks OK when sent by email before you actually send it to customers. To do so, specify 1-3 email addresses in the 'Send test to emails' fields.
6. Click the Save button. The created message gets added to the list of news list messages. After an automatic page refresh, you should see an information box with a confirmation message.
If you have specified any email addresses for sending a test newsletter, the message gets sent to these email addresses as soon as you click the Save button.
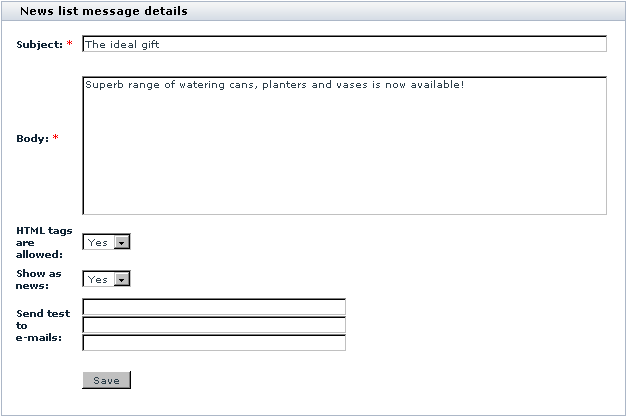
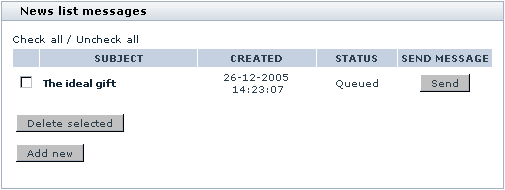
To view the newly created news message added to the list of messages for the news list, click the Messages link in the 'News Management' section menu at the top of the page. The added message should look something like this:
Managing news list messages
You can view/modify the details of any news messages, delete news messages and send news messages to newsletter subscribers.
All the operations on messages of a specific news list can be performed using the 'News list messages' dialog box:
To view/modify a news message:
- Open the 'News list messages' dialog box.
- In the list of news messages, find the message you wish to view/modify.
- Click on the subject of the message. This should open the 'News list message details' form with the message details.
- Modify the necessary details.
- Click the Save button. The message should be updated. You should see an information box with a confirmation message.
To delete one or more news message from a news list:
- Open the 'News list messages' dialog box.
- In the list of news messages, find the messages you wish to delete and select the check boxes next to them.
- Click the Delete selected button. The selected messages should be deleted. You should see an information box with a confirmation message.
To send a news list message to newsletter subscribers:
- Open the 'News list messages' dialog box.
- In the list of news messages, find the news message you wish to send to newsletter subscribers.
- Click the Send button opposite this message. The message should be sent. You should see the status 'Queued' change to 'Sent' for this message.
A sent message can be sent again by clicking the Resend button.
Troubleshooting
There is no option to subscribe to Newsletter from the checkout page when I'm using AJAX One Page Checkout. However, this option appears when I enable FastLane checkout instead of AJAX OnePage.
To enable newsletter signup for One Page Checkout, you will need to make some changes to the following template file:
skin/common_files/modules/One_Page_Checkout/opc_profile.tpl
Find these lines of code:
        {*** uncomment if you need to enable newsletter signup
        {include file='modules/One_Page_Checkout/profile/newslist_info.tpl' hide_header=true}
        ***}
and replace them with the following:
{include file='modules/One_Page_Checkout/profile/newslist_info.tpl' hide_header=true}
