X-Cart:ShippingEasy module installation
System requirements and installation
To be able to successfully install and use the ShippingEasy module, you need a working copy of X-Cart version 4.4.x installed on your server.
To install the module:
- Download the ShippingEasy module archive from the File Area section of your X-Cart Account. Look for a file named like x-shippingeasy-x.y.z.tgz, where x, y and z are numbers matching the version of your installed copy of X-Cart.
- Copy the contents of the module archive to the X-Cart root directory on your server or hosting account.
- If you are using a Windows-based server, or a UNIX-based server without terminal access:
- a) Unpack the module archive to a directory on your system using your favorite compression program (WinZIP, 7-Zip or any other archiver with support for TAR files).
- b) Use an FTP client to upload all the files contained in this directory (retaining the directory structure) to the X-Cart root directory on your server or your hosting account.
- If you are using a UNIX-based server with terminal access:
- a) Use an FTP client to upload the module archive to the X-Cart root directory on your server or your hosting account.
- b) Unpack the archive using the following command:
tar -xzvf x-shippingeasy-x.y.z.tgz
- (Replace x, y and z with the actual version numbers).
- Important: Make sure you keep the directory structure while unpacking and uploading the module archive, otherwise some necessary files may be overwritten!
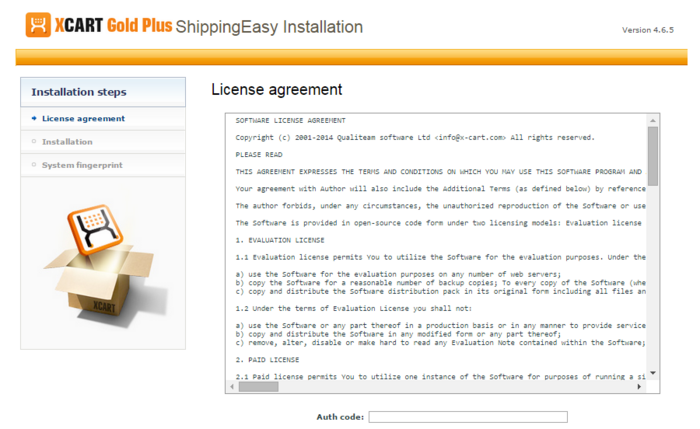
- In a web browser, run the installation script httр://<YOUR_XCART_DOMAIN>/install-shippingeasy.php replacing <YOUR_XCART_DOMAIN> with the actual domain name of your X-Cart store. This will start the installation wizard. A screen like the following will be displayed:
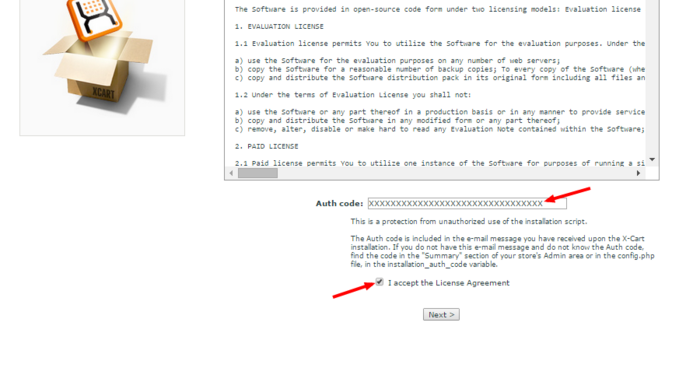
- Carefully read the License agreement, enter the Auth code for your X-Cart installation into the Auth code field and select the "I accept the License Agreement" check box:
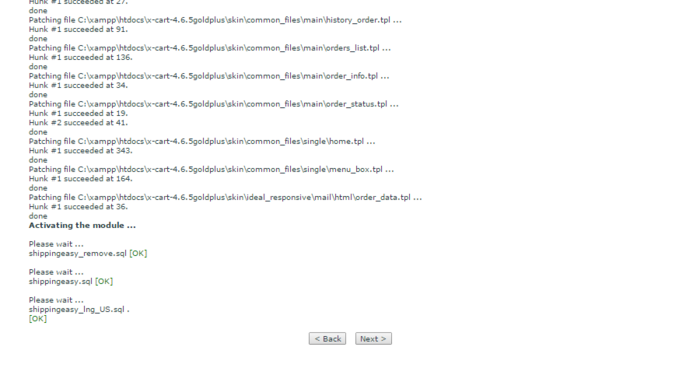
- Click Next to continue. The installation process will start. The installer will make the necessary changes to your X-Cart installation, and the module will be activated:
- Once the process is completed, click Next. This will open the next screen where you will be asked whether you wish a new system fingerprint to be generated:
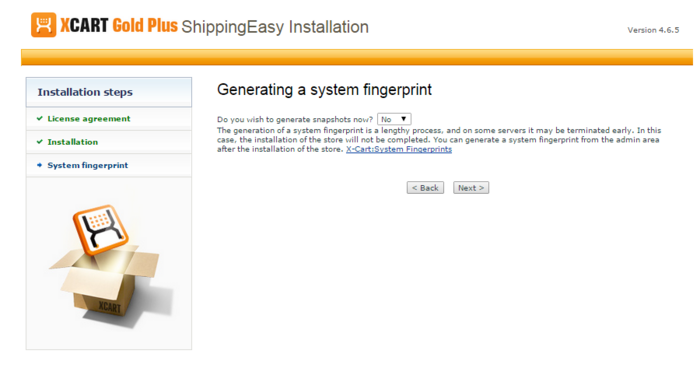
- Make your selection (Yes/No) and click Next. If you have chosen to generate a new system fingerprint, it will be generated. The process of generating a system fingerprint may take up as long as a few minutes. Once the generation process is completed, click Next. If you have chosen to skip the generation of a system fingerprint, you will be taken to the next step.
- After clicking Next you should see the "Installation complete" screen:
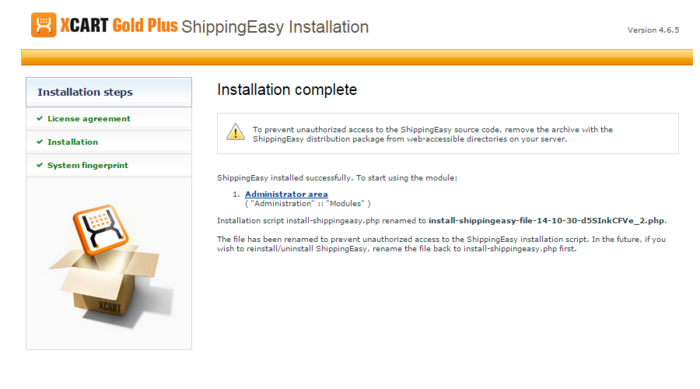
This is the final step. It informs you that the ShippingEasy module has been installed successfully. It also reminds you to remove the module archive file in case you put it in a web accessible directory; this is needed to protect the module from unauthorized copying.
Important: At the final step of the installation process, the installation script install-shippingeasy.php is automatically renamed as an additional measure to protect the module installation. Please take note of the filename to which the installation script was renamed. If you decide to re-install or uninstall the module later on, you will need to rename the installation script back to install-shippingeasy.php before launching the installation process in your web browser.
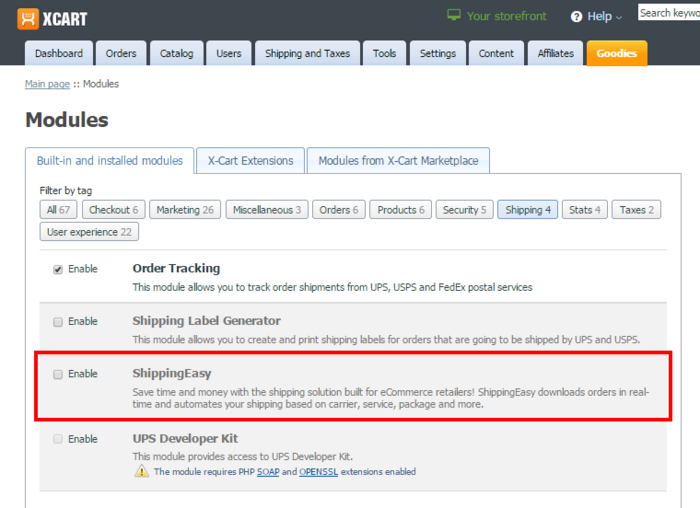
Now if you choose to view the list of your store's installed modules (this can be done using the Administrator area link provided on the "Installation complete" screen), the ShippingEasy module will be on the list:
See also:
Uninstallation
Uninstallation completely removes all the data related to the ShippingEasy module from your store.
To complete the uninstallation, you will need to run the ShippingEasy module installation script. You might remember that, after the module was installed in your store, the script was saved with a new name to help prevent unauthorised runs of the installer. Now, before you start, you need to rename the script back to its original name - install-shippingeasy.php.
To uninstall the module:
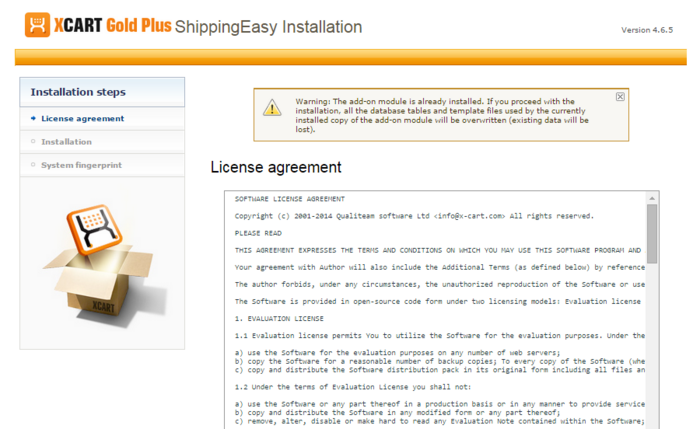
- Run the module installation script in your web browser by going to httр://<YOUR_XCART_DOMAIN>/install-shippingeasy.php (be sure to replace the <YOUR_XCART_DOMAIN> part with the actual domain name of your X-Cart store). This will start the installation wizard. A screen like the following will be displayed:
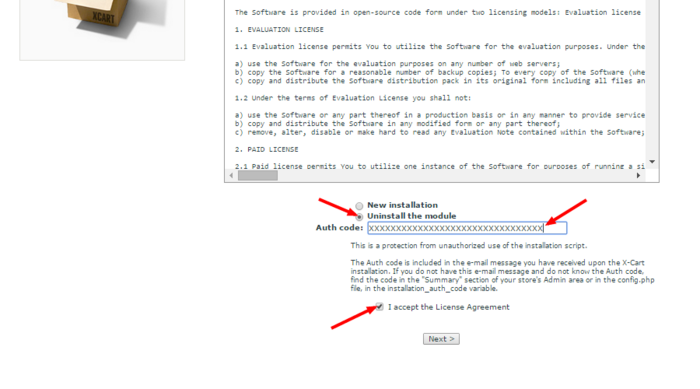
- Select "Uninstall the module", enter the Auth code for your X-Cart installation into the Auth code field and select the "I accept the License Agreement" check box:
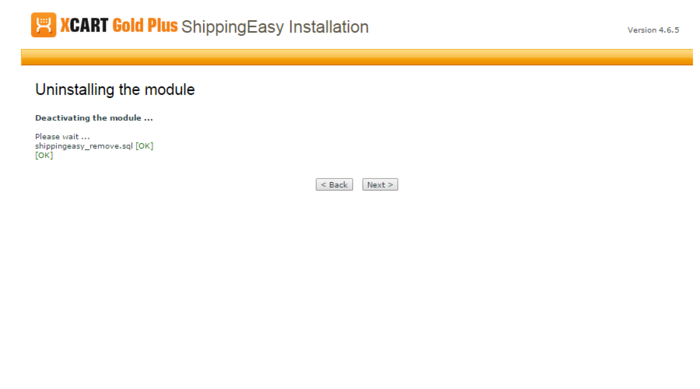
- Click Next to continue. The uninstallation process will start. The installer will make the necessary changes to your X-Cart installation, and the module will be deactivated:
- Once the process is completed, click Next. This will open the next screen where you will be able to generate a new system fingerprint.

- Generate the system fingerprint, or skip it. After clicking Next you should see the "Uninstallation complete" screen:
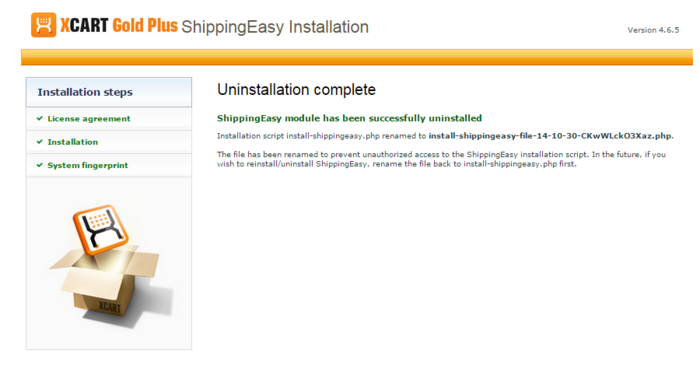
This is all. The ShippingEasy module has been uninstalled.
