X-Cart:X-Showroom
Contents
Overview
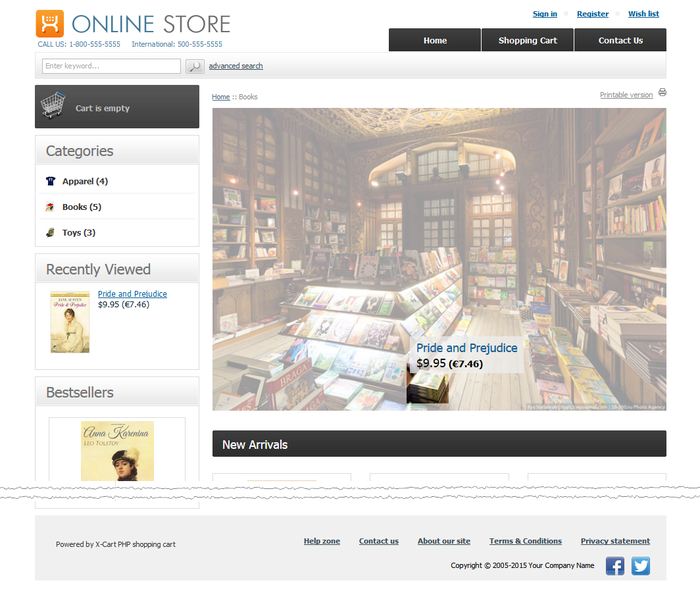
X-Cart's module X-Showroom is an extension that allows you to create interactive banners and publish them in your X-Cart based store. Interactive banners are images marked up with interactive hotspots providing links to specific products in your store's catalog. When a user hovers over a hotspot on a banner image, a tooltip appears over the hotspot with the name of the product to which the hotspot is linked:
By clicking on the product name in the tooltip the user can go directly to the product page for more information about the product.
Interactive banners can be inserted into any page in your store's catalog, including the home page, category pages and pages of specific products. The placement of interactive banners on the storefront is in the upper part of the page below the main site menu. The interactive nature of X-Showroom banners gives an attractive look to your site and promotes greater user engagement.
You do not need to be a webmaster or web developer: with X-Showroom, the creation and management of interactive banners does not require any tools other than your X-Cart store's Admin panel. To create an interactive banner, all you need to do is upload an image that will serve as the banner background, add some hotspots that will serve as links to your products and specify the store pages on which the banner will need to be displayed. Creating banner hotspots is point and click easy: you simply select a rectangular area on the banner image with your mouse and select a product to which this hotspot needs to be linked.
You can create as many interactive banners for your store as you like and control the display parameters of specific banners via a special section in your store's Admin area.
X-Showroom is available as an installable extension for X-Cart versions 4.6.6 and later.
Getting started
- Install the X-Showroom module:
- Make sure the installed module is active:
- Check and adjust the module configuration settings:
- Create one or more interactive banners using the Showroom section of your store's back end.
- View and manage the interactive banners you have added using the Showroom section of your store's back end.
Installing the module
To successfully install and use the X-Showroom module, you need a working copy of X-Cart version 4.6.6 or later installed on your server.
To install the module:
- Download the X-Showroom module archive from the File Area section of your X-Cart Account. Look for a file named like xshowroom-x.y.z.tgz, where x, y and z are numbers matching the version of your installed copy of X-Cart.
- Copy the contents of the module achive to the X-Cart root directory on your server or hosting account.
- If you are using a Windows-based server, or a UNIX-based server without terminal access:
- a) Unpack the module archive to a directory on your system using your favorite compression program (WinZIP, 7-Zip or any other archiver with support for TAR files).
- b) Use an FTP client to upload all the files contained in this directory (retaining the directory structure) to the X-Cart root directory on your server or your hosting account.
- If you are using a UNIX-based server with terminal access:
- a) Use an FTP client to upload the module archive to the X-Cart root directory on your server or your hosting account.
- b) Unpack the archive using the following command:
tar -xzvf xshowroom-x.y.z.tgz
- (Replace x, y and z with the actual version numbers).
- Important: Make sure you keep the directory structure while unpacking and uploading the module archive, otherwise some necessary files may be overwritten!
- In a web browser, run the installation script httр://<YOUR_XCART_DOMAIN>/install-xshowroom.php replacing <YOUR_XCART_DOMAIN> with the actual domain name of your X-Cart store. This will start the installation wizard.
- Follow the wizard instructions to install the module.
- Once the installation has been completed, you should see the "Installation complete" screen with a link to your store's Admin back end where you can enable the installed module.
Important:
1. If you have put the module archive file in a web accessible directory, be sure to remove it to protect the module from unauthorized copying.
2. At the final step of the installation process, the installation script install-xshowroom.php is automatically renamed as an additional measure to protect the module installation. Please take note of the filename to which the installation script was renamed in your store. If you decide to re-install or uninstall the module later on, you will need to rename the installation script back to install-xshowroom.php before launching the installation process in your web browser.
Uninstalling the module
Uninstallation completely removes all the data related to X-Showroom module from your store.
To complete the uninstallation, you will need to run the X-Showroom module installation script. You might remember that, after the module was installed in your store, the script was saved with a new name to help prevent unauthorised runs of the installer. Now, before you start, you need to rename the script back to its original name - install-xshowroom.php.
To uninstall the module:
- Run the module installation script in your web browser by going to httр://<YOUR_XCART_DOMAIN>/install-xshowroom.php (be sure to replace the <YOUR_XCART_DOMAIN> part with the actual domain name of your X-Cart store). This will start the installation wizard.
- Select "Uninstall the module" and follow the wizard instructions to complete the process.
- Once the uninstallation has been completed, you should see the "Uninstallation complete" screen.
Activating the module
If the module X-Showroom is installed but not active, you can enable (activate) it.
To enable the module:
- Go to the Modules section of your store's Admin area (Settings -> Modules).
- In the list of your store's installed modules, locate the entry for X-Showroom.
- Select the check box on the left of the module name.
The module will be enabled.
Deactivating the module
It is possible to temporarily disable (deactivate) the installed X-Showroom module. Deactivation stops the module from operation, but it does not remove any settings you made to the module configuration nor clear any data that was generated during the period that the module was in operation. If you wish to completely remove all the data related to using the module, you need to uninstall it. See Uninstalling the module for more info.
To disable the module:
- Go to the Modules section of your store's Admin area (Settings -> Modules).
- In the list of your store's installed modules, locate the entry for X-Showroom.
- Unselect the check box on the left of the module name.
The module will be disabled.
Configuring the module
After installation and activation, the X-Showroom module runs with the default parameters specified in its configuration settings. If you wish, you can adjust these parameters to better suit your needs; however, it is recommended to avoid using values that are too large or too small as it may negatively affect the usability of the user interface for the store administrator.
To adjust the module configuration:
- Go to the Modules section of your store's Admin area (Settings -> Modules).
- In the list of your store's installed modules, locate the entry for X-Showroom and click the Configure button next to it. (The Configure button is displayed only when the module is active).
The X-Showroom module configuration settings page opens: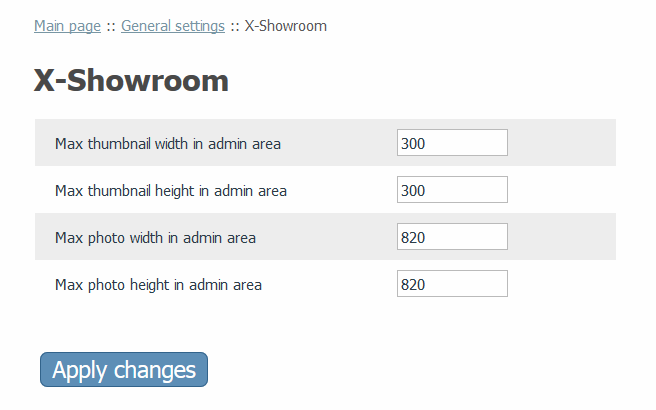
- Adjust the module settings as you require. Detailed information regarding the X-Showroom module configuration settings is available below.
- Click the Apply changes button to save the changes.
The configuration settings for the X-Showroom module are as follows:
- Max thumbnail width in admin area and Max thumbnail height in admin area: These are the maximum pixel dimensions of a banner image thumbnail as displayed in the general list of uploaded banner images on the Showroom page (Content ->Showroom) in your store's Admin area:
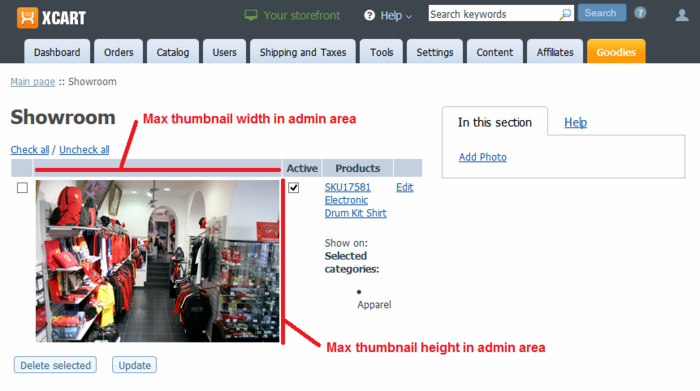
The default value for both these settings is 300 px. - Max photo width in admin area and Max photo height in admin area: These are the maximum pixel dimensions of a banner image displayed on the Edit Photo page in the Admin area where you tag the banner image with links to specific products:
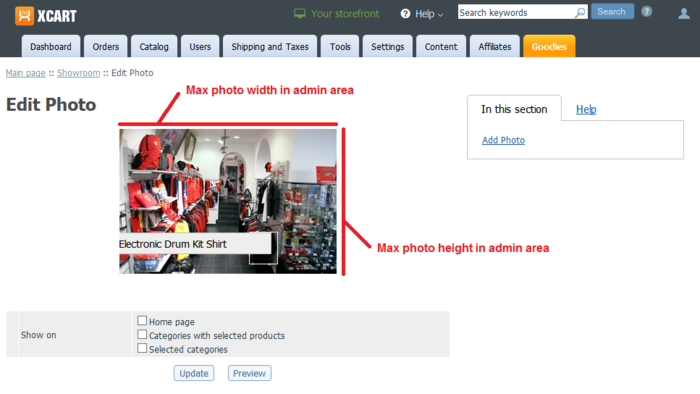
The default value for both these settings is 820 px.
Creating interactive banners
Creation and management of interactive banners is done in the Showroom section (Content -> Showroom).
To create a banner, complete the following steps:
- Add an image to be used in your banner:
- In the Showroom section menu (the area on the right-hand side of the screen titled "In this section"), select "Add Photo".
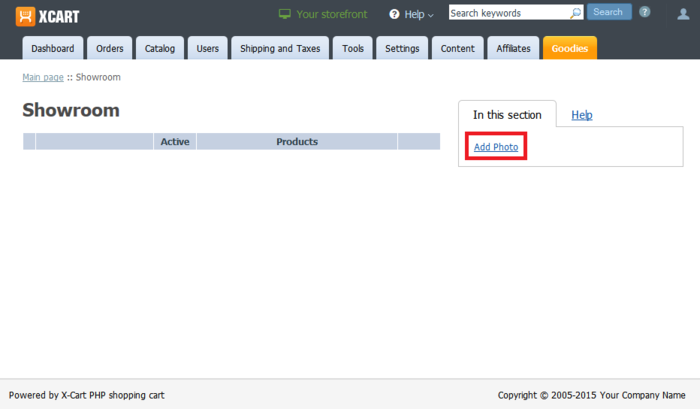
This opens the Add Foto page where you can add an image that will serve as the banner background on which hotspots linked to specific products will appear: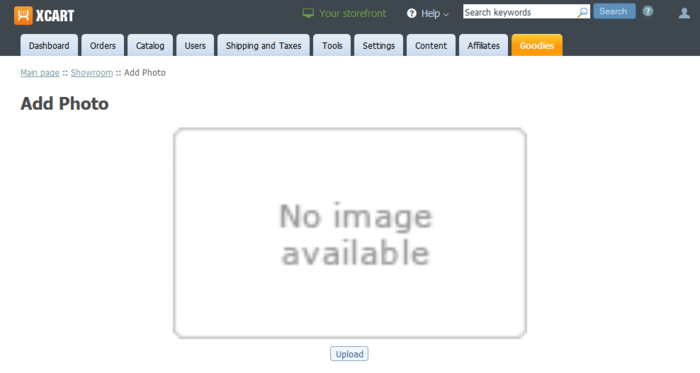
- Click the Upload button at the bottom of the page. The image upload manager dialog window will be displayed:
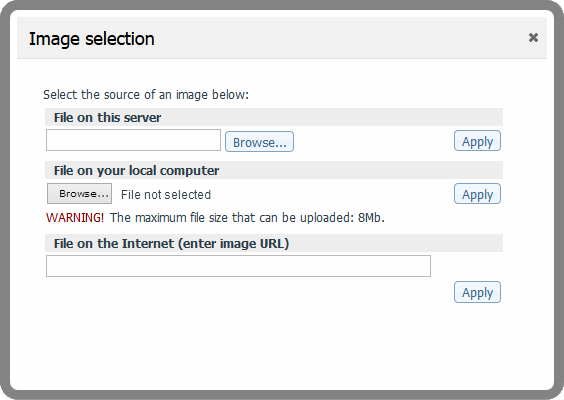
- Select the image you require from one of the following sources:
File on this server: Use this source if the image file you require is located on the file system of the server on which your X-Cart store is installed. Click Browse... in the respective section of the image upload manager dialog. A new dialog window displaying the files and folders on your store's server will be displayed: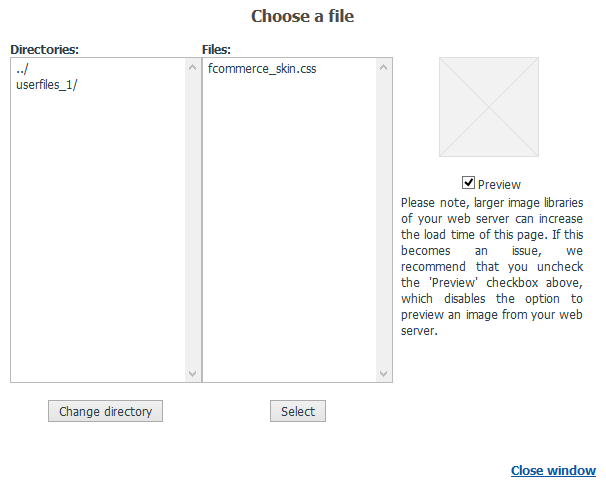
Select the image file you require and click Select.
File on your local computer: Use this section if the image file you require is located on the local file system of the computer on which you are currently working. Click Browse... in the respective section of the image upload manager dialog, select the image file you require and click Open.
File on the Internet: Use this section if the image file you require is located on the Internet. Enter the image URL into the appropriate field.
After selecting the file, click the Apply button opposite the respective section of the dialog.
Once you have selected the image and clicked Apply, the image preview will be displayed on the Add Photo page: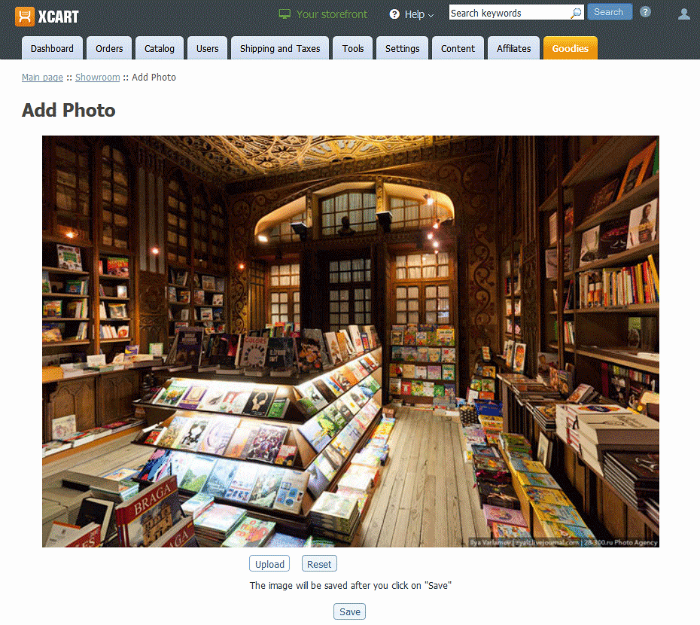
- Click the Save button below the image preview to complete the upload. The uploaded image will appear on the page where you are creating your interactive banner.
- In the Showroom section menu (the area on the right-hand side of the screen titled "In this section"), select "Add Photo".
- Add hotspots with links that will point from inside your banner to specific products in your store.
To add a hotspot:- Place the cursor over the banner image you have uploaded at the position where you want to add a hotspot.
- Press the left mouse button and drag the mouse in the desired direction to select the desired hotspot area.
- To finish the selection, release the mouse button. A dialog window titled "Select a product" will be displayed allowing you to select the product to which you want to add a link:
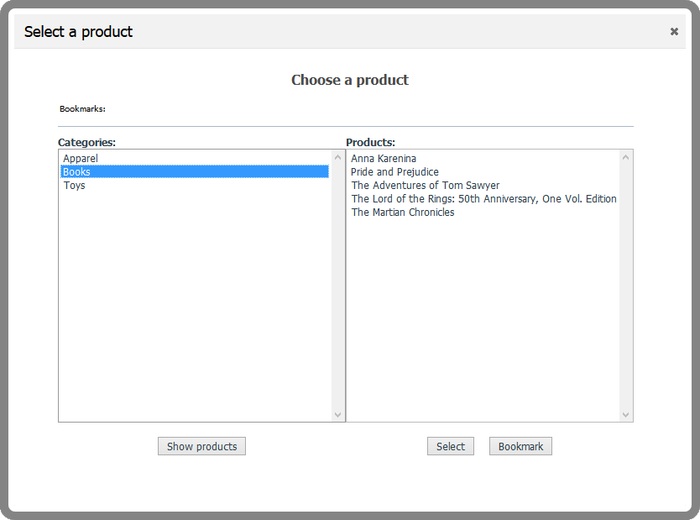
- Use the "Select a product" dialog to select the product you require.
The left-hand side of the dialog window displays your store's categories. To access the list of products in a category, double click the category name or click the category name once, then click the Show products button below the category list.
The list of products in the selected category appears on the right-hand side of the dialog. To select a product, double click the product name or click the product name once, then click the Select button below the product list.
Once the desired product has been selected, the "Select a product" dialog window will be closed, and a hotspot with a link to the product you have selected will be added to the banner image: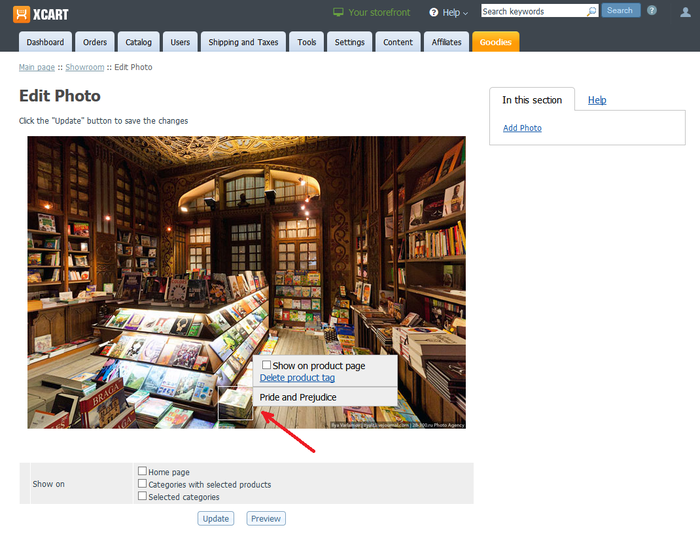
If necessary, it is possible to move a previously created hotspot over the banner image to adjust its position more precisely. To do so, place the cursor over the hotspot that needs to be moved, press the left mouse button and drag the hotspot to the desired position.
It is also possible to remove a hotspot. To do so, click the Delete product tag link for this hotspot.
- Specify the store pages on which the banner should be displayed.
In the lower part of the Add Photo page - below the banner image - you will find the banner display options allowing you to specify where to display the banner you have created:
- Home page: Select the check box for this option if you want the banner to be displayed on the home page of your store:
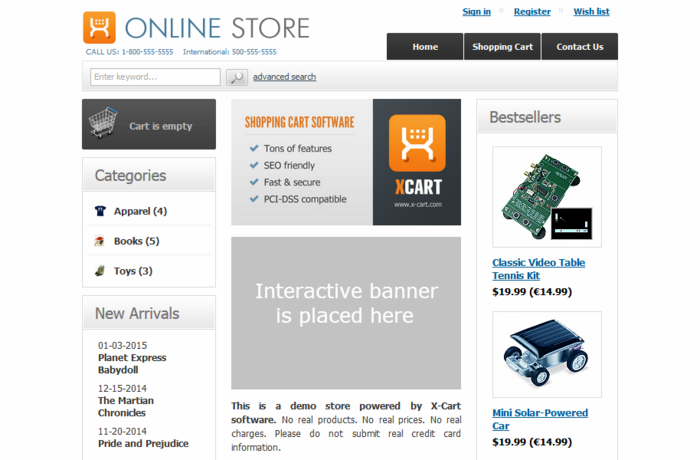
- Categories with selected products: Select the check box for this option if you want the banner to be displayed on the pages of categories that are home to the products linked from the banner hotspots.
- Selected categories: Select the check box for this option if you want to be able to choose specific categories in which to display the banner. The categories for selection will appear in the "Categories" section below:
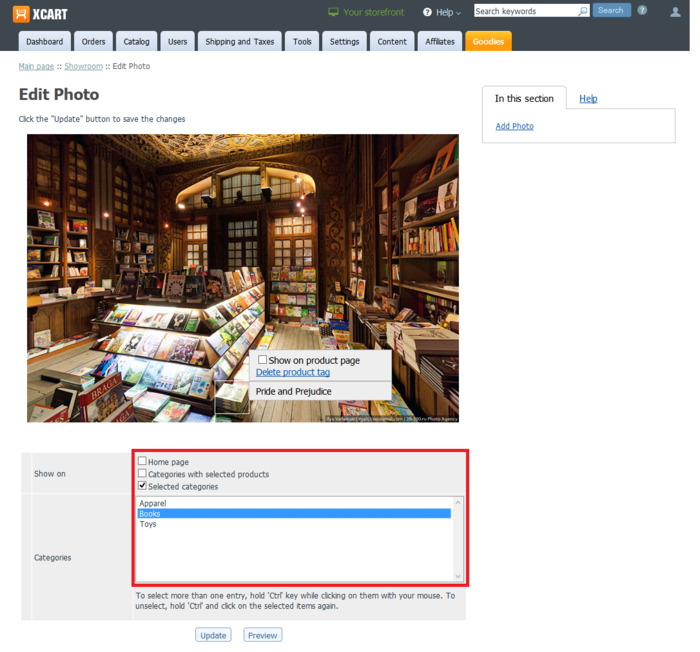
To select a category, click on the category name. It is possible to select more than one category by holding down the Ctrl key while selecting categories.
If you want the banner to be displayed on the pages of the products linked from the banner hotspots, select the Show on product page option next to the appropriate hotspot areas on the banner image above: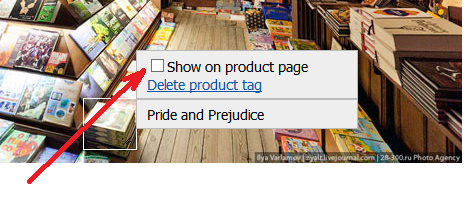
- Home page: Select the check box for this option if you want the banner to be displayed on the home page of your store:
- Once you have provided all the necessary information, save the changes by clicking the Update button at the bottom of the page.
Now if you go to your store's Storefront area, you should be able to see the banner you have created.
Managing interactive banners
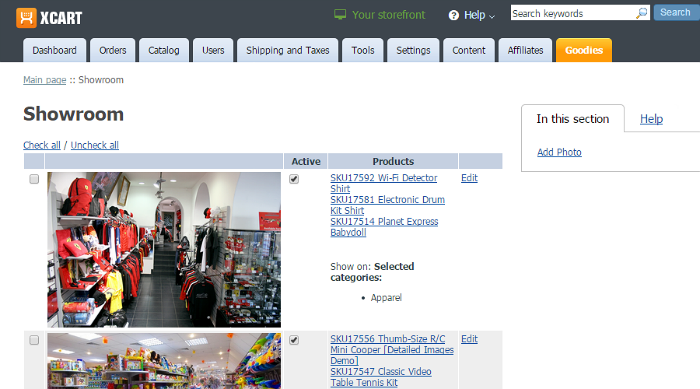
The list of previously created interactive banners can be found on the Showroom page (Content -> Showroom).
For each banner the following information is provided:
- banner image thumbnail;
- banner status (See the Active column: selected checkbox = the banner is visible to customers; unselected checkbox = the banner is not visible to customers);
- products to which the banner provides links (See the product list in the Products column);
- pages on which the banner is shown (See the "Show on" section in the Products column).
It is possible to edit banners, disable/re-enable banners and delete banners.
When you need to change a banner image, re-adjust the hotspots or change the pages on which a certain banner is displayed, you need to edit this banner.
To edit a banner:
- In the list of banners in the Showroom section (Content -> Showroom), locate the banner you need to edit and click the Edit link in the far right column on the line of that banner:
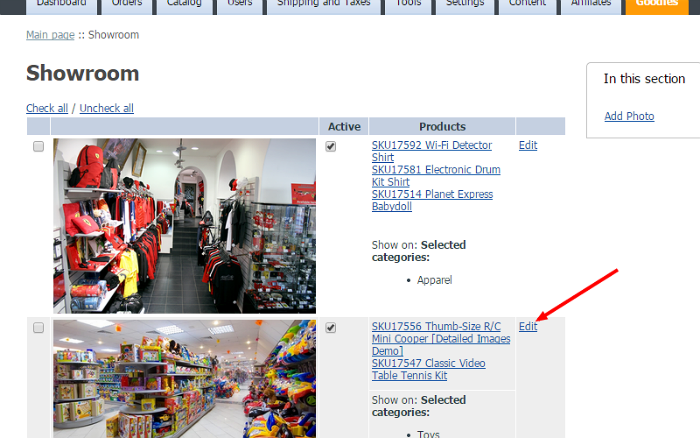
The Edit Photo page opens: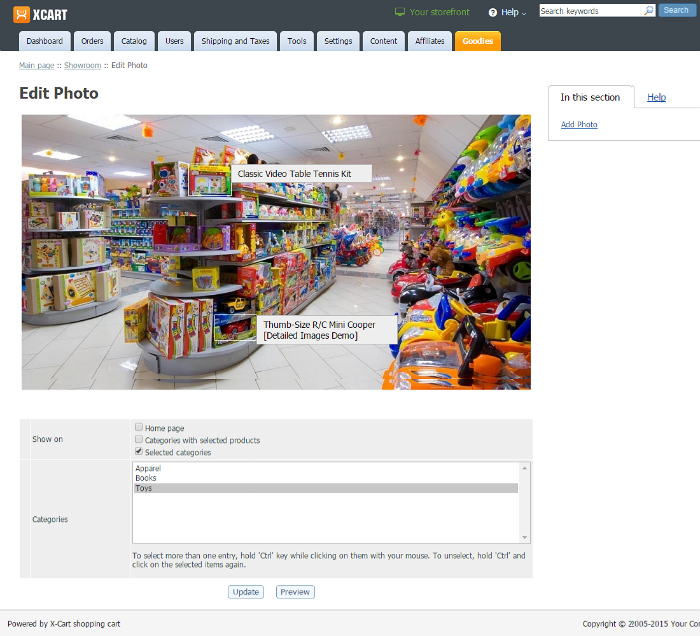
- Make changes to the banner parameters as you require.
- Click the Update button at the bottom of the page to save the changes. The banner will be updated.
It is possible to quickly disable an existing banner to hide it from any pages on which it appears.
To disable a banner:
- In the list of banners in the Showroom section (Content -> Showroom), locate the banner that needs to be disabled and unselect the checkbox in the Active column on the line of that banner.
- Click the Update button at the bottom of the banner list to save the changes.
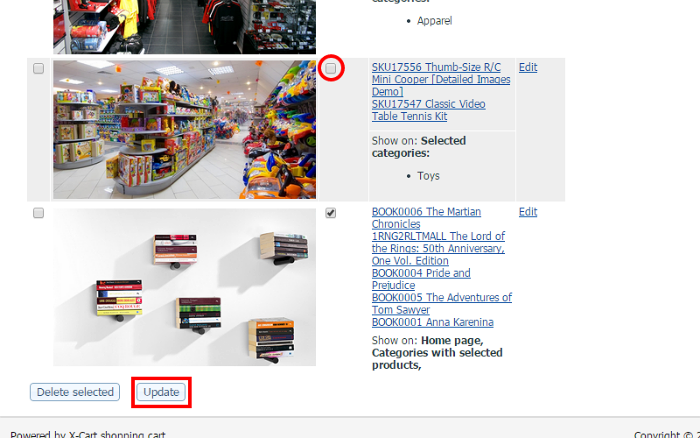
The banner will be disabled.
To re-enable a previously disabled banner, select the checkbox in the Active column again and click Update.
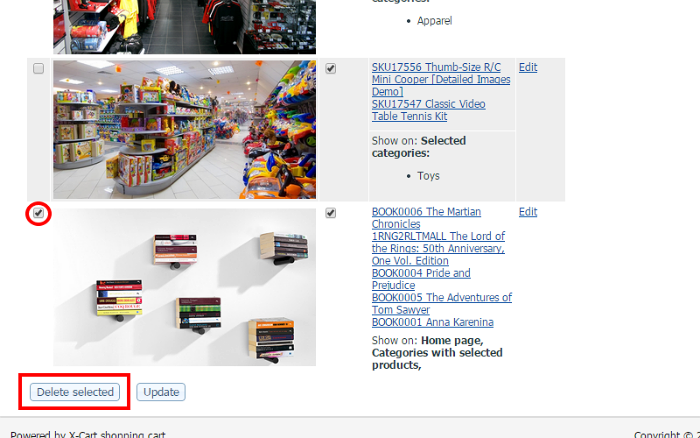
When you no longer need a certain banner, you can delete it.
To delete a banner:
