Difference between revisions of "LiteCommerce:Running Web Installation wizard"
(Created page with 'Web installation using LiteCommerce Installation Wizard is the major stage of LiteCommerce installation process. Follow the instructions below to complete the installation: 1. W…') |
|||
| Line 10: | Line 10: | ||
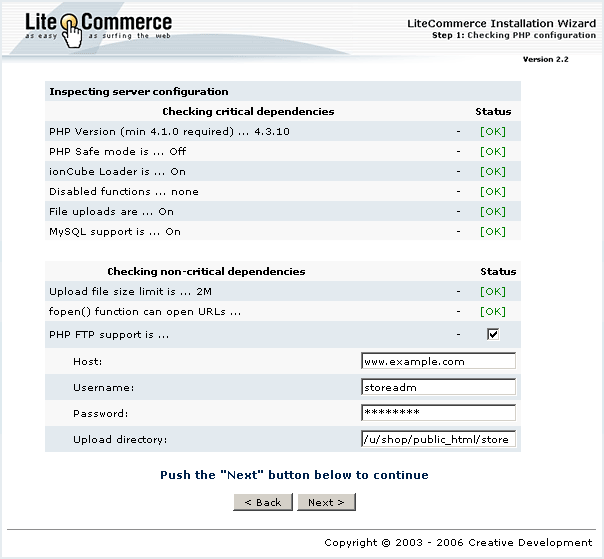
2. The installer first verifies the integrity of the essential files: if not all the necessary files have been uploaded correctly, some of them are damaged or missing, the installer will display a message including the list of these files. Then the installer examines the server configuration to check that it complies with the server requirements as outlined in the section [[LiteCommerce:Server Requirements]] of this manual. When the process is complete, you will see the configuration report screen. If server settings are correct, you will see the screen similar to Figure 1-12. | 2. The installer first verifies the integrity of the essential files: if not all the necessary files have been uploaded correctly, some of them are damaged or missing, the installer will display a message including the list of these files. Then the installer examines the server configuration to check that it complies with the server requirements as outlined in the section [[LiteCommerce:Server Requirements]] of this manual. When the process is complete, you will see the configuration report screen. If server settings are correct, you will see the screen similar to Figure 1-12. | ||
| − | + | <div align="center">[[Image:lc22-1-12.gif|604px|Figure 1-12: Successful server configuration checkup]] | |
Figure 1-12: Successful server configuration checkup | Figure 1-12: Successful server configuration checkup | ||
| − | + | </div> | |
Any server components that do not pass server configuration checkup are marked as ''''[ FAILED ]''''. If one or more of the critical dependencies fail, please contact your ISP and use the configuration report to resolve the issue. Once the issue is resolved, restart the Installation Wizard. | Any server components that do not pass server configuration checkup are marked as ''''[ FAILED ]''''. If one or more of the critical dependencies fail, please contact your ISP and use the configuration report to resolve the issue. Once the issue is resolved, restart the Installation Wizard. | ||
| Line 19: | Line 19: | ||
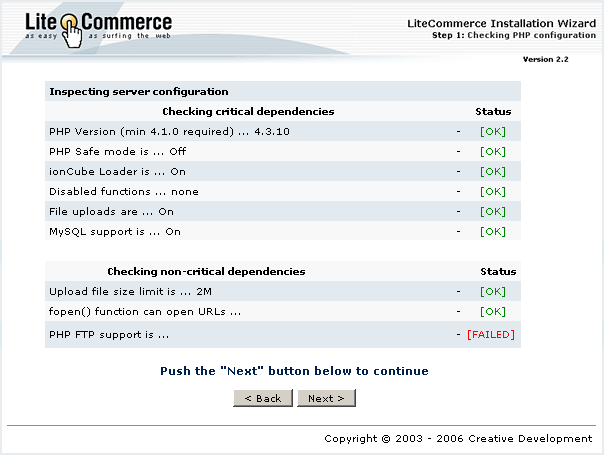
If an issue belongs to the list of non-critical dependencies (Figure 1-13), you can proceed with the installation. | If an issue belongs to the list of non-critical dependencies (Figure 1-13), you can proceed with the installation. | ||
| − | + | <div align="center">[[Image:lc22-1-13.gif|604px|Figure 1-13: Server configuration checkup revealing non-critical dependency failure]] | |
Figure 1-13: Server configuration checkup revealing non-critical dependency failure | Figure 1-13: Server configuration checkup revealing non-critical dependency failure | ||
| − | |||
| − | |||
| − | |||
| − | |||
| − | |||
</div> | </div> | ||
| + | {{Note1|Optional ''''PHP FTP support'''' is used to automatically set the necessary file permissions on uploaded distribution files. Leave the corresponding check box empty to set file permissions manually. If PHP FTP support is available on your server, you should provide the following data: | ||
* ''''Host'''' - FTP server domain name or IP address, | * ''''Host'''' - FTP server domain name or IP address, | ||
* ''''Username'''' and ''''Password'''' - credentials to access aforementioned FTP server, and | * ''''Username'''' and ''''Password'''' - credentials to access aforementioned FTP server, and | ||
* ''''Upload directory'''' - absolute location of LiteCommerce installation directory on the FTP server. | * ''''Upload directory'''' - absolute location of LiteCommerce installation directory on the FTP server. | ||
| + | }} | ||
{{Note1|Note: These parameters are essentially the same as FTP credentials you specified to the Windows-based LiteCommerce Installer (Figure 1-6).}} | {{Note1|Note: These parameters are essentially the same as FTP credentials you specified to the Windows-based LiteCommerce Installer (Figure 1-6).}} | ||
Revision as of 15:39, 12 January 2010
Web installation using LiteCommerce Installation Wizard is the major stage of LiteCommerce installation process. Follow the instructions below to complete the installation:
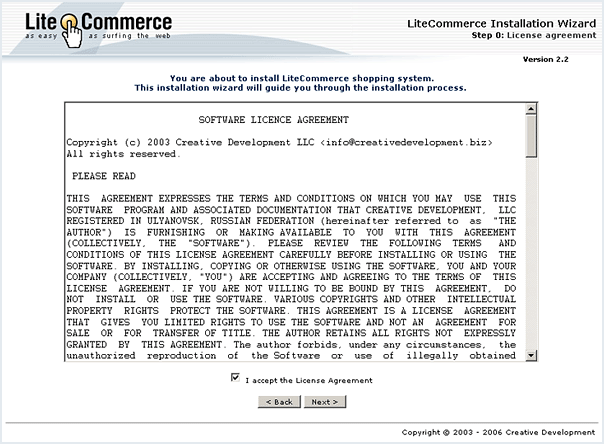
1. Web installation begins with the software license agreement screen (Figure 1-11). Read the agreement carefully, place a checkmark in the box underneath it to acknowledge acceptance of its terms and conditions, and click on the 'Next >' button to proceed to the next screen.
2. The installer first verifies the integrity of the essential files: if not all the necessary files have been uploaded correctly, some of them are damaged or missing, the installer will display a message including the list of these files. Then the installer examines the server configuration to check that it complies with the server requirements as outlined in the section LiteCommerce:Server Requirements of this manual. When the process is complete, you will see the configuration report screen. If server settings are correct, you will see the screen similar to Figure 1-12.
Any server components that do not pass server configuration checkup are marked as '[ FAILED ]'. If one or more of the critical dependencies fail, please contact your ISP and use the configuration report to resolve the issue. Once the issue is resolved, restart the Installation Wizard.
If an issue belongs to the list of non-critical dependencies (Figure 1-13), you can proceed with the installation.
- 'Host' - FTP server domain name or IP address,
- 'Username' and 'Password' - credentials to access aforementioned FTP server, and
- 'Upload directory' - absolute location of LiteCommerce installation directory on the FTP server.
Failed 'PHP FTP support' checkup requires that you set the file permissions manually before you can proceed with the installation:
- If your server is UNIX-based: Access LiteCommerce installation directory at your web server via FTP or command line, or use the Control panel utility supplied by your ISP to change certain file access permissions. To set the required file permissions, issue the following commands (for further details on changing file permissions, run 'man chmod' command in your UNIX system or see your FTP client reference manual):
chmod 777 .
chmod 666 etc/config.php
chmod 777 classes/modules
chmod 755 bin/*
- If your server is Windows-based: Use file management tools (Control Panel utility or other) supplied to you by your hosting provider to set the necessary file permissions (you might want to consult your hosting provider for details on how to do this). LiteCommerce installation directory, 'classes/modules/' and 'bin/' directories within it, and 'etc/config.php' file must be configured to be readable, writeable and deletable by the owner user of the web server application. If you do not know how to do this on your server, please consult our installation services for assistance.
After a successful server configuration checkup, click on the 'Next >' button to proceed with the installation.
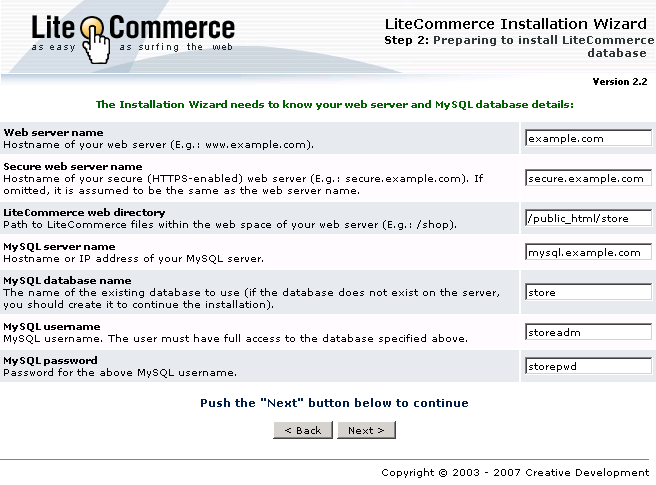
3. In the next screen (Figure 1-14) you are requested to provide detailed web and MySQL server information including:
- hostnames of secure and insecure web servers that will be running your LiteCommerce software (leave the secure web server name empty if it is the same as the web server name),
- LiteCommerce web directory (LiteCommerce installation directory, which is the same as the upload directory in Figure 1-6),
- hostname of your MySQL server (if MySQL server is located on the same machine as the web server, use 'localhost' as the name of MySQL server), and
- credentials to access MySQL server.
Click on the 'Next >' button after you have specified all the necessary information.
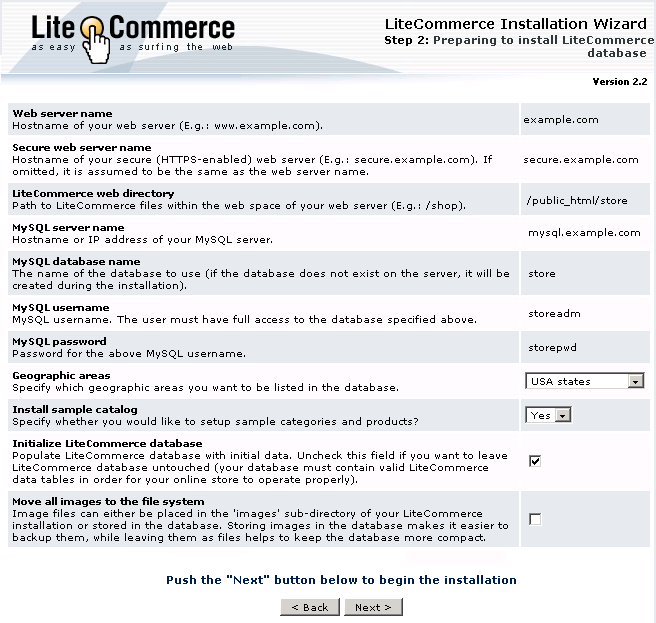
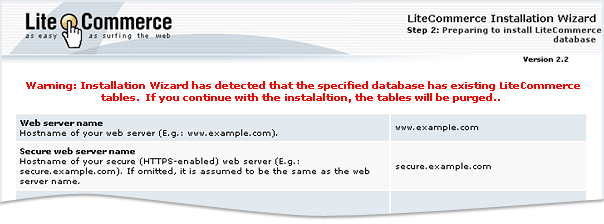
4. The installer checks your settings and informs you if it encounters any problems. In the next screen you can verify the information you have specified (Figure 1-15).
Additional options can also be provided to the Installer:
- the set of states/counties/provinces to be loaded into the database;
- whether you want to have a sample store catalog installed;
- the desired location of product images (see the section LiteCommerce:Storing Image Files for details);
- whether the database must be left unchanged (useful when you already have the database populated with the catalog and other store data).
Click on the 'Next >' button to proceed with the installation.
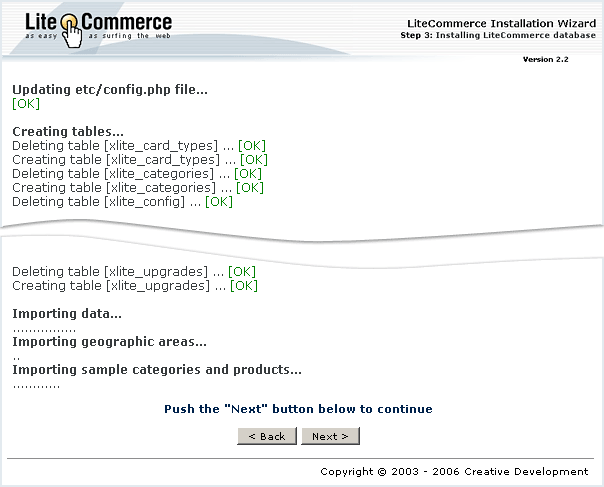
5. The next screen (Figure 1-17) shows the progress of LiteCommerce database installation. Review the installation details and click on the 'Next >' button.
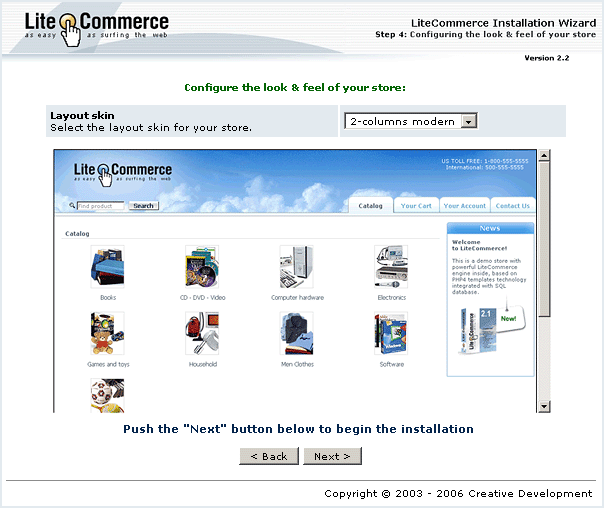
6. At the next step you are requested to choose the design layout for your store (Figure 1-18). Two 2-column layouts and two 3-column layouts are available. You can preview a layout by selecting it from the drop-down menu. Choose the design layout and click on the 'Next >' button to proceed with the installation.
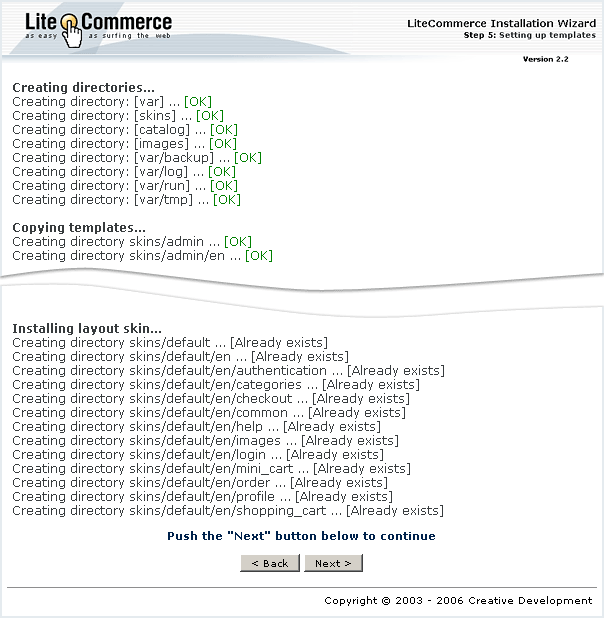
7. After you have specified the desired layout, the corresponding template files are copied to the destination location. Review the details (Figure 1-19) and click on the 'Next >' button.
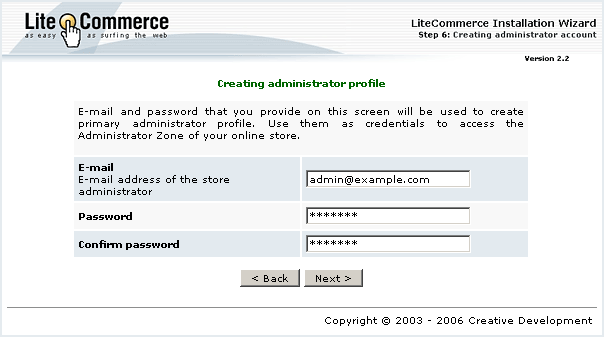
8. At the next step you are requested to provide administrator credentials (e-mail and password) to be used for accessing the Administrator Zone of your online store (Figure 1-20). Click on the 'Next >' button to proceed with the setup.
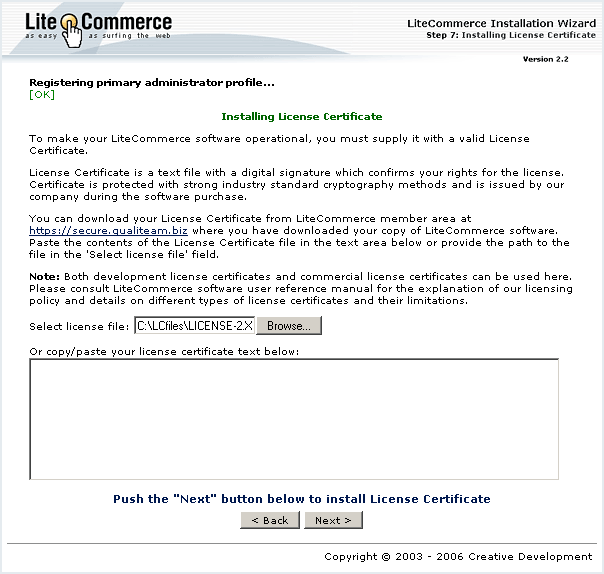
9. In order to complete the installation you are requested to present your License Certificate. You can either paste the contents of the License Certificate file into the text box provided at the same screen, or specify the location of the License Certificate file as shown in Figure 1-21. To locate the file on your computer, click on the 'Browse…' button.
Click on the 'Next >' button to complete the installation.
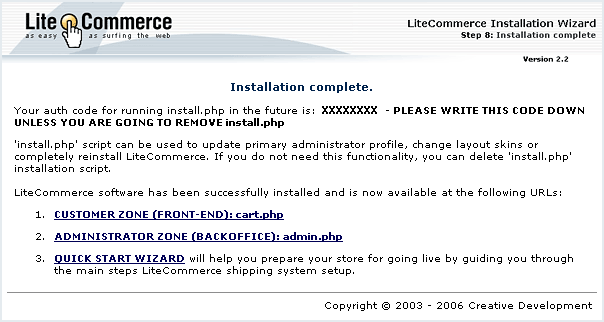
10. Once the installation is complete, the Installation Wizard displays the 'Installation complete' screen (Figure 1-22).
Please write down and keep in a safe place the Auth code provided to you in this screen. This code is used to prevent unauthorized use of LiteCommerce software. You will need this code in the future if you decide to use the Installation Wizard ('install.php') to change the store layout, change administrator credentials or completely reinstall LiteCommerce. If you forget the auth code, you can locate it in the 'etc/config.php' file of your LiteCommerce installation.
From the 'Installation complete' screen you can choose to proceed to the Customer Front-End ('Customer Zone'), Administrator Back Office ('Administrator Zone') or Quick Start Wizard which will guide you through basic configuration stages and help to prepare your online store for going live.
