X-Cart:X-MailChimp Integration module
Contents
What X-MailChimp module does
X-MailChimp module allows to use a powerful MailChimp mailing system. The module expands default X-Cart behavior. For the module to operate correctly you need a MailChimp account. The module also supports Analytics360. This functionality includes Google Analytics support and allows to see statistics results for every email campaign you send.
When the module is installed and configured, store clients can subscribe to one of store newsletters. The subscription information is sent to MailChimp and used to create newsletters. The module can operate together with the standard News management module.
Newsletter is an information letter available to store users by subscription. In order to receive newsletter emails, a client needs to provide an email address and specify, which of the available news lists he or she would like to read. When you have news lists which are active and available for subscription, newsletter subscription is available to any visitors of your store site, no matter if they are registered or anonymous.
Visitors can subscribe by clicking the 'Subscribe' link in the 'News' section:
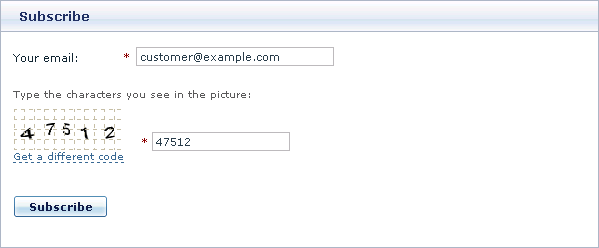
After that the visitor has to enter an email address in the provided subscription form.
After a customer has subscribed, he/she needs to select the newsletters he/she wishes to receive, by selecting the check boxes next to the required newsletter titles:
As soon as a client subscribes to a news list, his or her email address is automatically added to the mailing list for that news list so the client can begin getting the newsletter.
If you wish, you can enable notification emails to subscribers. Notification emails not only notify your new subscribers of the fact that their email address has been entered into a mailing list, but also provide a link allowing these subscribers to unsubscribe from newsletter emails.
An 'Unsubscribe' link is provided with each newsletter, so if any of your customers wish to discontinue their newsletter subscription, they will be able to do so at any time.
Roles in X-MailChimp integration module management
If you are an X-Cart GOLD administrator/provider or an X-Cart PRO administrator:
- You can enable/disable and configure the module X-MailChimp (See Enabling and Configuring 'X-MailChimp').
- You can inport and manage news lists from MailChimp (Check out News lists)
- You have full control over mailing lists (Check out Mailing lists). You can:
- add email addresses to any mailing list (manually or by importing a file with a list of email addresses),
- delete email addresses from a mailing list,
- export email addresses from a mailing list.
- You can create messages for news lists, manage created news messages and send them to newsletter subscribers (See News List Messages)
If you are an X-Cart PRO provider:
- You cannot post any news on the store site or send newsletters by yourself.
System requirements
To be able to successfully install and use X-MailChimp integration module you must have a working copy of X-Cart Gold or X-Cart Pro already installed on your server. Make sure that the version of the module is the same as the version of the installed copy of X-Cart.
Installing X-MailChimp integration
Installation
The instructions on how to install the X-MailChimp integration add-on module are the same both for X-Cart Gold and X-Cart Pro.
To install the module:
1. Obtain a distribution package for the X-MailChimp integration add-on module by downloading it from the File Area section of your X-Cart Account. The distribution package you need is contained in the archive file x-mailchimp-x.y.z.tgz where x, y and z are the version numbers of the module. Make sure the version of the module is the same as the version of the installed copy of X-Cart.
2. Put the distribution package to the X-Cart root directory on your server or hosting account.
- If you use a Windows-based server, or a UNIX-based server without terminal access:
- a) Decompress the archive with the X-MailChimp integration distribution package to a directory on your system using your favorite compression program (WinZIP or any other archiver with support for TAR files).
- b) Use an FTP client to upload all the files contained in the archive (retaining the directory structure) to the X-Cart root directory on your server or your hosting account.
- If you use a UNIX-based server with terminal access:
- a) Use an FTP client to upload the archive with the distribution package to the X-Cart root directory on your server or your hosting account.
- b) Decompress the package using the following commands.
tar -xzvf x-mailchimp-x.y.z.tgz
3. In a web browser, run the installation script httр://<YOUR_XCART_DOMAIN>/install-xmailchimp.php replacing the variable <YOUR_XCART_DOMAIN> with the true name of the domain where X-Cart is installed.
4. Enter the Auth code, accept the License Agreement and click the Next button.
5. The installation script copies the files and activates the module. Click the Next button to continue the installation.
6. The installation script generates a new system fingerprint. Click the Next button to complete the installation.
7. Use the ADMINISTRATOR AREA link to log in to the Admin area.
Uninstalling X-MailChimp integration
The instructions on how to uninstall the X-MailChimp integration add-on module are the same both for X-Cart Gold and X-Cart Pro.
To uninstall the X-MailChimp integration add-on module:
1. In a web browser, run the installation script http://www.example.com/install-mailchimp.php replacing "www.example.com" with the true name of the domain where X-Cart is installed.
2. Choose the Uninstall the module option, enter the Auth code, accept the License Agreement and click the Next button.
3. After the installation script removes the module files and deactivates the module, click the Next button to complete the uninstallation.
4. At the Uninstallation complete screen, click Next to leave the Wizard.
Enabling and Configuring 'X-MailChimp integration module'
To begin using the module:
1. Enable X-MailChimp module (Settings menu->Modules).
- When the module is enabled, you can see:
- the X-MailChimp management link in the Content menu.
- the X-MailChimp Newsletters section in General settings->Modules section.
2. Adjust the module settings via General settings/Modules->MailChimp Newsletters.
- API Key: Enter your API key you received by clicking here.
- Enable Analytics 360 for MailChimp: This setting enables sending information about purchases made by customers who received a newsletter, read it and came to the store.
3. Click the Save button.
News Lists
Creating news lists
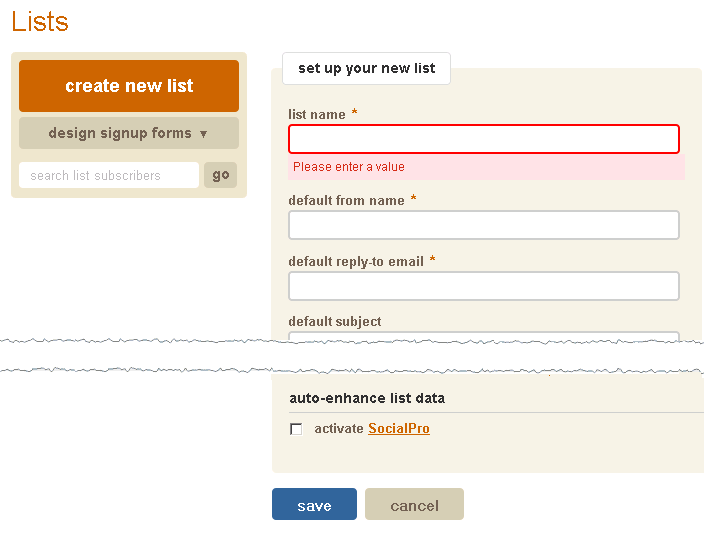
Before you can create any news messages, you need to create one or more news lists, which your customers will subscribe to.. News lists are categories in which specific news messages are created. The lists are created in MailChimp control panel.
'New Arrivals' could be a good name for a news list intended for messages like 'Newest & hottest products for your Mac' or 'Over 50 new items in Books category'.
'Coupons and Special Offers' could be a good name for a news list intended for messages like '20% off of any order Dec 20 - Jan 1' or 'Buy 2 books - get a 3rd one FREE!'.
For instructions on how to create a news list, consult MailChimp's Knowledge Base:
Importing news lists into X-Cart
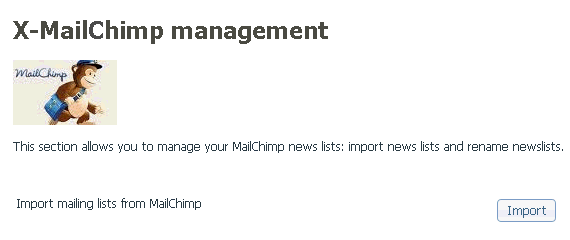
After you have configured your X-MailChimp module and created some news lists in MailChimp, you need to import them to X-Cart. To do that open the Content->X-MailChimp management page and click the Import button.
After all the news lists have been successfully imported into X-Cart, you will see a confirmation message in the upper right corner of the screen:
Managing news lists
Once news lists are imported from MailChimp you should specify a description for each list.
You can view/modify the details of any news list (rename, edit the description or change the status), as well as delete any news list if you are not going to use it any more.
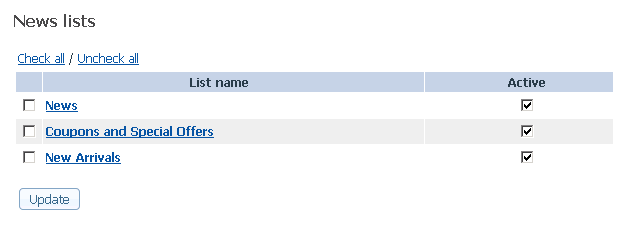
All the operations on existing news lists can be performed using the controls of the 'News lists' dialog box in the 'X-MailChimp management' section of the store's back end (Content menu->X-MailChimp management).
To view/modify the details of a news list
(rename, edit the description or change the news list's 'Available for subscription' status):
- Open the 'News lists' dialog box.
- Use the language selector at the top of the 'News lists' dialog box to select the language of the news list which you wish to view/modify. This should produce a list of all the available news lists for the selected language. News lists in other languages will not be displayed.
- Find the news list whose details you wish to view/modify and click on its name. The details of the news list should be opened in the 'News list details' form.Note: The language selector in this 'News list details' form should be inactive, as it is not possible to change the language of news lists. Also you cannot change the language of the page, while you are editing a news list.
- If necessary, edit any of the news list details.
- Click the Save button to save the changes.
The updated details should be saved. An information box with a confirmation message should appear.
To enable/disable a news list
If you need just to enable/disable a news list, you can do it directly in the 'News lists' dialog box:
- Open the 'News lists' dialog box.
- Use the language selector at the top of the 'News lists' dialog box to select the language of the news list(s) whose status(es) you wish to change. This should produce a list of all the available news lists for the selected language.
- Find the news list(s) whose statuses you wish to change.
- Select the check boxes in the ACTIVE column for all the news lists that need to be enabled (unselect to disable).
- Click the Save button to save the changes.
The statuses should be updated. An information box with a confirmation message should appear.


