Difference between revisions of "Draft:Advanced Order Management"
m (→Advanced Order Management operations) |
m (→Advanced Order Management operations) |
||
| Line 41: | Line 41: | ||
==Advanced Order Management operations== | ==Advanced Order Management operations== | ||
| + | |||
===Editing ordered products=== | ===Editing ordered products=== | ||
| + | To add products, remove products or edit the details of products contained in an order, click the <u>Edit ordered products</u> link on the 'Advanced Order Management' page. This opens the 'Order #X: edit products' section. | ||
:[[File:Create_order1.png|border]] | :[[File:Create_order1.png|border]] | ||
| + | '''Add product''' | ||
| + | |||
| + | # In the 'Add product' section, click the '''Browse''' button. This opens the 'Select a product' box. | ||
:[[File:Select_product.png|border]] | :[[File:Select_product.png|border]] | ||
| + | # In the 'Select a product' box, locate the product you want to add to the order and | ||
:[[File:Create_order2.png|border]] | :[[File:Create_order2.png|border]] | ||
Revision as of 04:01, 17 April 2013
Contents
Overview
X-Cart's Advanced Order Management module allows you to edit your customers' orders after they have been placed. With this module you can add products to an existing order, remove products from order, update product prices and quantities, add/update discounts and coupons, change the delivery method and shipping cost, etc. In versions 4.5.2 and later, you can also create orders via the store's back end.
Starting from version 4.3.0, the Advanced Order Management module is available as a built-in module in all X-Cart editions. It does not require installation and can be enabled in the Modules section of your store's Admin area.
For versions 4.0.0-4.2.3, the Advanced Order Management module is available as an add-on module which can be purchased and installed separately.
Enabling the Advanced Order Management module
To enable the module:
- In Admin area, go to the Modules section (Settings menu -> Modules).
- Choose the Advanced Order Management module by selecting the respective check box on the left.
- Click the Apply changes button. This activates the module.
Configuring the Advanced Order Management module
In X-Cart versions 4.5.2 and later, after enabling the Advanced Order Management module, you should check and adjust the module's configuration settings:
- In the Modules section (Settings menu -> Modules), click the Configure link opposite the module name ('Advanced Order Management').
The module configuration page (titled by the name of the module) opens: - Adjust the settings on the module configuration page as needed. At present, there is only one setting, Username prefix for customer added when order is created in back-end. This setting is related to the Create Order feature; it allows you to set a username prefix that will help you to identify automatically created customer profiles.
Whenever you create an order via the store's back end without linking it to an existing customer profile, the system automatically creates an anonymous customer profile for the person on whose behalf the order is being created. The username for such a profile is generated automatically as a string of numeric characters preceded by the username prefix specified in this field. For example, if the username prefix value is defined as "automatic", the usernames of automatically created customers will look as follows (Note the last three usernames in the list): - Click the Apply changes button to save the changes.


Editing orders with Advanced Order Management module
To edit an order with Advanced Order Management, do the following:
- In your store's back end, find the order you want to edit and open its details. Now that Advanced Order Management module is enabled at your store, the 'Order details' page contains a button titled Modify:
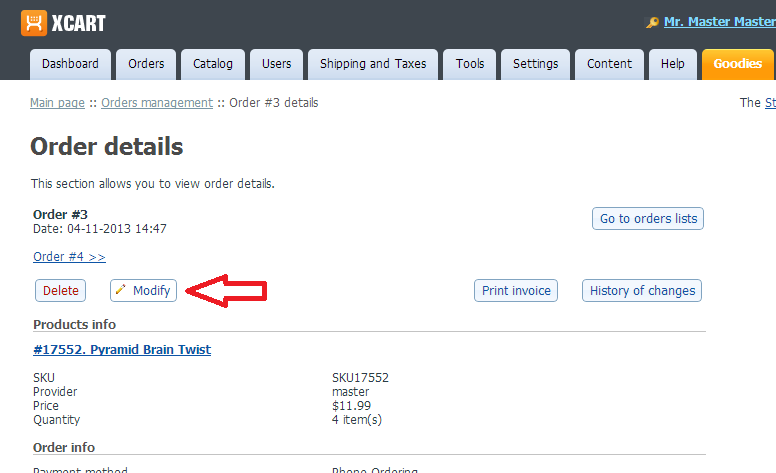
- Click the Modify button. This opens the 'Advanced Order Management' page where you can edit the order:
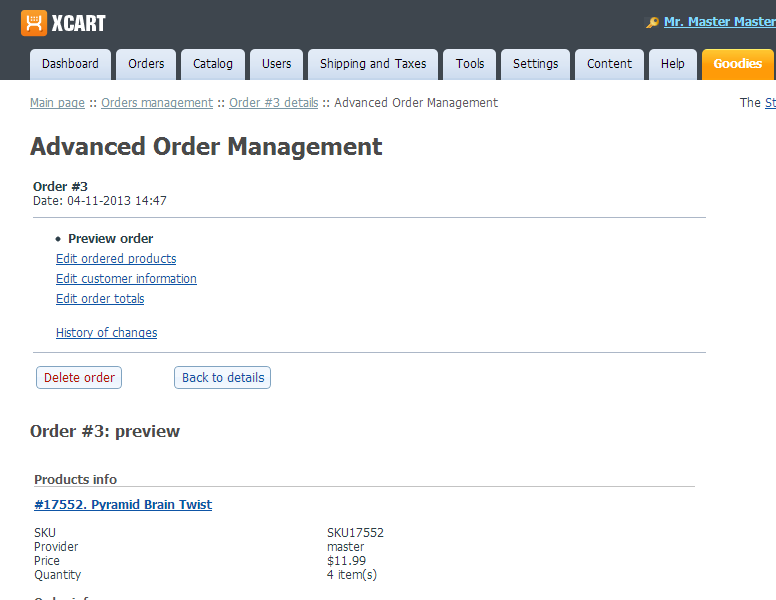
The top of the page provides links for access to the sections of the 'Advanced Order Management' page:
- Preview order: Allows to preview the order details at any moment during the editing process.
- Edit ordered products: Allows to add products to the order, remove products from the order, update product quantities and prices.
- Edit ordered gift certificates: (This link is displayed only for orders containing gift certificates) Allows to edit the amount of the ordered gift certificate, remove the gift certificate from the order or access the 'Gift certificate details' page where virtually any details of the gift certificate can be edited.
- Edit customer information: Allows to edit customer information including customer personal information and billing/shipping addresses.
- Edit order totals: Allows to modify the components that make up the order total (e.g., shipping cost, discount savings, etc).
- History of changes: Allows to view the history of changes made to the order.
- Click the link you require and make the changes. Detailed information on the Advanced Order Management operations is available below.
- Save the changes.


Creating orders with Advanced Order Management module

Advanced Order Management operations
Editing ordered products
To add products, remove products or edit the details of products contained in an order, click the Edit ordered products link on the 'Advanced Order Management' page. This opens the 'Order #X: edit products' section.

Add product
- In the 'Add product' section, click the Browse button. This opens the 'Select a product' box.

- In the 'Select a product' box, locate the product you want to add to the order and


Editing ordered gift certificates
Editing customer information
Editing order totals
Previewing order details
While editing an order, you can preview its details at any moment by clicking the Preview order link at the top of the 'Advanced Order Management' page. Before clicking the Preview order link, be sure to apply any changes you have made by clicking the Update button.
Saving changes
Viewing the history of changes