X-Cart:ShippingEasy
Contents
- 1 Overview
- 2 ShippingEasy module system requirements and installation
- 3 Integrating your X-Cart store with ShippingEasy
- 4 Activating and deactivating the module
- 5 Order status mapping
- 6 Manual export of orders to ShippingEasy
- 7 Canceling orders
- 8 Viewing shipment information
- 9 Updating order statuses for shipped orders
Overview
X-Cart's ShippingEasy module provides integration with ShippingEasy, a cloud-based shipping solution that allows you to automate shipping and lower shipping costs.
ShippingEasy module system requirements and installation
See ShippingEasy module installation.
Integrating your X-Cart store with ShippingEasy
To integrate your X-Cart store with ShippingEasy, complete the following steps:
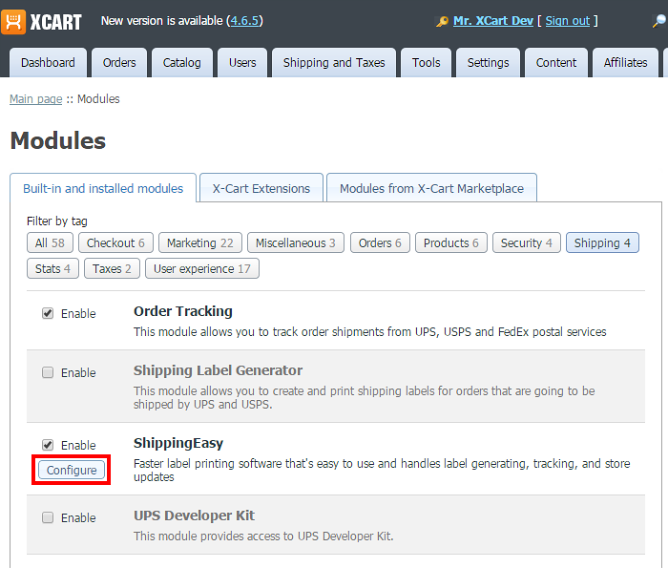
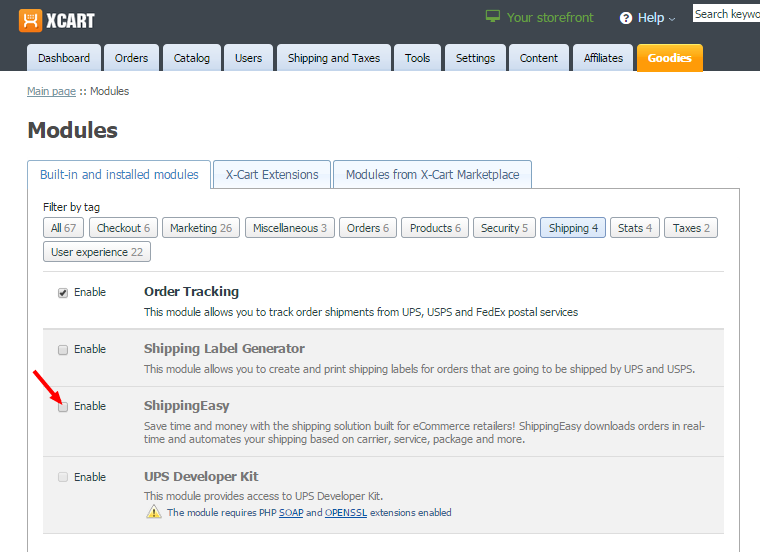
- If you haven't yet done so, install the ShippingEasy module in your X-Cart store. As a result, you should have the module ShippingEasy listed in your store's Modules section (Settings menu -> Modules).
- Сlick the Configure link for 'ShippingEasy' to access the module's settings page:
You should now see the ShippingEasy module configuration page: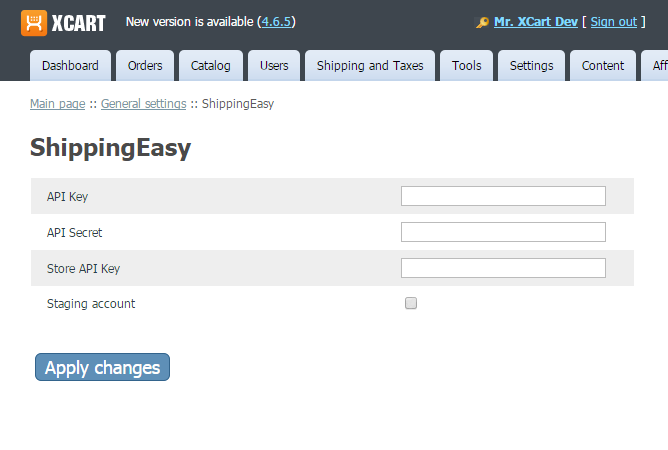
- At the top of the ShippingEasy module configuration page you should be able to see a link that says "View details and get your API credentials here". If you do not yet have an account with ShippingEasy, you can follow this link to sign up. For detailed information on creating a ShippingEasy account, see the How to create a ShippingEasy account guide on the ShippingEasy website.
- To complete the integration of your X-Cart store with ShippingEasy, you will need access to both your X-Cart store's Admin area and your ShippingEasy account settings, so be sure to keep both the sites open in your web browser tabs. For a production ShippingEasy account, to access your account settings, use the URL https://app.shippingeasy.com/settings, for a staging account -https://staging.shippingeasy.com/settings.
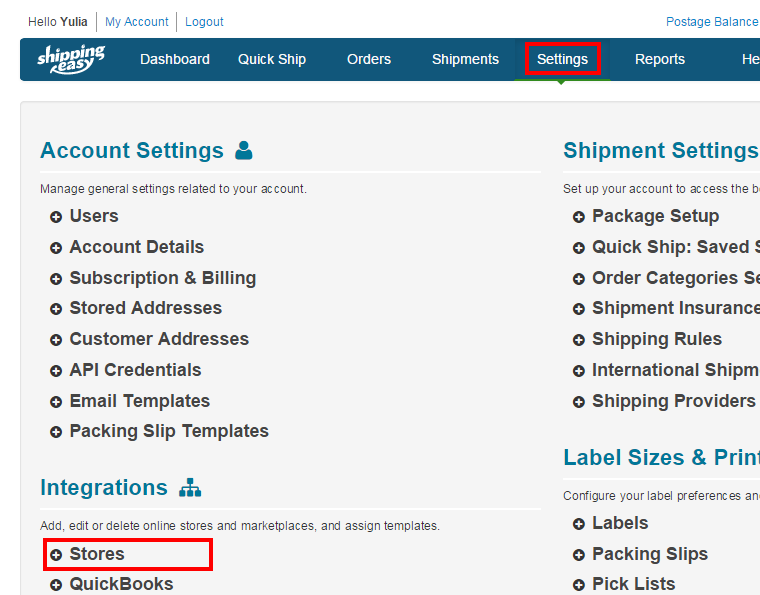
- (Skip this step if you have already configured your X-Cart store's settings in ShippingEasy during registration): Add your X-Cart store to the list of stores in your ShippingEasy account:
- In the Settings section of your ShippingEasy account, click on the Stores link under Integrations:
- Click the + Add New button on the right-hand side of the screen:
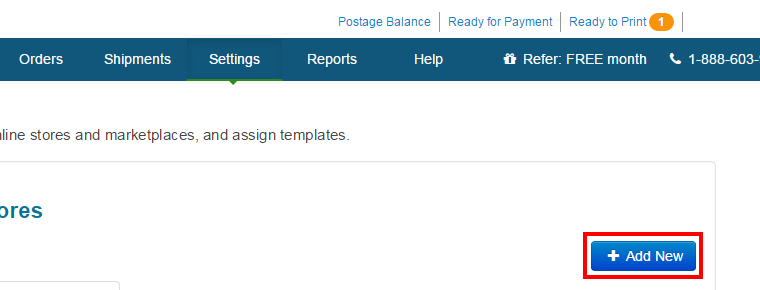
This opens a screen where you will be able to provide the details of your X-Cart store: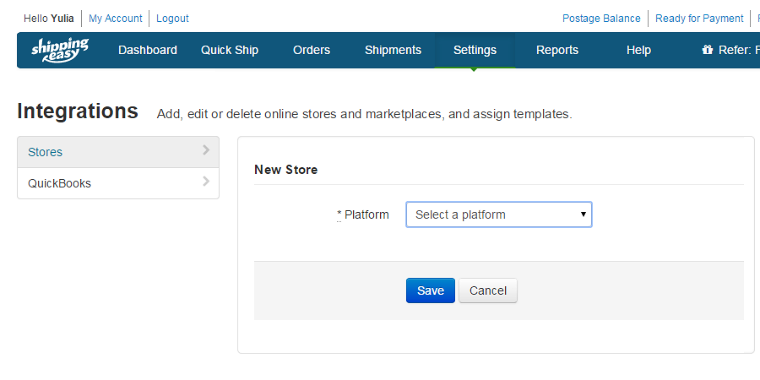
- From the Platform drop-down box, select X-Cart. In the Store URL field below, enter your X-Cart store's URL.
- Click Save.
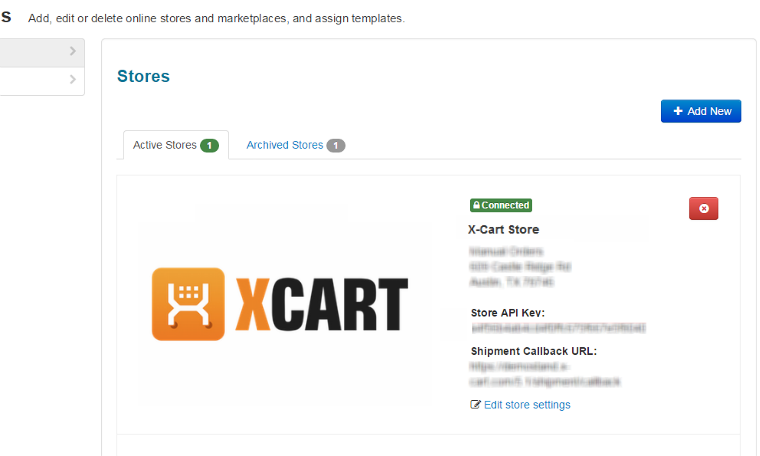
- Enter the required store settings and click Save at the bottom of the page. This creates an entry for your X-Cart store in your list of stores in ShippingEasy:
- In the Settings section of your ShippingEasy account, click on the Stores link under Integrations:
- Configure the ShippingEasy module in X-Cart:
- From the details of your X-Cart store in ShippingEasy (Settings -> Stores), copy the Store API Key:
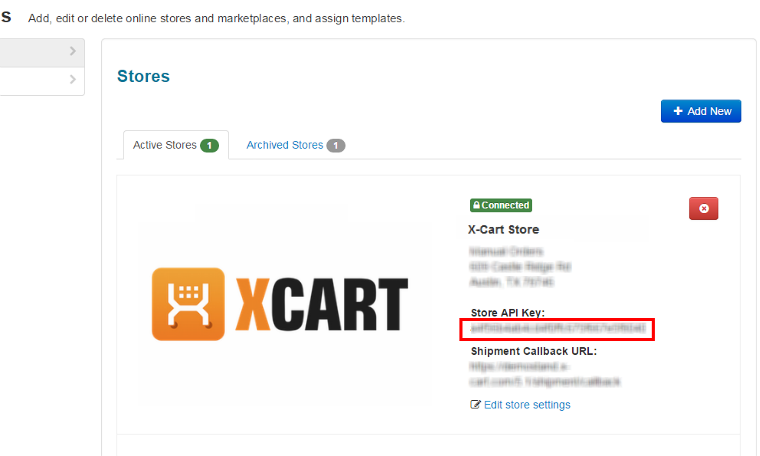
- Switch back to the browser tab where you are using X-Cart and paste the value you have just copied into the Store API Key field on the ShippingEasy module configuration page.
- Back in the browser tab with ShippingEasy, click on the Settings tab, then click on the API Credentials link under Account Settings:
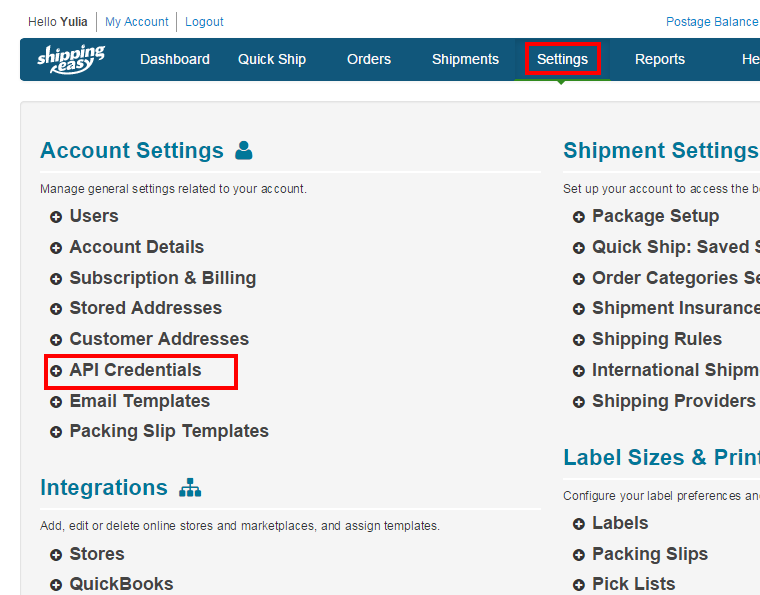
Your API Key and API Secret will be displayed: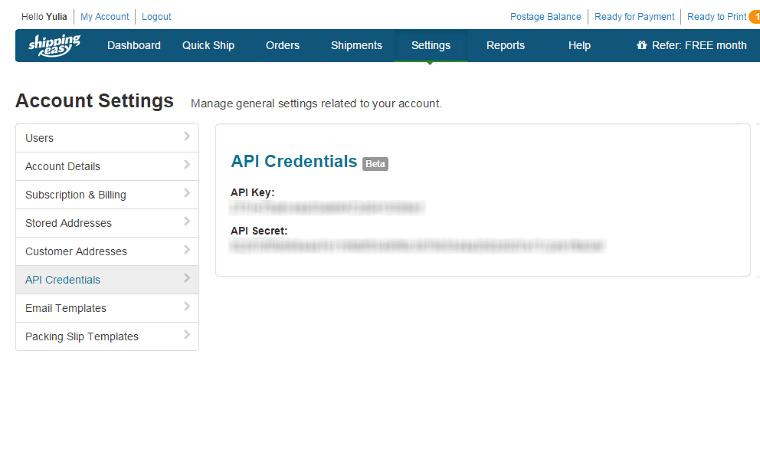
- Copy and paste these values one by one into the API Key and API Secret fields on the ShippingEasy module configuration page in your X-Cart store.
- If you are a third party developer using a staging ShippingEasy account, select the Staging account option on the ShippingEasy module configuration page in X-Cart. For production use, leave the Staging account check box unselected.
- Click the Apply changes button at the bottom of the ShippingEasy module configuration page in X-Cart to save the module configuration.
- From the details of your X-Cart store in ShippingEasy (Settings -> Stores), copy the Store API Key:
- Make the Shipment Callback URL that was automatically formed for your store by ShippingEasy as "Store URL + /shipment/callback" actually work for your store. To do so, insert the following rewrite rule into the .htaccess file located in your X-Cart installation directory:


<IfModule mod_rewrite.c>
RewriteEngine On
RewriteRule ^shipment/callback shippingeasy_callback.php?shopkey=XXX
</IfModule>
- (Be sure to replace XXX with the actual value of your secret key for access to the closed customer front end which is set in the General settings section of the store's Admin area.)
- Important: If your store uses the Clean URLs feature, make sure this code block goes before the code block for clean URLs in your .htaccess file.
That is all. You have completed integrating your X-Cart store with ShippingEasy. The next step will be to activate the ShippingEasy module and map your X-Cart order statuses to order statuses in ShippingEasy, after which the module will be fully ready to use.
Activating and deactivating the module
If the module ShippingEasy is installed, but not active, you can enable (activate) it.
To enable the module:
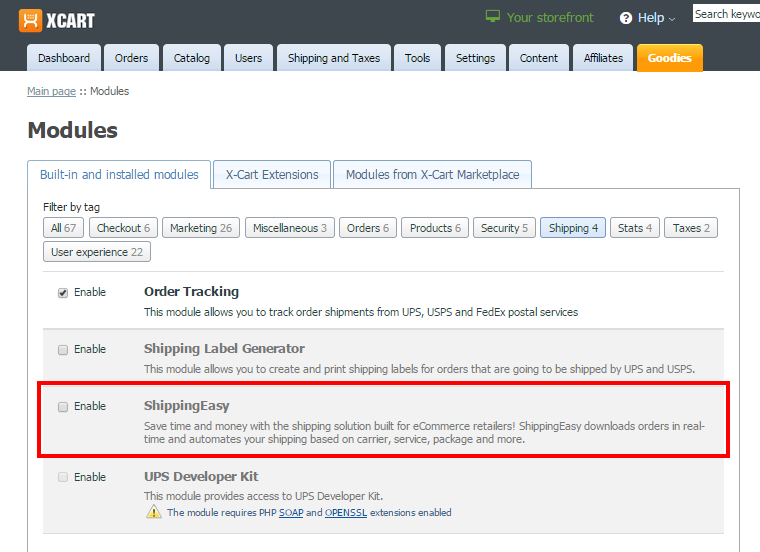
- Go to the Modules section of your store's Admin area (Settings menu -> Modules). This opens the list of your store's installed modules.
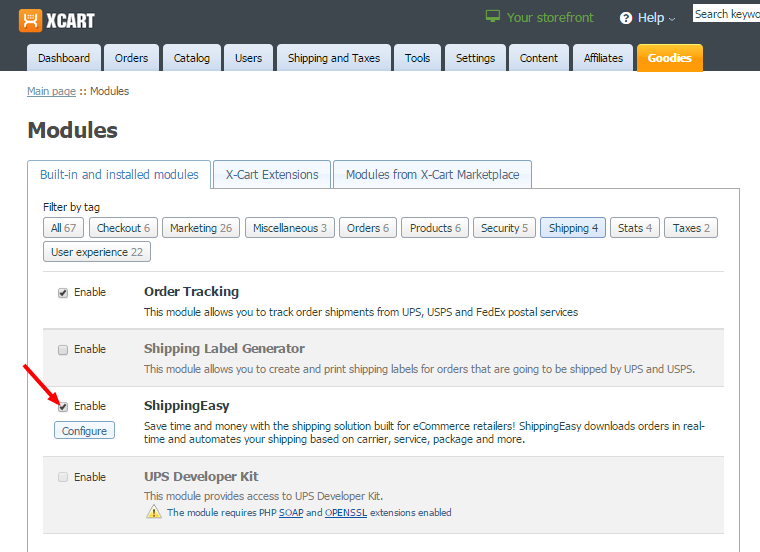
- Locate the entry for the ShippingEasy module and select the Enable check box on the left.
- Depending on the version of X-Cart you are using, you may need to apply the change by clicking Apply changes. The module will be enabled.


It is possible to temporarily disable (deactivate) the installed ShippingEasy module. Deactivation stops the module from operation, but it does not remove any settings you made to the module configuration nor clear any data that was generated during the period that the module was in operation. If you wish to completely remove all the data related to using the module, you need to uninstall it. See ShippingEasy module: Uninstallation for more info.
To disable the module:
- Go to the Modules section of your store's Admin area (Settings menu -> Modules).
- Locate the entry for the ShippingEasy module and unselect the Enable check box on the left.
- Depending on the version of X-Cart you are using, you may need to apply the change by clicking Apply changes. The module will be disabled.


Order status mapping
Order statuses used by ShippingEasy are not the same as those used by X-Cart, so, before orders from your X-Cart store can be exported to ShippingEasy, you will need to map order statuses in X-Cart to order statuses in ShippingEasy. To complete the task you will need to specify all the X-Cart statuses with which orders will need to be sent to ShippingEasy and - for each of these statuses - to specify the respective matching ShippingEasy statuses.
Here's how you can do it:
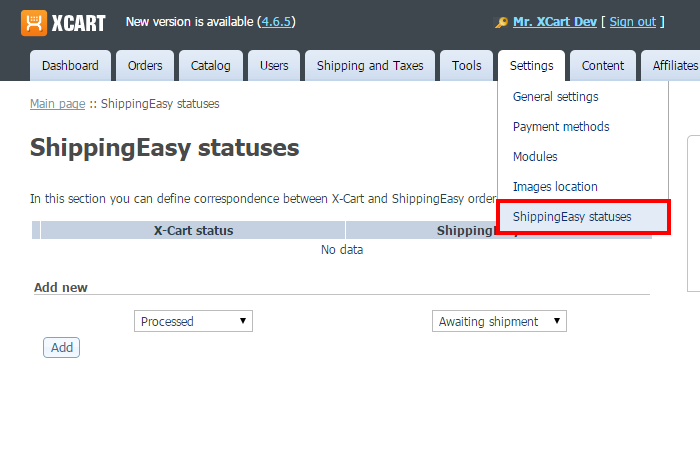
- In your X-Cart store's Admin area, go to the ShippingEasy statuses page (Settings menu -> ShippingEasy statuses):
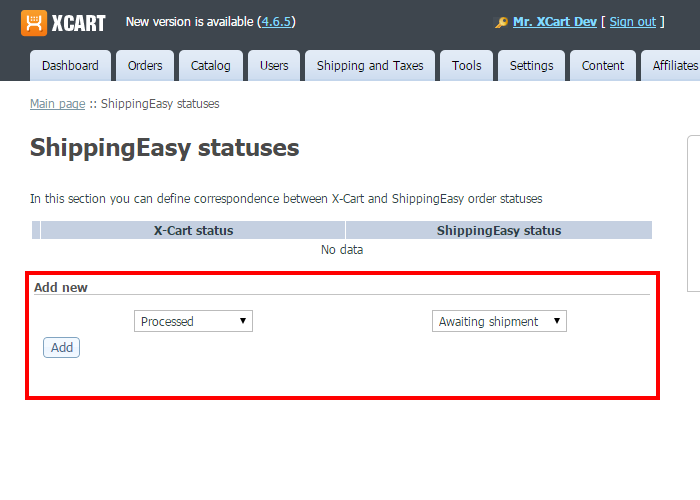
- In the Add new section of the page, adjust the drop-down boxes in the X-Cart status and ShippingEasy status columns so that they show a pair of matching statuses in X-Cart and in ShippingEasy. For example, if you want order info to be sent to ShippingEasy when an order gets the status "Processed" in X-Cart, and you want this order to be marked as "Awaiting shipment" in ShippingEasy, you should select "Processed" from the drop-down box in the X-Cart status column and "Awaiting shipment" from the drop-down box in the ShippingEasy status column:
- Click Add. The matching statuses will be added to the table above:
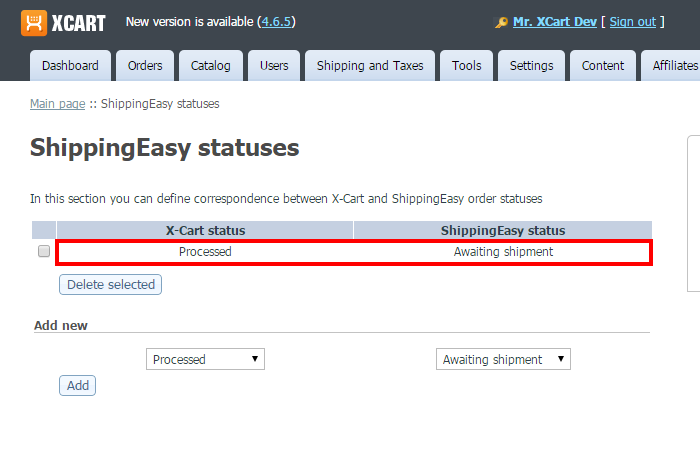
- Repeat steps 1-3 if you need to specify more matching pairs of statuses. As a result, you should have all the X-Cart statuses for which order info needs to be sent automatically to ShippingEasy listed in the X-Cart status column, and their respective matching ShippingEasy statuses listed on the opposite side in the ShippingEasy status column:


Note that your store will send order information to ShippingEasy no more than once per order. This means that when an order in X-Cart receives any of the statuses for which you have specified a matching status in ShippingEasy, information about this order will be automatically exported to ShippingEasy; if afterwards the status of this order in X-Cart changes to another status listed in the table, its information will not be sent to ShippingEasy again. For example, according to the order statuses configuration demonstrated in the snapshot above (Processed->Awaiting shipment, Queued -> Awaiting payment), an order that gets the status "Queued" in X-Cart will be sent to ShippingEasy; when this order is marked as "Processed", it won't be sent to ShippingEasy a second time.
Manual export of orders to ShippingEasy
In addition to automated export of orders to ShippingEasy based on orders receiving ShippingEasy exportable statuses, X-Cart's ShippingEasy module also supports export of orders to ShippingEasy in manual mode. This feature can be useful if you want to export to ShippingEasy some orders that had received ShippingEasy exportable statuses before these statuses were defined as such in the "ShippingEasy statuses" mapping table.
To export an order to ShippingEasy manually, use one of the following methods:
- Method 1 (can be used to bulk export multiple orders):
- In the Orders section of your X-Cart store's Admin area, find the orders you want to export and select the check boxes to the left of their numbers in the Orders list.
- Click the Export to ShippingEasy button at the bottom of the screen.

The selected orders will be exported to ShippingEasy. A success message will be displayed at the top of the screen:


- Method 2:
- In the Orders section of your X-Cart store's Admin area, find the order you want to export and open its details for viewing.
- On the page providing the order's details (Order details page), click the Export to ShippingEasy button.

The order will be exported to ShippingEasy. A success message will be displayed at the top of the screen:

Canceling orders
When an order gets canceled in X-Cart (i.e. gets the status "Failed" or "Declined"), the ShippingEasy module sends an order cancellation request to ShippingEasy. As a result, the respective order in ShippingEasy is removed. The process is fully automated, so you do not have to do the cancellation on the ShippingEasy end manually.
Viewing shipment information
When an order is shipped, ShippingEasy sends shipment related information back to your X-Cart store. This includes information about the carrier used, the shipping cost and the tracking number assigned to the shipment. In X-Cart this information is written to the Order notes (not visible to customer) field of the order details. The tracking number for the order is written to the Tracking number field of the order details. Here's what it looks like on the Order details page:
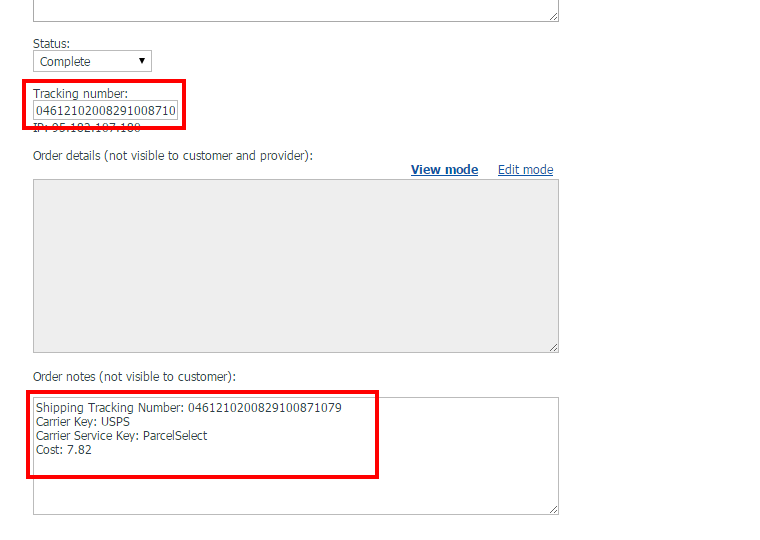
(For orders shipped using multiple parcels more than one tracking numbers may be received; in this case, all of them will be listed in the Tracking number field, separated by commas).

Updating order statuses for shipped orders
When an order is shipped in ShippingEasy, ShippingEasy notifies your X-Cart store about it, and the status of the order in your X-Cart store is automatically updated to either "Completed" or "Partially shipped".