LiteCommerce:Backing up and Restoring the Database
|
Database backups are performed for safekeeping to prevent the loss of valuable business data in case the original store database is corrupted or otherwise damaged.
Backing up the Database
In order to perform a backup, choose the 'DB Backup/Restore' section from the 'Maintenance' menu of the Administrator Zone. You will see the contents of the 'Backup database' tab (Figure 4-1). LiteCommerce software uses SQL format (also called SQL dump) files for backup purposes.
You can choose one of the two alternative ways of creating a backup of your store database:
- Download your database data directly to your local computer by clicking on the 'Download SQL file' button. The downloaded file is named 'db_backup.sql.php'.
- Save database data to a file within your LiteCommerce installation directory ('var/backup/sqldump.sql.php') by clicking on the 'Create SQL file' button. If you choose the second option, you can download the file from the server later on and delete it from the server by clicking on the 'Delete SQL file' button. The 'Delete SQL file' button only appears when the backup SQL file is present in the system.
Depending on the volume of your business information in the database (which includes order, customer, catalog and other data) backup procedures can take up to several minutes.
Restoring the Database
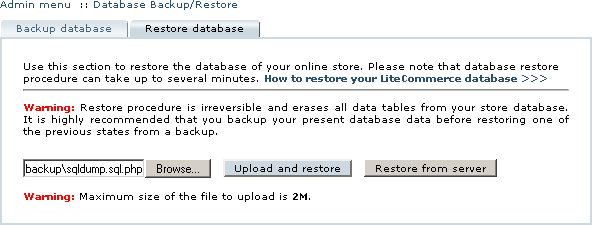
The inverse operation can be performed through the 'Restore database' tab in the same section (Figure 4-2). Two options are available:
- You can upload the database data directly from your local computer by clicking on the 'Browse...' button, choosing an SQL dump file and clicking on the 'Upload and restore' button. While this method is more convenient, it has a file size limitation.
- Alternatively, upload the database data file named 'sqldump.sql.php' manually to the 'var/backup/' sub-directory of your LiteCommerce installation on the web server and click on the 'Restore from server' button. After the restore you might want to delete the file from the server by clicking on the 'Delete SQL file' button in the 'Backup database' tab.
Since the restore procedure erases all the data in the database including the login history, the store administrator needs to re-login into the Administrator Zone once the procedure is finished. Such behavior is in line with the normal operation logic and is not an indication of a problem of any kind.

